Category: Basic Yoga

  • Seven Chakras in Your Body: What They Are & Why They Matter

    Seven Chakras in Your Body: What They Are & Why They Matter

    The seven chakras in human body are essential energy centers that influence our physical, emotional, and spiritual well-being. These chakras, located along the spine from the base to the crown of the head, are believed to regulate the flow of energy throughout the body. When these chakras are balanced, they promote harmony in our health, emotions, and spiritual growth.

    Each chakra has a unique role in our lives, from stabilizing our emotions to deepening our intuition. For example, the Root Chakra is associated with grounding and security, while the Crown Chakra connects us to higher consciousness and spiritual enlightenment.

    In this article, we’ll read and know about the 7 chakras in the human body and their significance. We will learn how to identify signs of blockages or imbalances in these energy centers and know about techniques like meditation, yoga, and visualization to restore their natural flow.

    Deep understanding the chakras in human body is really helpful for improving overall health, fostering self-awareness. Whether you’re on a spiritual journey or simply seeking better balance in life, the ancient wisdom of the chakras offers wonderful benefits.

    What Are the 7 Chakras?

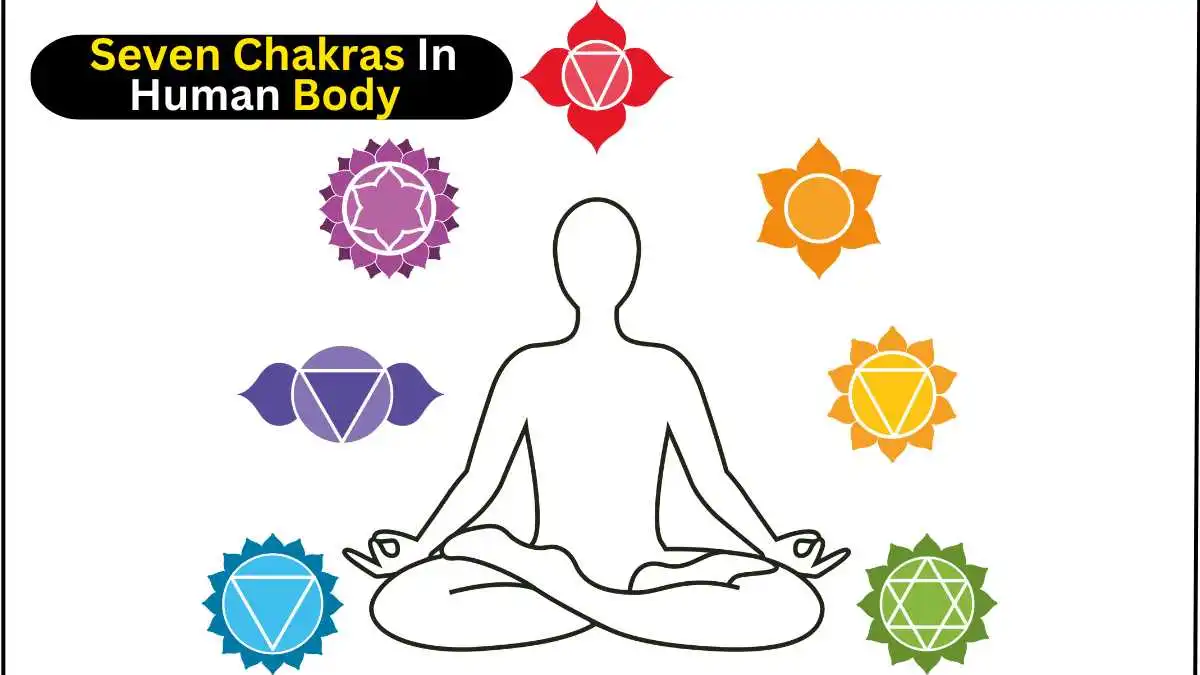
    The seven-chakra model is a traditional yogic and Tantric framework, not a map of seven anatomical organs. Modern teaching commonly describes seven major chakras from the base of the spine to the crown of the head.

    ChakraCommon Sanskrit nameTraditional symbolic area
    RootMuladharaBase of the spine
    SacralSvadhisthanaLower abdomen
    Solar plexusManipuraUpper abdomen
    HeartAnahataChest
    ThroatVishuddhaThroat
    Third eyeAjnaBetween the eyebrows
    CrownSahasraraCrown of the head

    For related context, read what Kundalini Yoga is, Kundalini Yoga and Tantra, and Kundalini Yoga safety.

    The concept of chakras originates from ancient Indian traditions, particularly Hinduism and Buddhism. Chakras are energy centers in the body that influence our physical, emotional, and spiritual well-being. Each chakra is linked to specific organs and systems, playing a vital role in maintaining overall health. The word “chakra” means “wheel” in Sanskrit, symbolizing the spinning energy that flows through these centers. Understanding the significance of these seven chakras in the human body is crucial, as blockages or imbalances can cause physical and emotional challenges.

    The human body is not just physical—it is also a complex system of energy. The chakras act as channels for life force energy, known as “prana”, which is essential for balance. When the chakras are aligned and functioning properly, they promote physical health, emotional stability, and spiritual growth. This alignment can lead to heightened awareness, better overall health, and a stronger connection to the world around us. On the other hand, blocked or unbalanced chakras may result in issues like stress, anxiety, and physical ailments.

    Each of the seven chakras in the human body has a unique purpose and influence. For example:

    1. Root Chakra: Muladhara

    1. The Root Chakra: Muladhara

    The root chakra, or Muladhara, is the first chakra located at the base of the spine. It represents security, stability, and grounding, forming the foundation for all other chakras. This energy center governs basic survival needs like food, shelter, and safety. When the root chakra is balanced, you feel secure, confident, and connected to the physical world.

    An imbalanced root chakra may lead to fear, insecurity, or disconnection. Physical signs can include lower back pain, leg issues, or problems with the feet.

    To balance this chakra, try grounding exercises like walking barefoot on grass, practicing yoga poses such as mountain pose or tree pose, and consuming red foods like apples or beets.

    2. Sacral Chakra: Svadhisthana

    The Sacral Chakra Svadhisthana

    The sacral chakra, or Svadhisthana, is located below the navel and is associated with emotions, creativity, and sexuality. This energy center influences relationships and helps us express our desires and creativity.

    A blocked sacral chakra can cause emotional instability, creative blocks, or reproductive issues. Symptoms may include lower back pain or problems with the urinary system.

    To activate it, engage in creative activities like painting or dancing, practice hip-opening yoga poses like pigeon pose, and eat orange-colored foods such as oranges and sweet potatoes.

    3. Solar Plexus Chakra: Manipura

    The solar plexus chakra, or Manipura, is located in the upper abdomen and governs personal power, confidence, and determination. It helps you assert yourself and make decisions.

    If the solar plexus chakra is unbalanced, you may feel powerless, indecisive, or struggle with self-worth. Physical symptoms include digestive issues or problems with the liver and pancreas.

    To restore balance, practice core-strengthening yoga poses like planks, recite affirmations for self-confidence, and include yellow foods like bananas and corn in your diet.

    4. Heart Chakra: Anahata

    The heart chakra, or Anahata, is located at the center of the chest and bridges the lower and upper chakras. It symbolizes love, compassion, and emotional balance.

    An imbalanced heart chakra may cause feelings of isolation, resentment, or difficulty in forming meaningful relationships. Physical symptoms can include chest tension or respiratory issues.

    To open the heart chakra, focus on self-love, practice heart-opening yoga poses like camel pose, and eat green foods such as spinach and avocados.

    5. Throat Chakra: Vishuddha

    The throat chakra, or Vishuddha, is located in the throat area and governs communication, self-expression, and authenticity. It enables you to express your truth confidently.

    Blockages in this chakra can lead to difficulty speaking up, fear of judgment, or neck tension. Physical symptoms may include sore throats or thyroid problems.

    To activate the throat chakra, try singing, chanting, or practicing yoga poses like fish pose. Blue foods such as blueberries and blackberries can also help nourish this chakra.

    6. Third Eye Chakra: Ajna

    The third eye chakra, or Ajna, is located between the eyebrows and is associated with intuition, insight, and higher consciousness. It helps you access inner wisdom and clarity.

    A blocked third eye chakra may result in confusion, lack of direction, or difficulty trusting your intuition. Physical symptoms can include headaches or vision problems.

    To balance this chakra, practice meditation and visualization, do yoga poses like child’s pose, and eat indigo-colored foods like eggplants and grapes.

    7. Crown Chakra: Sahasrara

    The crown chakra, or Sahasrara, is located at the top of the head and represents spiritual connection, enlightenment, and universal consciousness. It is your gateway to higher realms of awareness.

    An unbalanced crown chakra can cause feelings of disconnection, lack of purpose, or spiritual confusion. Physical symptoms may include headaches or insomnia.

    To nourish the crown chakra, meditate, practice mindfulness, spend time in nature, and consume light, nourishing foods like herbal teas and fresh fruits.

    How Should You Use Chakra Ideas in Practice?

    1. Treat chakra language as a traditional symbolic framework, not a medical diagnosis.
    2. Use meditation, breath awareness or journaling if those practices are meaningful to you.
    3. Do not use chakra explanations to delay medical care for pain, dizziness, mood changes or other symptoms.
    4. If a teacher makes strong healing claims, ask what evidence supports them.

    Three Common Chakra Misunderstandings

    • “Blocked chakra” is not a medical test result.
    • Chakras are not the same as endocrine glands or nerve plexuses.
    • Different Indian traditions describe subtle-body systems differently.

    Balancing and Activating the Seven Chakras

    Balancing and activating the seven chakras is essential for achieving overall well-being and harmony within oneself. By incorporating practices such as meditation, yoga, and energy healing, individuals can restore balance and deepen their connection to these vital energy centers. Meditation is especially effective, as it promotes mindfulness and self-awareness. Guided meditations focusing on each chakra, combined with breathwork, can help release blockages and enhance energy flow. Setting clear intentions for each session can further direct healing energy to areas that need attention.

    Yoga offers another powerful method for chakra balancing, with specific poses targeting each energy center. A personalized yoga routine can stimulate physical and energetic alignment, fostering a deeper connection with the body and its energy systems. Enhancing these practices with tools like sound healing, crystals, or aromatherapy can amplify their effects, creating a holistic approach to chakra balancing.

    Understanding and working with the chakras is a lifelong journey. By committing to practices that promote balance and harmony, individuals can unlock their full potential, cultivate a deeper sense of self-awareness, and lead a more vibrant and fulfilling life. The wisdom of the chakras not only fosters personal healing but also serves as a reminder of the interconnectedness of all beings and the vast potential within each of us.
  • What Is Walking Yoga

    What Is Walking Yoga

    In today’s fast-paced world, finding moments of tranquility and physical activity can be a challenge. Walking yoga, a gentle and accessible practice, offers a harmonious blend of physical movement and mindfulness. This unique approach to yoga integrates traditional yoga postures and breathing techniques with the simple act of walking. By combining these elements, walking yoga provides a holistic approach to well-being, promoting both physical and mental health.  

    Understanding the Basics of Walking Yoga

    At its core, walking yoga is a practice that involves mindful walking, incorporating specific yoga postures, breathing exercises, and meditation techniques. Unlike traditional yoga, which is often practiced on a mat, walking yoga allows practitioners to connect with nature and experience the therapeutic benefits of movement in the outdoors.  

    Key Principles of Walking Yoga

    • Mindful Walking: The foundation of walking yoga lies in mindful walking. By paying attention to each step, practitioners can cultivate awareness of their body and breath. This simple act can significantly reduce stress and improve overall well-being.  
    • Yoga Postures: Walking yoga incorporates various yoga postures, such as tree pose, warrior pose, and cobra pose. These postures are modified to be performed while walking, enhancing flexibility, strength, and balance.
    • Breathing Techniques: Deep, conscious breathing is an integral part of walking yoga. By focusing on the breath, practitioners can calm the mind, reduce anxiety, and improve energy levels.
    • Meditation: Meditation is a powerful tool for relaxation and stress reduction. In walking yoga, meditation techniques can be integrated into the practice, such as focusing on the sensations of walking or practicing mindfulness of the breath.  
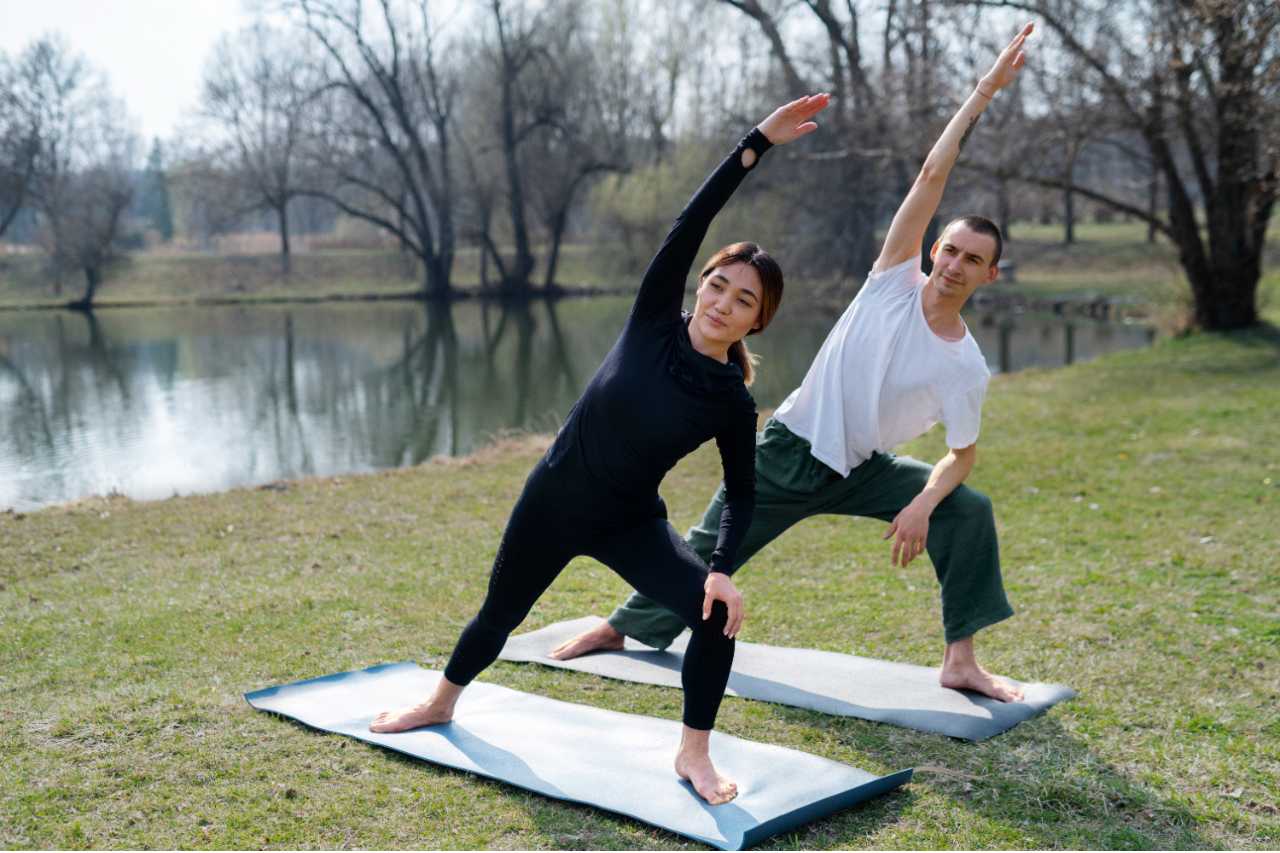
    Benefits of Walking Yoga infographic with a person doing a standing side stretch outdoors
    What Is Walking Yoga 6

    Benefits of Walking Yoga

    Walking yoga offers a wide range of benefits for both physical and mental health. Some of the key advantages include:  

    • Physical Benefits:
    • Improved cardiovascular health
    • Increased flexibility and strength
    • Enhanced balance and coordination
    • Boosted immune system
    • Weight management
    • Mental Benefits:
    • Reduced stress and anxiety
    • Improved mood and emotional well-being
    • Enhanced focus and concentration
    • Increased mindfulness and self-awareness
    • Better sleep quality

    How to Practice Walking Yoga

    1. Choose a safe, quiet route with even ground.
    2. Walk naturally for two minutes.
    3. Notice how each foot meets the ground.
    4. Let breathing settle into an easy rhythm without forcing a count.
    5. For five minutes, keep returning attention to steps, breath and surroundings.
    6. Finish with one minute of standing still and noticing how you feel.

    Walking Yoga vs Regular Walking

    Regular walkingWalking Yoga
    May focus mainly on distance or fitnessAdds deliberate breath and attention
    Can be fast or goal-drivenUsually uses a steady, aware pace
    Attention may stay on phone or conversationAttention repeatedly returns to body and surroundings

    Walking Yoga is not a standard classical yoga style with one fixed method. It is better understood as mindful walking informed by yogic attention and breathing. For related practice, see meditation at home, weekly yoga practice, and yoga footwear.

    To begin your walking yoga journey, follow these simple steps:

    • Find a Peaceful Location: Choose a serene outdoor setting, such as a park, forest, or beach. A quiet and natural environment can enhance your overall experience.
    • Warm-up: Start with a gentle warm-up, including some basic stretches and deep breathing exercises.
    • Mindful Walking: Begin walking slowly, paying attention to each step. Focus on your breath and the rhythm of your movements.
    • Incorporate Yoga Postures: As you walk, incorporate simple yoga postures, such as tree pose or warrior pose. Modify the postures to suit your individual needs and abilities.  
    • Practice Breathing Techniques: Throughout your walk, practice deep, conscious breathing. Inhale deeply through your nose and exhale slowly through your mouth.
    • Mindful Meditation: Take moments to pause and meditate. Focus on your breath, body sensations, or a specific mantra.
    • Cool-down: After your walk, end with a gentle cool-down, including some stretching and relaxation techniques.

    Tips for a Successful Walking Yoga Practice

    Three Walking Yoga Examples

    • Morning reset: 10 quiet minutes before work, focusing on steps and breath.
    • Lunch break: 15 minutes at a natural pace without checking your phone.
    • Evening practice: slower walking followed by two minutes of standing still.

    Walking Yoga Safety

    Use a familiar route, watch traffic and uneven ground, and do not close your eyes while walking. If balance is uncertain, keep the practice on flat, predictable surfaces.

    • Start Slowly: Begin with short, regular walks and gradually increase the duration and intensity of your practice.
    • Listen to Your Body: Pay attention to your body’s signals and avoid pushing yourself too hard.
    • Dress Comfortably: Wear loose-fitting, comfortable clothing that allows for free movement.
    • Find a Supportive Community: Join a walking yoga group or find a qualified instructor to guide your practice.
    • Be Patient and Kind to Yourself: Remember that progress takes time. Be patient with yourself and celebrate your achievements, no matter how small.

    Walking yoga offers a gentle and effective way to improve your physical and mental health. By combining the benefits of walking, yoga, and mindfulness, this practice can help you reduce stress, increase energy, and enhance your overall well-being. Whether you’re a seasoned yogi or a complete beginner, walking yoga is a wonderful way to connect with nature, nourish your body, and calm your mind.

  • The Art of Sequencing in Yoga:How to Design Effective and Suitable Yoga Classes

    The Art of Sequencing in Yoga:How to Design Effective and Suitable Yoga Classes

    How Can You Master the Art of Sequencing: How to Design perfect and Effective Yoga Classes?

    Table of Contents

    Yoga Class Sequence

    Introduction: What is Sequencing in Yoga?

    Sequencing in yoga is an essential skill for both yoga teachers and practitioners. Specifically, it involves designing the order and flow of poses in a yoga class. This process ensures that each movement builds on the previous one. Consequently, this thoughtful arrangement allows students to move safely, steadily, and mindfully through their practice.

    Moreover, the art of sequencing goes beyond merely linking postures together. It is about crafting an experience that helps students connect with their bodies. Additionally, it allows them to deepen their practice and leave the class feeling balanced and refreshed. Whether you are a teacher planning a class or a practitioner designing your own home practice, understanding the principles of effective sequencing can greatly enhance the quality of your yoga experience.

    Why is Sequencing Important in Yoga?

    The importance of sequencing in yoga cannot be overstated. For instance, imagine entering a yoga class where the poses feel disjointed, with little to no flow between them. This situation can leave you feeling confused, unsteady, and even at risk of injury. Conversely, a well-sequenced class offers a smooth and natural experience. It guides your body and mind through a journey that begins with gentle warm-ups, builds to a peak, and concludes in relaxation.

    1. Enhancing Safety:

    • One of the primary reasons for thoughtful sequencing is safety. To begin with, starting with gentler poses helps warm up the muscles and joints. This preparation is essential for readying the body for more challenging postures. For instance, jumping straight into deep backbends without proper preparation can strain the spine and potentially lead to injury. In contrast, sequencing allows the body to gradually open up, thereby reducing the risk of strains or overstretching.
    2. Achieving a Balanced Practice:
    • A well-sequenced class ensures that all parts of the body are engaged and balanced. For example, after focusing on one area, such as the shoulders, the sequence should then move to another area, like the hips or legs. This approach creates a well-rounded practice. As a result, it helps prevent overworking any single muscle group, which could otherwise lead to discomfort or injury over time.

    3. Maintaining Flow and Focus:

    • Flow is a key aspect of yoga, and it is often associated with the concept of “vinyasa,” where movement is synchronized with breath. Consequently, effective sequencing maintains this flow, allowing students to transition seamlessly from one pose to the next. This smooth progression helps keep the mind focused and present. As a result, the practice becomes not just physical but also a form of moving meditation.
    4. Managing Energy Levels:
    • The energy in a yoga class should build and then gradually taper off. A well-planned sequence starts slow, gradually increases in intensity, reaches a peak, and then cools down. This natural rise and fall of energy levels help students leave the class feeling refreshed, not exhausted. It balances the nervous system, helping to relieve stress and promote relaxation.

    How to Start Creating an Effective Yoga Sequence?

    Creating a yoga sequence may seem daunting at first. However, by following a few basic principles, you can craft a class that flows naturally and feels cohesive. The process begins with setting an intention and understanding the needs of your students—or your own body if you’re practicing solo.

    1. Setting Your Intention:
    • The intention is the heart of your sequence, as it provides purpose and direction to the practice. For instance, are you focusing on building strength? Alternatively, perhaps you want to emphasize flexibility, or maybe your goal is relaxation and stress relief. Whatever your intention, it will guide your choice of poses and the overall structure of the class.

      For example, if your intention is to create a calming and restorative class, you might choose poses that are gentle, involve deep stretching, and emphasize longer holds. Conversely, a class designed to build strength might include more standing poses, balances, and core work.

    2. Choosing a Peak Pose:

    • The peak pose is the most challenging or central posture of your sequence. Everything before it prepares the body for this pose, and everything after it helps cool down and integrate the work done. Selecting a peak pose gives your sequence a clear focus and helps to structure the class logically.

    For instance, if your peak pose is Urdhva Dhanurasana (Upward Bow Pose), your sequence should include poses that open the chest, strengthen the arms, and prepare the spine for a deep backbend. This might include postures like Bhujangasana (Cobra Pose), Setu Bandhasana (Bridge Pose), and Virabhadrasana I (Warrior I Pose).

    3. Designing the Warm-Up:
    • A good warm-up is crucial for any yoga sequence. It prepares the body for the more intense work to come by gently stretching and mobilizing the muscles and joints. In the context of a morning yoga class, this could involve movements that wake up the spine, like Cat-Cow stretches, or poses that gently engage the legs and arms, such as Downward-Facing Dog or gentle lunges.

    The warm-up should be dynamic, moving through different planes of motion to ensure that the entire body is ready for the practice ahead. It’s also a good time to focus on breathing, helping students to connect with their breath, which will support them throughout the practice.

    4. Building the Flow:
    • After warming up, gradually introduce more challenging poses that lead towards your peak pose. This is the main body of your sequence and should be designed to flow smoothly from one posture to the next. For example, a sequence leading to Ardha Chandrasana (Half Moon Pose) might include preparatory poses like Utthita Trikonasana (Extended Triangle Pose), and Virabhadrasana II (Warrior II Pose), which build strength and balance.

    It’s important to maintain a sense of progression in this phase. The poses should build upon each other, increasing in intensity, but also providing opportunities for recovery and integration. This ensures that students are neither overwhelmed nor under-challenged.

    5. Cooling Down:
    • Once the peak pose has been completed, it’s time to cool down. The cool-down phase is all about bringing the body back to a state of rest. It should include poses that release any tension built up during the more active part of the sequence. Gentle forward bends, supine twists, and hip openers are excellent choices for cooling down.

    Cooling down helps to calm the nervous system, stretch out the muscles, and transition the body and mind into a more relaxed state. It’s the perfect preparation for the final relaxation pose, Savasana.

    6. Ending with Savasana:

    • Savasana, or Corpse Pose, is the final posture of almost every yoga class. While it may seem simple, it is one of the most important parts of the practice. Savasana allows the body to absorb all the benefits of the practice, promoting deep relaxation and a sense of peace.

    Encourage students to lie completely still, focusing on their breath, and letting go of any remaining tension. It’s a moment of surrender and stillness, providing the perfect end to a well-sequenced class.

    Tips for Effective Yoga Sequencing

    Creating a sequence that is safe, balanced, and enjoyable requires attention to detail and a deep understanding of the body’s needs. Here are some additional tips to help you refine your sequencing skills:

    1. Keep it Simple:

    • When planning a sequence, especially for beginners, simplicity is key. Avoid the temptation to include too many complex poses. Instead, focus on a few fundamental postures and explore them deeply. This approach not only makes the class more accessible but also helps students build a strong foundation.

    2. Listen to Your Body:

    • Whether you’re practicing on your own or teaching a class, it’s important to stay attuned to the body’s signals. If something doesn’t feel right, don’t hesitate to modify the pose or adjust the sequence. Flexibility in sequencing means being responsive to the needs of the moment, ensuring that the practice is always safe and beneficial.
    3. Balance Challenge and Rest:
    • A good yoga sequence should balance effort and ease. After a challenging pose like Virabhadrasana III (Warrior III Pose), it’s a good idea to follow with a more restful posture, such as Balasana (Child’s Pose). This approach prevents burnout and helps maintain a steady flow of energy throughout the practice.

    4. Use Transitions Mindfully:

    • Transitions are the glue that holds your sequence together. Moving smoothly from one pose to the next helps maintain the flow and keeps students engaged. Pay attention to how you guide students in and out of poses, ensuring that the transitions are as mindful as the postures themselves.

    5. Keep Your Students in Mind:

    • Always consider the experience level and physical limitations of your students when designing a sequence. What might be appropriate for an advanced class could be too challenging for beginners. Tailoring your sequence to the needs of your students is key to creating a successful yoga class.

    Common Mistakes to Avoid in Yoga Sequencing

    Even experienced yoga teachers can fall into common traps when creating sequences. Here are a few mistakes to watch out for:

    1. Skipping the Warm-Up:

    • Diving straight into challenging poses without adequate warm-up is a recipe for injury. Always take the time to prepare the body, even in shorter classes.
    2. Overloading the Sequence:
    • Including too many poses in a single class can overwhelm students and disrupt the flow. Instead of trying to fit in as many postures as possible, focus on quality and depth in each pose.

    3. Ignoring the Breath:

    • Breath is the foundation of yoga practice. Ensure that your sequence allows for deep, even breathing. If the pace is too fast or the poses too challenging, students may start to hold their breath, which can increase stress and tension.

    4. Lack of Balance:

    • A well-balanced sequence should address all parts of the body, not just one area. Make sure to include a variety of poses that engage different muscle groups and movements to create a holistic practice.

    Conclusion: Designing the Perfect Yoga Sequence

    Mastering the art of sequencing is a journey that requires both knowledge and intuition. By setting a clear intention, understanding the needs of your students, and carefully planning each stage of the class, you can create sequences that are not only effective but also deeply fulfilling.

    Furthermore, remember that the ultimate goal of yoga sequencing is to create a practice that feels harmonious and balanced. Whether you’re teaching a class or practicing on your own, thoughtful sequencing can transform your yoga practice into a powerful tool for physical, mental, and spiritual growth.

    With continued practice and attention to detail, you’ll soon find that creating effective yoga sequences becomes second nature. As a result, you will be able to share the beauty and benefits of yoga with others in a meaningful way

  • How Yoga Can Improve Posture : Yoga Practices for Better Posture

    How Yoga Can Improve Posture : Yoga Practices for Better Posture

    How Yoga Can Improve Bad Posture: Yoga Practices for Better Posture

    Table of Contents

    Introduction of Poor or Bad Posture

    Why we need to improve Posture ? Poor posture is a common problem that affects many people, often without them knowing how much it impacts their health and quality of life. The way we sit, stand, and move can greatly affect our physical well-being, and bad posture can cause multiple issues beyond just discomfort.

    When we talk about poor posture, we mean that parts of your body are not in their natural positions. This can show up in different ways, like slumped shoulders, a head that leans forward, or an overly curved lower back. These misalignments can upset your body’s natural balance, leading to strain on your muscles, ligaments, and joints.

    Role of Spine in Posture

    One of the most significant issues associated with poor posture is its effect on the spine. The spine is designed to support and distribute the weight of the body, but when it is not properly aligned, it can lead to chronic pain and discomfort. Over time, this misalignment can contribute to more serious conditions such as herniated discs, sciatica, and even spinal degeneration.

    Additionally, poor posture can cause your muscles to be out of balance. For example, if your shoulders are always rounded forward, your chest muscles can become tight and short, while your upper back muscles can get weak and stretched out. This imbalance can lead to headaches, neck pain, and feeling tired. Likewise, if your pelvis tilts forward, it can cause lower back pain and affect your hip joints.

    Besides physical pain, poor posture can also harm your mental well-being. Studies have shown that slouching or hunching can affect your mood and energy levels, making you feel depressed or lowering your self-esteem. On the other hand, good posture can make you feel more confident and positive, as it promotes an open and upright body language.

    Recognizing poor posture early and taking steps to correct it is crucial for maintaining overall health. Simple adjustments in daily habits, such as being mindful of how you sit at your desk, standing with your weight evenly distributed, and engaging in exercises that promote proper alignment, can make a significant difference. By addressing poor posture proactively, you can alleviate discomfort, prevent more serious health issues, and improve your overall quality of life.

    Understanding and Improving Your Posture: How Bad Posture affect you

    Poor posture is a common issue many people face, often without realizing its impact on their overall health. Recognizing and correcting bad posture is crucial for maintaining well-being and preventing discomfort.

    Identifying Poor Posture

    One of the most noticeable signs of poor posture is the alignment of your shoulders and neck. Typically, when you have poor posture, your shoulders tend to slump forward, and your head juts out, creating a noticeable curve in your neck and upper back. In contrast, good posture aligns your ears, shoulders, and hips in a straight line, reducing strain on your muscles and spine.

    The Effects of Poor Posture

    • Headaches: Tension in the neck muscles from poor alignment can contribute to headaches.
    • Back Pain: Misalignment puts extra stress on your back, often leading to chronic pain and discomfort.
    • Spinal Issues: Over time, poor posture can lead to conditions like herniated discs and hunchback, affecting your spine’s natural curvature.
    • Reduced Height: Slouching can make you appear shorter, as your spine may not fully extend when you are hunched over.

    Common Posture Problems

    Modern lifestyles, such as prolonged sitting at desks or looking down at screens, often exacerbate poor posture. Over time, these habits cause the muscles to adapt to incorrect positions, making it harder to correct posture without conscious effort.

    How to test a bad or good Posture

    To assess your posture, stand naturally in front of a mirror:

    • Align your shoulders and ears so they are level.
    • Let your arms hang naturally by your sides and see where your thumbs point.
    • If your posture is correct, your thumbs should point forward. If not, your thumbs might point outward or to the side, indicating poor posture.

    How to Improve Your Posture

    Correcting poor posture involves consistent practice and exercises:

    • Regular Stretching: Incorporate stretches that open the chest and strengthen the back.
    • Strength Training: Focus on exercises that build core strength to support the spine.
    • Mindful Awareness: Pay attention to your posture throughout the day, especially when sitting or standing for long periods.

    By following these simple steps and incorporating daily exercises, you can see significant improvements in your posture within just a few weeks. Stay tuned for detailed exercises and tips on how to enhance your posture effectively.

    10 Yoga Poses for Better Posture : Yoga for Beginners

    For beginners, it’s important to start with yoga postures that are simple, gentle, and effective for building a strong foundation. Here are some beginner-friendly postures that are easy to learn and perform while still providing great benefits:

    1. Mountain Pose (Tadasana)

      Category: Standing

      Benefits in Posture: Improves alignment, strengthens legs, and enhances balance.

      How to do it:

      • Stand with feet together, arms at your sides.
      • Distribute your weight evenly across both feet.
      • Engage your thighs, lift your chest, and relax your shoulders.
      • Hold for 5-10 breaths.

      Inhale deeply as you lengthen your spine and exhale as you ground yourself into the pose.

    2. Child’s Pose (Balasana)

      Category: Sitting

      Benefits in Posture: Stretches the back, hips, and thighs; promotes relaxation.

      How to do it:

      • Kneel on the floor, touch your big toes together, and sit on your heels.
      • Lower your torso between your thighs and extend your arms forward or rest them alongside your body.
      • Hold for 5-10 breaths.

      How to breathe: Inhale deeply into your back and exhale to release tension and deepen the stretch.

    3. Cat-Cow Pose (Marjaryasana-Bitilasana)

      Category: Prone

      Benefits in Posture: Increases spine flexibility, warms up the body, and helps with alignment.

      How to do it:

      • Start on your hands and knees, wrists under shoulders, knees under hips.
      • Inhale, arch your back, and lift your head and tailbone (Cow Pose).
      • Exhale, round your back, and tuck your chin (Cat Pose).
      • Repeat for 5-10 breaths.

      Breathing: Inhale as you arch your back, exhale as you round it.

    4. Downward-Facing Dog (Adho Mukha Svanasana)

      Category: Inverted

      Benefits in Posture: Stretches the entire body, strengthens the shoulders and back.

      How to do it:

      • Start on hands and knees, tuck your toes, and lift your hips towards the ceiling.
      • Straighten your legs, and push your heels towards the floor.
      • Hold for 5-10 breaths.

      How to breathe: Inhale deeply as you lengthen your spine, exhale as you press your heels down.

    5. Bridge Pose (Setu Bandhasana)

      Category: Supine

      Benefits in Posture: Strengthens the back, opens the chest, and improves spinal alignment.

      How to do it:

      • Lie on your back with knees bent, feet hip-width apart.
      • Lift your hips towards the ceiling, and clasp your hands under your back.
      • Hold for 5-10 breaths.

      Inhale as you lift your hips, exhale as you lower them.

    6. Cobra Pose (Bhujangasana)

      Category: Prone

      Benefits in Posture: Opens the chest, strengthens the back, and reduces stiffness.

      How to do it:

      • Lie on your stomach, place your hands under your shoulders.
      • Inhale and lift your chest off the ground, keeping elbows close to your body.
      • Hold for 5-10 breaths.

      Focus on Breathing: Inhale as you lift, exhale as you lower.

    7. Forward Fold (Uttanasana)

      Category: Standing

      Benefits in Posture: Stretches the hamstrings, relieves tension, and improves flexibility.

      How to do it:

      • Stand with feet hip-width apart.
      • Hinge at your hips and fold forward, letting your head and arms hang down.
      • Hold for 5-10 breaths.

      How to breathe: Inhale as you lengthen your spine, exhale as you deepen the fold.

    8. Spinal Twist (Ardha Matsyendrasana)

      Category: Seated

      Benefits in Posture: Enhances spinal flexibility, reduces tension in the back and shoulders.

      How to do it:

      • Sit with legs extended, bend one knee and place the foot outside the opposite thigh.
      • Twist your torso towards the bent knee, using your opposite elbow for support.
      • Hold for 5-10 breaths.

      Breathing tips: Inhale as you lengthen your spine, exhale as you deepen the twist.

    9. Chair Pose (Utkatasana)

      Category: Standing

      Benefits in Posture: Strengthens the legs, core, and improves balance.

      How to do it:

      • Stand with feet together, bend your knees as if sitting in a chair.
      • Extend your arms overhead, keeping your chest lifted.
      • Hold for 5-10 breaths.

      How to breathe: Inhale as you lift, exhale as you hold the position.

    10. Seated Forward Bend (Paschimottanasana)

      Category: Seated

      Benefits in Posture: Stretches the back and hamstrings, calms the mind.

      How to do it:

      • Sit with legs extended, hinge at your hips, and reach for your feet.
      • Hold for 5-10 breaths.

      Breath: Inhale as you lengthen, exhale as you reach forward.

    11. Locust Pose (Salabhasana)

      Category: Prone

      Benefits in Posture: Strengthens the back muscles, improves posture.

      How to do it:

      • Lie on your stomach, lift your chest, arms, and legs off the floor.
      • Hold for 5-10 breaths.

      How to breathe: Inhale as you lift, exhale as you lower.

  • How to Become a Yoga Instructor : Yoga Teacher Training Overview

    How to Become a Yoga Instructor : Yoga Teacher Training Overview

    How to Become a Yoga Instructor : Yoga Teacher Training Overview

    How to Become a Yoga Instructor : Yoga Teacher Training Overview

    How to Become a Yoga Instructor

    Becoming a yoga instructor is an exciting and rewarding journey. Whether you love practicing yoga or want to share its benefits with others, learning how to become a yoga instructor can lead to a fulfilling career. In this simple guide, we’ll explain the steps you need to take, from choosing the right yoga teacher training to getting certified and starting your teaching career. Follow these easy steps, and you’ll be on your way to becoming a yoga instructor.

    What is Yoga Teacher Training?

    Yoga teacher training, commonly known as YTT, is a specialized program designed to equip individuals with the necessary skills and knowledge to teach yoga effectively. Whether you aspire to teach in a studio, lead online classes, or bring yoga into corporate settings, a YTT program provides you with the foundational understanding of yoga philosophy, anatomy, teaching methodology, and practical experience.

    Yoga Teacher Training

    Why Should You Consider Yoga Teacher Training?

    Enrolling in a YTT program goes beyond just learning yoga poses. It deepens your understanding of yoga as a holistic practice that encompasses physical postures (asanas), breathing techniques (pranayama), meditation, and more. Here are some key reasons why YTT might be right for you:

    • Personal Growth: YTT is not just about becoming a teacher but also about personal transformation. It allows you to deepen your practice, explore yoga philosophy, and cultivate mindfulness.
    • Career Opportunities: With yoga’s growing popularity, certified yoga instructors are in demand worldwide. Whether you aim to teach locally or travel as a yoga instructor, YTT opens doors to various career opportunities.
    • Community and Connection: YTT programs foster a sense of community among like-minded individuals. You’ll build lifelong connections with fellow yogis and mentors who share your passion for yoga.
    Why Yoga Teacher Training

    Types of Yoga Teacher Training Programs

    YTT programs vary in duration, focus, and intensity. The most common certifications are:

    • 200-Hour Yoga Teacher Training: This foundational program covers the basics of yoga philosophy, anatomy, teaching methodology, and includes practical teaching experience. It’s the minimum requirement for teaching yoga in most studios.
    • 300-Hour Yoga Teacher Training: Building upon the 200-hour program, the 300-hour training dives deeper into advanced yoga techniques, sequencing, and therapeutic applications.
    • 500-Hour Yoga Teacher Training: Combining the 200-hour and 300-hour programs, the 500-hour certification is the most comprehensive, offering in-depth knowledge and skills to become a highly qualified yoga instructor.
    Types of Yoga Teacher Training

    Benefits of Yoga Alliance Certification

    Yoga Alliance is the largest international registry of yoga teachers and schools. While certification with Yoga Alliance is not mandatory, it adds credibility to your training and may enhance your employability as a yoga instructor. Benefits of being Yoga Alliance certified include:

    • Credibility: Yoga Alliance sets standards for yoga teacher training programs, ensuring they meet certain criteria in terms of curriculum, teaching hours, and faculty qualifications.
    • Networking Opportunities: Being part of Yoga Alliance connects you with a global community of yoga professionals, offering opportunities for networking, mentorship, and continuing education.
    • Career Advancement: Many yoga studios and fitness centers prefer hiring instructors who are registered with Yoga Alliance, especially for their 200-hour and 500-hour certifications.
    Yoga Alliance Certification

    Online vs. In-Person Yoga Teacher Training

    Advancements in technology have made online YTT programs increasingly popular and accessible. Here’s a comparison of online vs. in-person YTT programs:

    • Online Yoga Teacher Training: Provides flexibility for students to study at their own pace, access recorded lectures and materials, and complete assignments remotely. Ideal for individuals with busy schedules or those living in remote areas.
    • In-Person Yoga Teacher Training: Offers direct interaction with instructors and classmates, hands-on learning experiences, and real-time feedback. Suitable for students who thrive in a structured, immersive environment.
    Online vs. In-Person Yoga Teacher Training

    Key Considerations When Choosing a YTT Program

    Selecting the right YTT program is crucial for your learning experience and future career as a yoga instructor. Here are key factors to consider:

    • Accreditation and Curriculum: Ensure the program is accredited by a reputable organization like Yoga Alliance. Review the curriculum to ensure it covers essential topics such as yoga philosophy, anatomy, teaching methodology, and practical teaching experience.
    • Faculty Qualifications: Research the qualifications and experience of the program’s faculty members. Experienced instructors with diverse teaching styles and backgrounds can enrich your learning experience.
    • Student Reviews and Testimonials: Read reviews and testimonials from past students to gauge their satisfaction with the program, teaching quality, and overall experience.
    • Cost and Value: Compare tuition fees, payment options, and additional costs such as study materials and certification fees. Consider the program’s value in terms of what you’ll learn and the career opportunities it may open up.
    Choosing a YTT Program

    Certification and Continuing Education

    Upon completing a YTT program, you’ll receive a certification that typically does not expire. However, continuing education is encouraged to stay updated with new developments in yoga practices, teaching techniques, and safety guidelines.

    Certification and Continuing Education

    Insurance for Yoga Instructors

    Insurance is essential for yoga instructors to protect themselves from liabilities and unforeseen circumstances. Whether you teach in a studio, gym, or private setting, having liability insurance provides peace of mind and may be required by studios or venues where you teach.

    Insurance for Yoga Instructors

    Starting your journey to become a yoga instructor is an amazing experience that deepens your practice and prepares you for a rewarding career. By understanding the different types of YTT programs, certification processes, and job opportunities, you’ll be ready to choose the right path for your goals in the world of yoga.

  • Yoga Asana for Self-Healing: Safe Practice, Benefits and Simple Poses

    Yoga Asana for Self-Healing: Safe Practice, Benefits and Simple Poses

    Yoga asanas for self-healing: practice scope

    Yoga can support general well-being, mobility, breathing awareness and relaxation, but it should not be presented as a cure for disease. A useful yoga asana practice starts with your present ability, uses steady breathing, and avoids forcing range of motion. Yoga asanas for self-healing should be viewed as general well-being support, not a method to treat or cure a condition.

    This guide explains simple yoga asanas that practitioners can use for a balanced home practice. If you have persistent pain, dizziness, recent surgery, pregnancy-related concerns, or a diagnosed condition, speak with a qualified health professional and tell your yoga teacher before practising.

    What Does “Self-Healing” Mean in Yoga?

    In yoga, self-healing is better understood as supporting the body and mind through regular movement, rest, breathing and attention. It does not mean that a yoga pose can diagnose, treat or cure a medical condition.

    A good practice may help you notice tension, improve movement confidence and create a calmer routine. The effect depends on the person, the practice, sleep, stress, daily activity and many other factors.

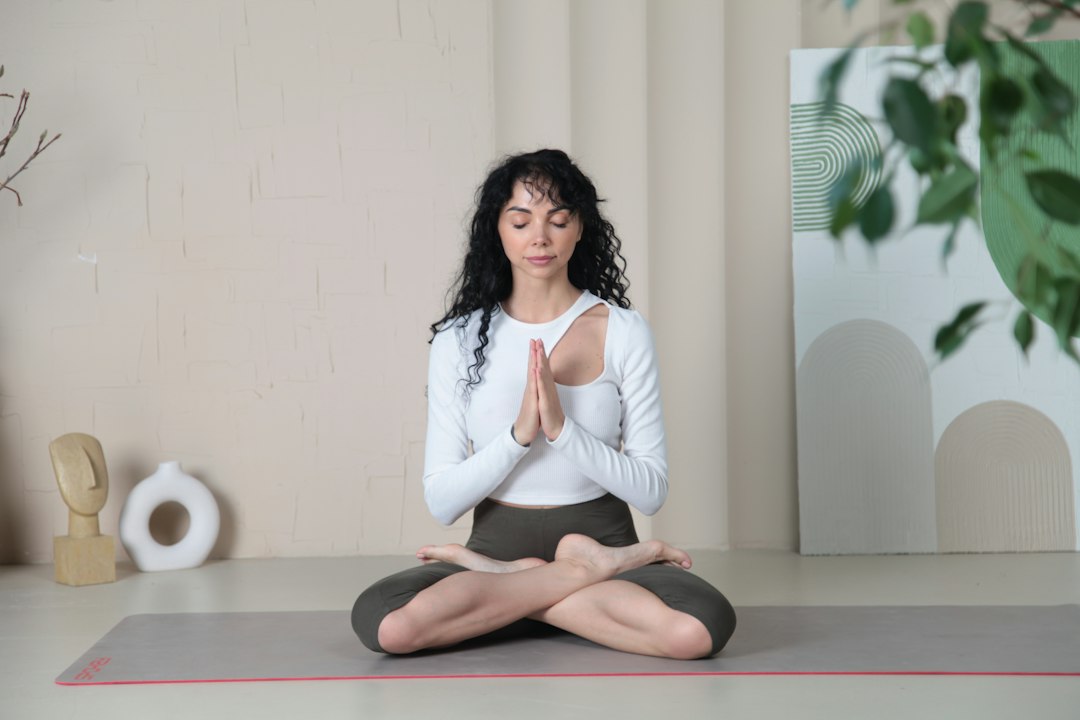
    Comfortable seated position illustrating yoga asanas for self-healing support
    A seated practice can focus on comfort and attention. It is not medical treatment.

    8 yoga asanas for self-healing support: a safe interpretation

    Here, yoga asanas for self-healing means a general well-being routine, not a way to heal an injury or illness without care. Choose a few movements below rather than forcing all eight. Use a chair or wall when needed, and leave time for rest. The NCCIH evidence and safety review discusses what research can and cannot establish.

    1. Cat-Cow Pose

    Begin on hands and knees. Move slowly between a gentle spinal arch and a rounded back while matching the movement with your breath. Keep the range comfortable.

    Practice focus: spinal movement, breath coordination and warming up.

    2. Child’s Pose

    Kneel and bring the hips back toward the heels. Rest the torso forward and place the arms where they feel comfortable. Use a cushion if the knees or hips need support.

    Practice focus: rest, slow breathing and reducing unnecessary muscular effort.

    3. Cobra Pose

    Lie on the abdomen with the hands near the ribs. Lift the chest gently without forcing the lower back. Keep the shoulders away from the ears.

    Practice focus: gentle back extension and upper-body awareness.

    4. Downward-Facing Dog

    From hands and knees, lift the hips up and back. Keep the knees bent if needed. Lengthen the spine first instead of trying to force the heels down.

    Practice focus: whole-body strength, shoulder control and hamstring length.

    5. Bridge Pose

    Lie on the back with the knees bent and feet on the floor. Press through the feet and raise the hips to a comfortable height. Lower slowly.

    Practice focus: hip extension, leg strength and controlled spinal movement.

    6. Warrior II

    Stand with the feet apart, turn the front foot out and bend the front knee. Keep the knee moving in the same direction as the toes and the torso upright.

    Practice focus: leg strength, balance and steady attention.

    7. Tree Pose

    Stand beside a wall if balance is uncertain. Place one foot against the ankle or inner calf, not directly on the knee joint. Keep the gaze steady.

    Practice focus: balance, foot strength and concentration.

    8. Savasana

    Lie comfortably on the back, or use support under the knees. Allow the breathing to become natural and remain still for a few minutes.

    Practice focus: rest, body awareness and recovery after practice.

    A flexible 15–20-minute sequence

    The time depends on transitions, pauses and individual comfort. Start with fewer poses and increase only when the routine remains manageable. You can substitute supported sitting for any floor posture.

    1. Cat-Cow: 2 minutes
    2. Downward-Facing Dog: 3 slow rounds
    3. Warrior II: 30–45 seconds each side
    4. Tree Pose: 30 seconds each side
    5. Bridge Pose: 3–5 repetitions
    6. Child’s Pose: 1–2 minutes
    7. Savasana: 5 minutes

    Move at a pace that lets you breathe normally. Stop if you feel sharp pain, numbness, unusual pressure, or dizziness.

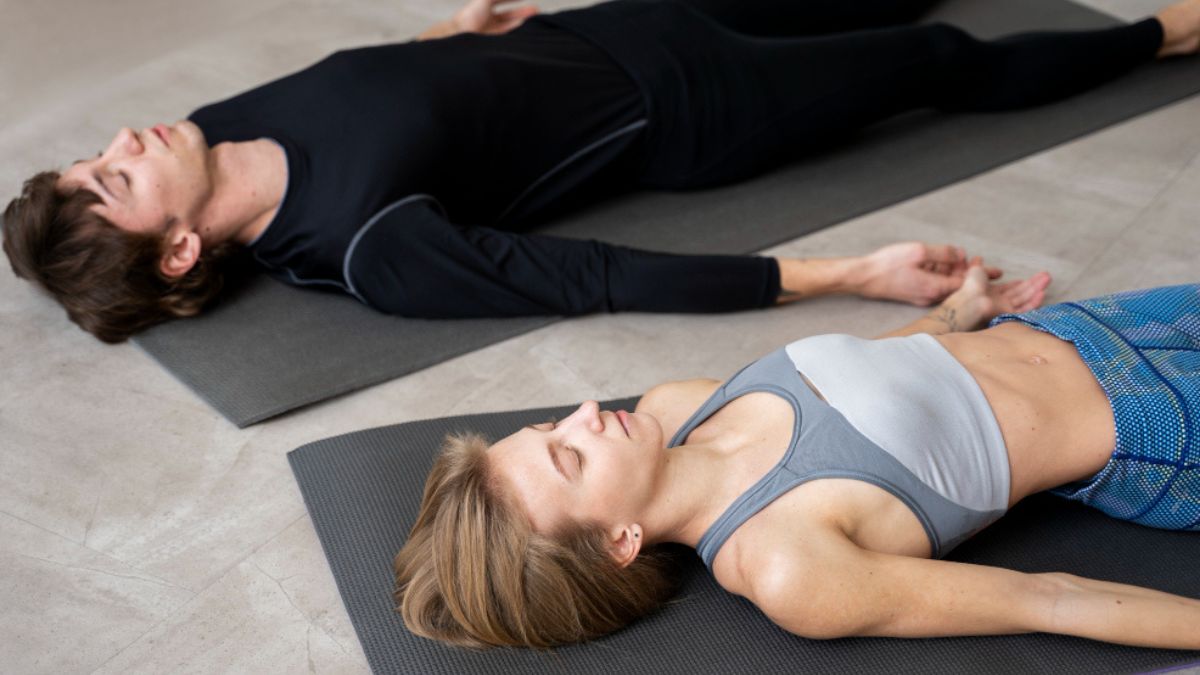
    Two people resting on mats in Savasana
    Quiet rest is optional; choose a chair or side-lying position if more comfortable. Editorial photograph.

    How to Make Yoga Practice Safer

    • Use a smaller range of motion when you are stiff or tired.
    • Do not compete with photos or other students.
    • Use props when they improve comfort and control.
    • Build consistency before intensity.
    • Tell the teacher about pain, injury or movement limits.

    For related reading, see yoga for mind-body harmony, what asana means in yoga, and our 200-hour yoga teacher training in Rishikesh.

    Frequently asked questions about yoga asanas for self-healing

    Can yoga heal a medical condition?

    Yoga should not replace diagnosis or treatment. Some programmes may support symptoms or well-being in specific populations, but that does not prove a pose cures a condition. Continue appropriate healthcare and discuss suitable activity with your clinician when needed. Use the term self-healing carefully: in this guide it means self-care through movement, attention and rest, rather than a clinical claim.

    How often should beginners practise?

    Begin with a short routine you can repeat comfortably, with rest between more demanding sessions. There is no ideal frequency for everyone. Check how you feel during practice and the following day. Reduce intensity if soreness or fatigue interferes with normal activity. Our weekly practice guide offers flexible ranges rather than a fixed prescription.

    Should a pose hurt?

    No. Effort and a mild stretching sensation can occur, but sharp pain, numbness, dizziness or unusual pressure are reasons to stop. Do not use deep breathing to endure a painful position. Return to a supported posture and seek advice when symptoms persist. A teacher can offer a smaller range or alternative, but cannot determine the cause of a medical symptom from a class.

    Do I need advanced poses or strong pranayama?

    No. Basic postures, natural breathing and quiet rest can form a useful practice. Avoid long breath holds, rapid breathing or complicated balances when you are unfamiliar with them. A demanding technique is not proof of greater benefit. Learn separately with suitable instruction if you want to progress. Keep health conditions, previous injury and your present capacity central to the decision.

    How to choose your first routine

    1. Select three familiar movements and one comfortable resting position.
    2. Warm up with small movements and ordinary breathing.
    3. Keep enough time for transitions and props.
    4. Stop before pain or breath holding develops.
    5. Record what was comfortable, and adjust next time.

    For an introduction to the philosophical meaning of posture, read what asana means. For everyday awareness rather than treatment claims, read yoga for mind-body harmony. Educational practice guidance complements suitable care; it does not replace it.

  • Yoga for Mind-Body Harmony: Essential Poses and Practice Tips

    Yoga for Mind-Body Harmony: Essential Poses and Practice Tips

    Yoga for mind-body harmony combines comfortable movement, ordinary breathing and steady attention. Begin with a few familiar poses and quiet rest. The aim is to notice how you move and respond, rather than produce perfect calm or cure a condition. This guide explains ten common postures, simple modifications and a short routine you can adapt to your day.

    What is Yoga?

    Yoga for Inner Peace and Physical Fitness is a mind-body practice that started in ancient India. The word “yoga” comes from the Sanskrit word “yuj,” meaning to unite or join. Yoga aims to connect the mind, body, and spirit, making it a practice that promotes both physical and mental wellness. Practice needs adaptation to the person, their mobility and health. A class label alone does not establish suitability.

    How Can Yoga Support Mind-Body Balance?

    Yoga can combine movement, breathing and attention in one routine. The goal is not perfect calm. It is learning how to move, breathe and focus with less unnecessary effort.

    A Simple 10-Minute Mind-Body Practice

    1. Easy breathing — 2 minutes
    2. Cat-Cow — 2 minutes
    3. Standing balance — 2 minutes
    4. Gentle forward fold — 2 minutes
    5. Quiet rest — 2 minutes

    See our yoga life balance guide, yoga vs meditation, and Yoga for a 9–5 job.

    • Improved Flexibility and Strength: Yoga poses (asanas) target various muscle groups, enhancing flexibility and strength.
    • Enhanced Mental Focus and Reduced Stress: Yoga encourages mindfulness and self-awareness, helping to reduce stress and improve mental clarity.
    • Mind-Body Connection: Yoga promotes a sense of tranquility and balance, allowing you to connect with your inner self.Learn more about Yoga & Meditation

    Who Can Practice Yoga?

    One of the greatest aspects of yoga is its inclusivity. Whether you’re a beginner or experienced, young or old, fit or just starting out, yoga can be adapted to suit your needs. Yoga poses can be modified to accommodate individual capabilities, but no posture or class is appropriate for everyone. Health conditions and previous injuries may require individual modifications.

    Here are some common yoga poses to get you started:

    Starting your yoga journey can be both exciting and a bit overwhelming. Here are 10 simple yoga poses perfect for beginners. These Yoga Poses
    are easy to learn and provide a great foundation for your practice.

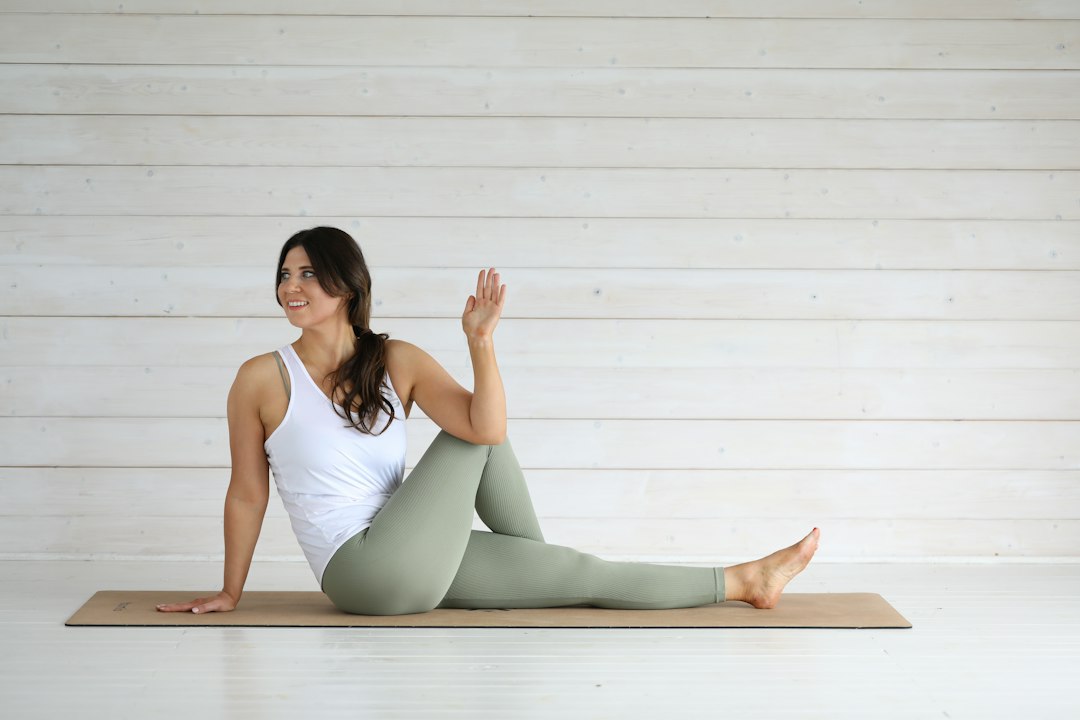
    Seated twist illustrating comfortable yoga for mind-body harmony
    Comfortable range and ordinary breathing matter more than depth. Editorial photograph.

    1. Mountain Pose (Tadasana)

    How to do it:

    • Stand tall with your feet together.
    • Arms by your sides, shoulders relaxed.
    • Distribute your weight evenly across both feet.
    • Breathe naturally and notice contact with the floor. Use a chair for support if balance feels uncertain.

    Benefits:

    • Improves posture.
    • Increases awareness and balance.

    2. Downward-Facing Dog (Adho Mukha Svanasana)

    How to do it:

    • Start on your hands and knees.
    • Lift your hips up towards the ceiling, forming an inverted V-shape.
    • Keep your hands shoulder-width apart and feet hip-width apart.
    • Relax your head and neck.

    Benefits:

    • Stretches the entire body.
    • Strengthens arms and legs.

    3. Child’s Pose (Balasana)

    How to do it:

    • Kneel on the floor, sit back on your heels.
    • Lower your chest to your thighs and stretch your arms forward.
    • Rest your forehead on the ground.

    Benefits:

    • Relieves stress and tension.
    • Gently stretches the back and hips.

    4. Cat-Cow Pose (Marjaryasana-Bitilasana)

    How to do it:

    • Start on your hands and knees.
    • Inhale, arch your back (Cow Pose), lifting your head and tailbone.
    • Exhale, round your back (Cat Pose), tucking your chin and tailbone.

    Benefits:

    • Increases flexibility in the spine.
    • Offers gentle spinal movement.

    5. Cobra Pose (Bhujangasana)

    How to do it:

    • Lie on your stomach, hands under your shoulders.
    • Inhale, lift your chest off the ground, keeping elbows close to your body.
    • Press your legs and pelvis into the floor.

    Benefits:

    • Strengthens the spine.
    • Moves the upper trunk gently.

    6. Tree Pose (Vrikshasana)

    How to do it:

    • Stand tall, shift your weight onto one foot.
    • Place the sole of your other foot on your inner thigh or calf (avoid the knee).
    • Bring your hands together at your chest or raise them overhead.

    Benefits:

    • Improves balance.
    • Strengthens legs and core.

    7. Seated Forward Bend (Paschimottanasana)

    How to do it:

    • Sit with your legs extended in front of you.
    • Inhale, lengthen your spine.
    • Exhale, bend forward from your hips, reaching for your feet or shins.

    Benefits:

    • Stretches the spine and hamstrings.
    • Calms the mind.

    8. Bridge Pose (Setu Bandhasana)

    How to do it:

    • Lie on your back, knees bent, feet flat on the floor.
    • Place your arms by your sides.
    • Inhale, lift your hips towards the ceiling, keeping your feet and shoulders grounded.

    Benefits:

    • Strengthens the back and glutes.
    • Opens the chest and hips.

    9. Butterfly Pose (Baddha Konasana)

    How to do it:

    • Sit with your feet together and knees bent, allowing your knees to fall to the sides.
    • Hold your feet with your hands.
    • Sit comfortably and support the knees if needed. Do not push them down.

    Benefits:

    • Stretches the inner thighs and hips.
    • Improves flexibility.
    Two people resting in Savasana on yoga mats

    10. Corpse Pose (Savasana)

    How to do it:

    • Lie flat on your back, arms by your sides, palms facing up.
    • Close your eyes and relax your entire body.
    • Focus on your breath.

    Benefits:

    • Promotes relaxation.
    • Offers an opportunity for quiet rest.

    Consistency is Key

    The secret to getting the most out of yoga is doing it regularly, even for a little bit each day. Think of it like watering a plant – a little sprinkle every day keeps it healthy, but if you forget for a long time, it might wilt. Aim for 20-30 minutes of yoga most days, but even if you only have 10 minutes, that’s still great! The important thing is to find a routine that fits your life. You can practice at a yoga studio with a teacher, join a free yoga class in your community park, or follow yoga workouts online. There are tons of options to find what works best for you

    How can you adapt yoga for mind-body harmony?

    Make one change at a time. Use a chair for balance, practise Cat-Cow while seated, keep the knees bent in a fold and choose a small backbend. Quiet sitting can replace a posture that causes discomfort. Comfortable breathing matters more than matching a fixed count. If observing the breath makes you anxious, listen to room sounds or keep your eyes on a familiar point instead.

    In classical yoga, steady practice and ethical conduct have a wider purpose than a fitness routine. Modern research on yoga examines particular programmes and health outcomes. Those are different ways of understanding practice. The NCCIH yoga review explains evidence and safety limits; it does not establish a cure or guarantee inner peace from a pose.

    How can you begin this week?

    1. Choose a comfortable time and a stable surface.
    2. Try the ten-minute sequence, shortening it when needed.
    3. Record one observation about comfort, breathing or attention.
    4. Repeat a manageable routine rather than adding harder poses immediately.
    5. Seek guidance when pain, fear or a health condition changes your practice.

    For more detailed movement cues, read our mind-muscle connection guide. If you want guided study of posture, breathing and philosophy, see the FitFortunes 200-hour course. Teacher training is a study programme, not medical treatment.

    Frequently asked questions

    Do I need to feel calm throughout yoga?

    No. Restlessness, ordinary thoughts and effort can still be present during practice. Yoga for mind-body harmony is a way to observe and respond to those experiences, not a requirement to suppress them. Keep the routine manageable and adjust positions or attention when needed. If a practice causes persistent distress, stop and seek appropriate guidance rather than using willpower to force it.

    Can I use a chair for this routine?

    Yes. A chair can support sitting, small spinal movements, standing balance and quiet rest. Choose one that is stable and place it where it cannot slide. You can practise fewer poses and keep a complete short routine. The chair yoga guide explains options and evidence. Suitability depends on your needs rather than your age alone.

    Is yoga enough for every fitness goal?

    No. A gentle routine may support movement and attention, but may not provide all the strength or aerobic activity you need. Class intensity and duration vary. Combine practice with appropriate daily activity and recovery. Our yoga and strength-training guide explains the overlap and limitations. Choose activities that match your ability and goals.

    What symptoms mean I should stop?

    Stop for sharp pain, numbness, dizziness, unusual weakness or breathing difficulty. Reduce effort before you become unable to control a movement. Persistent or unfamiliar symptoms need appropriate assessment. A yoga teacher can adapt a class, but should not diagnose a medical condition. Comfortable variations and a smaller routine are valid choices; advanced poses are not required.

  • How to Practice Kriya Yoga at Home Step-by-Step Guide

    How to Practice Kriya Yoga at Home Step-by-Step Guide

    Kriya Yoga is a profound old Indian spiritual practice. It is a methodical approach to meditation that supports people in achieving awareness and self-realization. Kriya Yoga has gained popularity recently because of its ease of use, efficiency, and home practicability. Your gateway to full well-being, Fitfortunes, offers an invitation to learn about the life-changing art of Kriya Yoga. Join us today to start your journey to self-realization and inner peace. follow below the content for know about How to Practice Kriya Yoga at Home

    How to Practice Kriya Yoga at Home Step-by-Step Guide
    How to Practice Kriya Yoga at Home

    What is Kriya Yoga?

    Kriya Yoga, popularized by Paramahansa Yogananda in his book “Autobiography of a Yogi, is a spiritual practice involving techniques to harness the life force within. It blends pranayama, meditation, and visualization to awaken spiritual energy. Whether in bustling cities or serene mountains, this technique empowers individuals to infuse everyday actions with divinity. Through breath control, Kriya Yoga offers pathways to inner peace, joy, and spiritual connection, making it accessible to all seeking transformative growth.

    How do I start practicing Kriya Yoga at Home?

    It’s essential to start Kriya Yoga for beginners at home with a basic practice. To begin, find a quiet time and place. Then, practice simple breathing techniques to help you relax. To monitor your development, use guided meditations and keep a journal. Online resources can be beneficial, but keep in mind that determination and regularity are essential on this profound journey. 

    Technique of Kriya Yoga at Home

    Set aside a dedicated space: Look for a calm, quiet area of your house where you may practice Kriya Yoga alone.

    Establish a regular practice:  Practice Kriya Yoga every day at the same time. Consistency is the key to enjoying the rewards of this age-old practice.

    Begin with relaxation: Start your practice by doing some light stretching and deep breathing to let your body and mind relax.

    Practice pranayama: To control your breathing and quiet your mind, use pranayama techniques like deep breathing and alternating nostril breathing.

    Meditate regularly: Meditation is the foundation of Kriya Yoga, so set aside some time for it. To still your racing thoughts, concentrate on your breathing or a mantra. 

    Follow a guided routine: Make use of materials like books, online guides, or videos to help you with Kriya Yoga at home.

    Stay committed: In your practice, exercise perseverance and patience. Have trust in the process and permit yourself to develop spiritually by making a continuous effort.

    Seek guidance if needed: To improve your knowledge of Kriya Yoga, if you’re new to the practice, think about going to courses or consulting with experienced practitioners.

    Step-by-Step Guide to 8 Steps of Kriya Yoga

    Preparation: Take a few deep breaths to calm your body and mind, close your eyes, and sit comfortably in a quiet area.

    Invocation: To assist and bless your practice, mentally give a prayer or invocation to the spiritual deity or guru of your choice.

    Pranayama: Practice pranayama to control your breathing and to activate your body’s panic energy.

    Mudras: To improve focus and channel energy flow, do certain hand gestures, or mudras.

    Visualization: Imagine spiritual light or energy cleaning your mind, elevating your consciousness, and entering your body.

    Chanting: Repeat mantras or holy prayers to increase your spiritual vibration and establish a connection with higher awareness.

    Meditation: Enter into a state of deep meditation by focusing your mind on a single point of concentration or by observing the natural flow of your breath. 

    Which is the best place to learn Kriya Yoga?

    The Fitfortunes Yoga course and facilities provide genuine Kriya Yoga instruction and training. It is essential to do your research and select a reputable teacher or institution that shares your values and spiritual goals. and you can join also join 200 Hour Yoga Teacher Training in Rishikesh 

    Conclusion

    Practicing Kriya Yoga at home can be a transformative journey towards self-discovery and spiritual awakening. By incorporating the principles and techniques of Kriya Yoga into your daily life, you can experience inner peace, harmony, and profound spiritual growth. Remember to approach your practice with sincerity, dedication, and an open heart, and you will surely reap the benefits of this ancient yogic science.

    FAQ

  • Best Yoga Poses to Increase Height

    Best Yoga Poses to Increase Height

    Explore the content Best Yoga Poses to Increase Height

    Everyone desires good height, but it is largely determined by genetics. However, height also plays an important role in our lifestyle, making us look tall, handsome, and beautiful. don’t worry if your not happy to your height i will telling you some Best Yoga Poses to Increase Height

    Illustration showing four yoga poses with the title "Best Yoga Poses to Increase Height" on a brown background. The poses include boat pose, chair pose, downward-facing dog, and triangle pose, performed by a woman wearing a pink top and blue leggings. Decorative elements are present in the corners.
    Best Yoga Poses to Increase Height


    It also helps in reducing and showing less body fat.  Even if you have short height, you can make some lifestyle changes to increase your height. Most people enhance their height by playing sports from a young age, but if you are not interested in sports, you can also increase your height through yoga and exercise. There are specific yoga poses that can help you grow taller quickly. Let’s explore these yoga poses that will not only help increase your height but also reduce your body fat.

    How Do Yoga Poses Increase Height

    Yoga is not just a physical exercise; it is a complete practice for the body and mind. Yoga helps increase height mainly by stretching and improving posture.

    Role of Stretching and Posture Improvement

    Good posture significantly affects height. If you slouch, you look shorter. Yoga helps straighten your back and improve your posture, making you look tall and confident.

    Psychological Benefits

    Yoga also has psychological benefits. It reduces stress and anxiety, which indirectly helps you appear taller by promoting better posture and overall health.

    The Best Yoga Poses To Increase Height Fast

    Certain yoga poses are more effective in increasing height. These poses mainly focus on stretching the spine and improving posture.

    • Tadasana (Mountain Pose)
    • Bhujangasana (Cobra Pose)
    • Vrikshasana (Tree Pose)
    • Adho Mukha Svanasana (Downward Facing Dog Pose)
    • Trikonasana (Triangle Pose)
    • Sukhasana (Easy Pose)
    • Paschimottanasana (Seated Forward Bend)
    • Surya Namaskar (Sun Salutation)

    Step-by-Step Guide to Best Yoga Poses to Increase Height


    Tadasana (Mountain Pose)

    How to Perform:

    • Stand straight with your feet together.
    • Stretch your arms overhead.
    • Rise onto your toes and stretch your body upwards.
    • Hold for a few seconds, then relax.

    Benefits:

    • Improves posture
    • Stretches the whole body
    • Enhances balance and stability

    Bhujangasana (Cobra Pose)

    How to Perform:

    • Lie on your stomach with palms under your shoulders.
    • Inhale and lift your chest off the ground by straightening your arms.
    • Hold for a few breaths, then exhale and come down.

    Benefits:

    • Stretches the spine
    • Strengthens back muscles
    • Opens chest and shoulders

    Vrikshasana (Tree Pose)

    How to Perform:

    • Stand straight and balance on your left foot.
    • Place your right foot on your left thigh.
    • Join your palms in a prayer position and raise them over your head.
    • Hold for a few breaths, then switch legs.

    Benefits:

    • Improves balance and stability
    • Strengthens legs and spine
    • Enhances concentration

    Adho Mukha Svanasana (Downward Facing Dog Pose)

    How to Perform:

    • Start on your hands and knees.
    • Lift your hips towards the ceiling, forming an inverted V-shape.
    • Keep your hands shoulder-width apart and feet hip-width apart.
    • Hold for a few breaths.

    Benefits:

    • Stretches the entire back
    • Strengthens arms and legs
    • Improves blood circulation

    Trikonasana (Triangle Pose)

    How to Perform:

    • Stand with feet wide apart.
    • Turn your right foot out and left foot slightly in.
    • Extend your arms to the sides, then bend at the waist to the right, letting your right hand touch your right ankle.
    • Hold for a few breaths, then switch sides.

    Benefits:

    • Stretches legs and torso
    • Improves balance and flexibility
    • Strengthens core

    Sukhasana (Easy Pose)

    How to Perform:

    • Sit cross-legged on the floor.
    • Keep your back straight and place your hands on your knees.
    • Close your eyes and take deep breaths.

    Benefits:

    • Improves posture
    • Relieves stress
    • Enhances flexibility in hips and legs

    Paschimottanasana (Seated Forward Bend)

    How to Perform:

    • Sit with your legs extended straight.
    • Inhale and reach your arms overhead.
    • Exhale and bend forward, trying to reach your toes.
    • Hold for a few breaths.

    Benefits:

    • Stretches spine and hamstrings
    • Improves flexibility
    • Calms the mind

    Surya Namaskar (Sun Salutation)

    How to Perform:

    • Start in a standing position.
    • Perform a series of 12 poses in a fluid sequence, synchronizing each pose with your breath.
    • Repeat the sequence several times.

    Benefits:

    • Stretches and strengthens the entire body
    • Improves flexibility
    • Boosts overall health and wellness

    Conclusion

    i hope you understand well Best Yoga Poses to Increase Height Including yoga in your daily routine can offer many benefits, including potential height increase. These yoga poses not only stretch and strengthen your body but also improve your overall well-being. So why wait? Grab your yoga mat and start stretching for a taller and healthier you.

    Ready to try these yoga poses with FitFortune?

    Start with simple yoga poses and see the difference in yourself. join the course Best 200 Hour Yoga Teacher Training in Rishikesh Remember, consistency is key. Happy stretching!


    FAQ

  • What are the benefits of asanas |10 benefits of asanas?

    What are the benefits of asanas |10 benefits of asanas?

    What are the benefits of asanas 10 benefits of asanas
    What are the benefits of asanas


    What are the benefits of asanas 10 benefits of asanas
    What are the benefits of asanas
    Benefits of Yoga Asanas: A Holistic Approach to Well-being

    Benefits of Yoga Asanas: A Holistic Approach to Well-being

    Yoga is an ancient practice rooted in Indian philosophy, initially developed in India, and is now widely known and very popular worldwide. Practicing Yoga Asana benefits not just our physical body but also our mental and emotional health. It improves our ability to concentrate. Asanas are one of the core components of yoga. But what exactly are asanas, and why should you include them in your daily routine? Let’s explore the benefits of asanas.

    What Is Asana?

    What is Asana is the physical practice of yoga that is related to your body and health. In Sanskrit, asana means “seat,” and it is especially used for meditation. Today, asana has become another name for yoga, but it is only one part of it. These postures or poses align and balance the body, mind, and spirit. Each pose, from simple to complex, offers unique benefits, and stillness and presence are essential in every pose.

    What Are The Types of Asana?

    There are many different types of asanas that can help you choose the right postures for your specific needs and goals. Let’s explore the types of Asana:

    1. Standing Asanas

    • Mountain Pose (Tadasana)
    • Warrior Pose (Virabhadrasana)
    • Tree Pose (Vrikshasana)

    2. Seated Asanas

    • Lotus Pose (Padmasana)
    • Seated Forward Bend (Paschimottanasana)
    • Bound Angle Pose (Baddha Konasana)

    3. Backbends Asanas

    • Cobra Pose (Bhujangasana)
    • Bridge Pose (Setu Bandhasana)
    • Wheel Pose (Chakrasana)

    4. Forward Bend Asanas

    • Standing Forward Bend (Uttanasana)
    • Head-to-Knee Pose (Janu Sirsasana)
    • Child’s Pose (Balasana)

    5. Inversion Asanas

    • Half Lord of the Fishes Pose (Ardha Matsyendrasana)
    • Revolved Triangle Pose (Parivrtta Trikonasana)
    • Twisted Chair Pose (Parivrtta Utkatasana)

    6. Balancing Asanas

    • Headstand (Sirsasana)
    • Shoulder Stand (Sarvangasana)
    • Legs-Up-the-Wall Pose (Viparita Karani)

    7. Twist Asanas

    • Crow Pose (Bakasana)
    • Eagle Pose (Garudasana)
    • Half Moon Pose (Ardha Chandrasana)

    8. Restorative Asanas

    • Corpse Pose (Savasana)
    • Legs-Up-the-Wall Pose (Viparita Karani)
    • Reclining Bound Angle Pose (Supta Baddha Konasana)

    9. Core Strengthening Asanas

    • Boat Pose (Navasana)
    • Plank Pose (Phalakasana)
    • Side Plank Pose (Vasisthasana)

    10. Hip Opening Asanas

    • Pigeon Pose (Kapotasana)
    • Frog Pose (Bhekasana)
    • Garland Pose (Malasana)

    Shloka: “Yogasthah kuru karmani siddhirav Siddhirbhavatha kudastava” (Bhagavad Gita 2.47)

    This Shloka emphasizes that yoga (including asanas) isn’t just about physical results, but a holistic approach to well-being.

    1. Cultivating Supple Strength:

    Imagine a graceful willow swaying in the breeze. Asanas, like Trikonasana (Triangle Pose) and Prasarita Padottanasana (Wide-Legged Forward Bend), lengthen and stretch your muscles, enhancing flexibility. This newfound suppleness translates into everyday movements becoming more fluid and graceful, while reducing the risk of injuries.

    Shloka: “Sthiram sukham asanam” (Hatha Yoga Pradipika 1.1)

    This Shloka reminds us that asanas aren’t about pushing ourselves to the limit, but finding a balance between stability and gentle exploration. As your flexibility improves, you’ll naturally build strength within the lengthened muscles, leading to a strong yet supple physique.

    2. Finding Your Center:

    Asanas like Vrikshasana (Tree Pose) and Virabhadrasana I & II (Warrior Poses) challenge your balance. Holding these postures requires core engagement, which strengthens your abdominal and back muscles. This core stability translates to better balance not just on the yoga mat, but also in everyday life, preventing falls and improving coordination.

    3. Feel Energized with Yoga Poses:

    If you are Feeling sluggish? Flowing sequences like Surya Namaskar (Sun Salutations) get your heart pumping and blood circulating. This improves oxygen flow throughout your body, boosting your energy levels and leaving you feeling revitalized.

    4. Weight Management Through Asana Practice:

    While not solely focused on weight loss, dynamic asanas like Surya Namaskar and Vinyasa sequences create internal heat (tapas) and burn calories. Additionally, some asanas like Bhujangasana (Cobra Pose) and Dhanurasana (Bow Pose) stimulate the digestive system, promoting healthy metabolism.

    5. Untie Those Tension Knots: Relax and De-Stress with Yoga Poses:

    The world throws a lot at us. Asanas like Savasana (Corpse Pose) and Balasana (Child’s Pose) provide a much-needed sanctuary for relaxation. Here, you focus on deep, mindful breathing, calming the nervous system and reducing stress hormones.Life can get pretty stressful, leaving us feeling like a tangled mess of knots. But guess what? Yoga poses, also called asanas, can be your secret weapon for unwinding and letting go of that tension!

    Here’s how these poses help:

    Deep Breaths, Deep Relaxation: Think of calming poses like child’s pose or corpse pose. These encourage slow, deep breaths, which naturally soothe your mind and body. Imagine each breath melting away a knot of stress.

    Quiet Your Mind: Holding yoga poses requires some focus, but not the kind that stresses you out! It’s a gentle way to quiet your mind chatter and let go of worries, leaving you feeling more peaceful.

    Release the Tightness: Some poses, like gentle twists and forward bends, can actually help loosen tight muscles that hold onto stress. Imagine gently stretching out those knots and feeling the tension melt away.

    6.Boost Your Body’s Defenses: Yoga Poses for a Stronger You:

    Asanas like Setu Bandhasana (Bridge Pose) and Salabhasana (Locust Pose) stimulate the lymphatic system, a key player in the immune response. By promoting lymphatic drainage, asanas can potentially help your body fight off infections and illnesses more effectively.

    7. Sharpening Your Focus:

    Lymph Power: Imagine a network of tiny highways inside you. These highways, called the lymphatic system, help fight off bad guys like germs. Certain yoga poses, like bridge pose or locust pose, can help these “highways” flow more smoothly, potentially giving your immune system a boost.

    Sweat it Out: Feeling a bit sluggish? Dynamic yoga sequences can get your heart pumping and make you sweat. Sweating is your body’s natural way of flushing out toxins that can make you feel icky. Think of it as a spring cleaning for your insides!

    Stress Less, Fight More: We all know stress can make us feel crummy. Yoga poses, especially calming ones like corpse pose or child’s pose, can help lower stress levels. With less stress, your body can focus its energy on fighting off those pesky germs and keeping you healthy.

    Asanas like Sukhasana (Easy Pose) and Marjariasana (Cat-Cow Pose) require focus on breath and bodily sensations. This mindful practice improves concentration and mental clarity, which benefits your work, studies, and daily interactions.

    8. Stand Tall with Confidence: Yoga Poses for better Body Posture:

    Imagine walking with the grace and confidence of royalty. Yoga poses, or asanas, can be your secret weapon for achieving that regal posture! They’re not just about looking good – good posture can actually improve your health and well-being.

    Many asanas, like Tadasana (Mountain Pose) and Virabhadrasana (Warrior Pose), emphasize proper spinal alignment and core engagement. Over time, these postures strengthen your core muscles, leading to improved posture, reduced back pain, and a more confident presence.

    9. A Journey to Inner Peace:

    Asanas are not just physical exercises; they are a bridge to the mind and spirit. Focusing on the breath during practice creates a sense of inner peace and well-being. This calmness translates into a more positive outlook on life and helps manage emotional fluctuations.

    10. A Holistic Path to Well-being:

    Asanas offer a multifaceted approach to well-being. They strengthen your body, reduce stress, elevate your mood, and enhance your mental clarity. This holistic approach leads to a healthier, happier you, both on and off the yoga mat.

    Conclusion

    The benefits of asanas are vast, ranging from physical improvements to mental clarity and spiritual growth. By incorporating asanas into your daily routine, you can experience enhanced overall well-being and a more balanced life.

    Aura Cleaning

    Ready to experience the amazing benefits of asanas for yourself? At FitFortunes, join Yoga Course we’re here to help you on your journey to better health and wellness. Whether you’re a beginner or an experienced yogi, our expert guidance and personalised programs will support you every step of the way.