Author: Fitfortunes yogaways

  • Yoga Asanas for Weight Loss: A Safe Beginner Guide

    Yoga Asanas for Weight Loss: A Safe Beginner Guide

    Losing weight doesn’t have to mean intense workouts or complicated diets. Yoga offers a gentle, yet effective, way to shed those extra pounds. Through specific yoga poses (known as asanas), you can improve your flexibility, build strength, and boost metabolism, all while focusing on your mental well-being.

    In this article, we’ll cover several yoga asanas that can help you achieve weight loss goals. These poses will not only burn fat but also strengthen and tone your body. Plus, yoga promotes a mindful approach, helping you reduce stress and stay focused on a healthier lifestyle.

    Why Yoga for Weight Loss?

    Yoga might not seem like a traditional weight-loss workout, but it offers several unique benefits. Here’s how yoga helps you lose weight:

    1. Boosts Metabolism: Many yoga poses help stimulate digestion and metabolism, which is essential for weight loss.
    2. Reduces Stress: High stress levels can trigger emotional eating. Yoga calms the mind, helping you avoid unhealthy eating habits.
    3. Promotes Mindfulness: Yoga encourages being present in the moment. This mindfulness helps you make healthier food choices and practice portion control.
    4. Increases Strength and Flexibility: Regular yoga practice tones muscles, increases flexibility, and improves overall body composition.

    Yoga’s holistic approach means that you’re not just losing weight—you’re improving your entire well-being.

    Top Yoga Asanas for Weight Loss

    If you want to lose weight through yoga, here are some of the most effective asanas that target key areas of your body, increase metabolism, and tone muscles.

    1. Sun Salutations (Surya Namaskar)

    Sun Salutations are a series of 12 connected poses. This dynamic flow increases your heart rate and stimulates the metabolism. Practicing this sequence helps burn calories, stretches the body, and enhances flexibility.

    How to do it:

    • Begin in Tadasana (Mountain Pose).
    • Move into a forward fold and step back into a plank pose.
    • Drop into Chaturanga (low push-up), then flow into Upward Dog and Downward Dog.
    • Step forward again and return to standing.
    • Repeat for 5–10 rounds.

    This full-body movement activates multiple muscle groups, promoting weight loss and improving cardiovascular health.

    1. Warrior Poses (Virabhadrasana I, II, III)

    Warrior Poses are fantastic for toning the legs, strengthening the core, and building endurance. These poses also increase heart rate, which helps with burning fat.

    How to do it:

    • Warrior I: Start in Tadasana and step one foot back. Bend the front knee and reach arms overhead.
    • Warrior II: From Warrior I, open the hips and shoulders, keeping arms parallel to the floor.
    • Warrior III: Balance on one leg, extending the other leg behind you and arms forward.

    Warrior poses are powerful for building strength and balance while focusing on the legs and core.

    1. Boat Pose (Navasana)

    Boat Pose targets the abdominal muscles, helping tone your core. Strengthening your core is essential for weight loss because it supports your posture and overall movement.

    How to do it:

    • Sit on the floor and lift your legs, keeping them straight.
    • Lean back slightly while maintaining a straight back.
    • Hold your arms parallel to the ground and hold for 20–30 seconds.
    • Gradually build up the duration as your core strength improves.

    This pose helps tighten the core and improves balance, which are key to overall fitness and weight loss.

    1. Chair Pose (Utkatasana)

    Chair Pose is a powerful pose for toning the legs, glutes, and abs. It also engages the back muscles and increases strength and endurance.

    How to do it:

    • Stand with your feet together.
    • Bend your knees and lower your hips as though you’re sitting in a chair.
    • Reach your arms overhead, keeping your back straight.
    • Hold the position for 30–60 seconds.

    Chair Pose strengthens the lower body and engages the core, boosting calorie burn and metabolism.

    1. Plank Pose (Phalakasana)

    Plank Pose is a full-body exercise that engages the core, shoulders, arms, and legs. It builds endurance and helps burn fat, particularly in the abdominal area.

    How to do it:

    • Start in a push-up position with your hands directly under your shoulders.
    • Keep your body in a straight line from head to heels.
    • Hold for 30 seconds to 1 minute, keeping your core engaged the whole time.

    Plank helps build core strength and tone the entire body, which supports weight loss and muscle definition.

    1. Cobra Pose (Bhujangasana)

    Cobra Pose stretches the spine and helps strengthen the back muscles. It also aids in digestion, which is essential for efficient weight loss.

    How to do it:

    • Lie flat on your stomach with your hands under your shoulders.
    • Press your palms into the floor and lift your chest, keeping your elbows slightly bent.
    • Hold for 20–30 seconds and then slowly lower back down.

    Cobra Pose supports digestion and strengthens the lower back, which contributes to overall fitness.

    1. Bridge Pose (Setu Bandhasana)

    Bridge Pose is excellent for toning the glutes and legs. It also helps strengthen the back and stimulate the thyroid, which plays a role in regulating metabolism.

    How to do it:

    • Lie on your back with knees bent and feet flat on the floor.
    • Press into your feet and lift your hips up, keeping your arms by your sides.
    • Hold for 30–60 seconds.

    This pose activates the lower body and helps increase circulation, aiding in fat burning.

    Upcoming Traditional Multi-Style 200 Hour Yoga Teacher Training

    Upcoming Traditional Multi-Style 200 Hour Yoga Teacher Training

    Date Shared Room Book Private Room Book

    Additional Tips for Successful Weight Loss with Yoga

    To maximize weight loss with yoga, it’s important to combine your practice with other healthy habits:

    • Mindful Eating: Pay attention to what you eat and when. Yoga encourages mindfulness, which can help you make better food choices and avoid overeating.
    • Stay Consistent: Practice yoga regularly (3–4 times a week). Consistency is key to seeing results.
    • Hydrate: Drinking water before and after your practice is important for overall health and digestion.
    • Add a Healthy Diet: Focus on whole foods like vegetables, fruits, and lean proteins. Avoid processed foods, sugars, and excessive fats.

    How to Get Started with Yoga for Weight Loss

    1. Start Slow: If you’re new to yoga, begin with beginner-friendly poses and gradually build up to more advanced postures.
    2. Warm-Up: Start each session with gentle stretches to loosen your body and prevent injury.
    3. Cool Down: End your session with relaxing poses like Child’s Pose or Savasana to calm your body and mind.
    4. Practice Regularly: For optimal results, practice yoga for 30–60 minutes, 3–4 times a week.

    Final Thoughts: Why Yoga is the Key to Sustainable Weight Loss

    Yoga offers a holistic approach to weight loss that combines physical activity with mindfulness and stress relief. By incorporating poses like Sun Salutations, Warrior Poses, and Boat Pose into your routine, you can burn calories, build strength, and improve overall health. Yoga isn’t just about shedding pounds—it’s about nurturing your body and mind. So, take a deep breath, get on your mat, and start your weight loss journey with yoga today!
  • What Religion Is Yoga

    What Religion Is Yoga

    Yoga is not tied to any single religion, race, or cultural group. Though its roots trace back to ancient India, yoga transcends boundaries and belongs to all of humanity. At its core, yoga is a spiritual practice, but it is not limited to or owned by any particular faith or belief system.

    One of the earliest advocates of this universal view of yoga was Guru Gorakhnath, a renowned yogi and spiritual teacher. His teachings emphasize that yoga is a path for all, regardless of religious affiliation or societal background.

    Guru Gorakhnath’s Wisdom: Yoga Is Universal

    Guru Gorakhnath, a prominent figure in the Nath tradition, believed yoga was a path to self-realization and liberation, free from the confines of religion, caste, or creed. In his poetic verses known as Gorakh Shabdi, he profoundly states:

    “Yoga na ashram ka hai, nadharam ka, najaati ka, yoga to ek shuddhmarghai jo sabkeliyehai.”
    (“Yoga does not belong to any ashram, religion, or caste. Yoga is a pure path meant for everyone.”)

    Guru Gorakhnath shared the wisdom that yoga is not tied to any particular identity, religion, or place. His teachings encourage us to look beyond labels and connect with the true self. Yoga, he said, is a path to inner peace and liberation that is open to all people, regardless of their background or beliefs.

    This message is timeless, reminding us that yoga is a universal practice that does not belong to one group. It is a gift for the world, one that brings peace and understanding to everyone who practices it.

    How Yoga Transcends Religion

    Yoga, Hinduism and Religion: A Clear Distinction

    How to Choose a Class That Fits Your Beliefs

    Before You Join a Yoga Class: 5 Questions

    1. Is the class mainly physical, philosophical, devotional or mixed?
    2. Does it include chanting, prayer or Sanskrit recitation?
    3. Can students opt out of practices they are not comfortable with?
    4. Does the teacher explain the historical context accurately?
    5. Does the class respect different religious and non-religious backgrounds?

    Three Common Class Examples

    • Fitness-focused class: mostly movement, breathing and relaxation with little philosophy.
    • Traditional philosophy class: may include Sanskrit terms, Yoga Sutras, Bhagavad Gita or ethical teachings.
    • Devotional class: may include chanting, prayer or ritual depending on the teacher and tradition.

    These formats can all be called yoga, which is why reading the class description matters more than assuming one universal religious meaning.

    • Read the class description before attending.
    • Ask whether chanting, devotional language or ritual is included.
    • Choose a physical or secular class if that is your preference.
    • Choose a traditional philosophy class if you want historical and spiritual context.
    • Leave any class that pressures you to accept beliefs you do not share.

    Yoga classes vary widely. The label “yoga” alone does not tell you whether a class is physical, philosophical, devotional or mixed.

    QuestionShort answer
    Did yoga develop in India?Yes
    Is yoga historically connected with Hindu, Buddhist and Jain traditions?Yes
    Must someone become Hindu to practise yoga?No
    Can yoga include spiritual or devotional elements?Yes, depending on the tradition and class

    Modern yoga can be taught as physical exercise, meditation, philosophy, devotional practice, or a combination. The best answer depends on what a specific teacher or tradition includes. Continue with Is Yoga a Religion?, Should Christians Do Yoga?, and the eight limbs of yoga.

    While yoga originated in the spiritual practices of ancient India and is often associated with Hinduism, Jainism, and Buddhism, its principles are universal. Here’s how yoga goes beyond religious boundaries:

    1. Focus on Self-Realization: Yoga emphasizes personal growth, mindfulness, and self-awareness rather than worship or dogma.
    2. Inclusivity: People of all faiths can practice yoga without altering their beliefs.
    3. Non-Sectarian Teachings: Texts like the Yoga Sutras of Patanjali highlight ethics, meditation, and self-discipline without endorsing specific religious practices.

    Modern Yoga and Its Global Appeal

    Yoga has grown beyond its Indian roots and is now practiced by millions around the world. It doesn’t matter your culture, religion, or beliefs. People from all backgrounds enjoy yoga for its physical, mental, and spiritual benefits. Yoga’s flexibility makes it a great practice for everyone, offering a way to improve health and find peace without interfering with one’s faith or philosophy.

    Ancient Yogis: Teachers of Unity and Wisdom

    Throughout history, ancient yogis and spiritual leaders from different religions have shaped the way we practice yoga today. They taught that yoga is a universal path to inner peace and self-discovery, free from the limits of religion. These teachers were far ahead of their time in promoting unity through yoga.

    For example, Guru Gorakhnath, a key figure in the Nath tradition, explained that yoga is not tied to any religion, caste, or ashram. It is a pure, universal path that is open to everyone. Similarly, Swami Vivekananda brought yoga to the West, showing that its teachings can help anyone, no matter their background. Buddhist monks in Tibet used yoga practices to reach deeper meditation and spiritual growth, blending their traditions with yogic principles. Jain yogis focused on non-violence (ahimsa) and discipline, core values in yoga. Even Sufi mystics embraced meditation practices similar to yoga, seeking divine connection through mindfulness and inner peace.

    Yoga for All: A Universal Practice

    Yoga’s beauty lies in its adaptability. It does not require you to follow any particular religion. Whether you are Christian, Muslim, Jew, Hindu, Buddhist, or atheist, yoga offers a way to strengthen your body, calm your mind, and connect with your deeper self.

    For Christians, yoga can complement prayer and contemplation. Muslims can find peace in the mindfulness and meditative aspects of yoga. Buddhists and Jains naturally connect with yoga’s focus on meditation and ethical living. Even atheists can enjoy yoga purely as a tool for mental health, physical wellness, and relaxation. Yoga opens the door to self-improvement, regardless of your faith.

    “VasudhaivaKutumbhakam”: The World is One Family

    Yoga’s universal approach is grounded in the ancient Indian concept of VasudhaivaKutumbhakam, meaning “the world is one family.” This powerful idea teaches that we are all connected, regardless of our backgrounds or beliefs. Yoga encourages us to see beyond our differences and recognize our shared humanity.

    No matter where you practice yoga—whether in India, America, or anywhere else in the world—the core of yoga remains the same. It is a tool for health, peace, and unity. The teachings of yoga invite everyone to embrace their connection to the world and the people around them.

    The Global Appeal of Yoga

    Yoga is not just for one group of people. Its flexibility and variety make it accessible to everyone. There are many types of yoga for different needs: Hatha yoga for balance and relaxation, Ashtanga yoga for a more intense workout, and Restorative yoga for relaxation and healing. No matter what your goal is, there is a style of yoga that fits.

    Yoga’s principles—like mindfulness, balance, compassion, and discipline—resonate with people from all cultures and religions. These principles promote unity, bringing together diverse communities of yoga practitioners.

    Yoga: Connecting the World

    In today’s world, yoga is more than just a practice—it’s a bridge that connects people. It brings together different cultures, religions, and philosophies. People of all faiths can embrace yoga because its teachings are universal. It is a language of health, mindfulness, and inner peace that transcends barriers.

    By practicing yoga, we honor the vision of ancient yogis, who believed that yoga is a path for all. Yoga helps us see beyond differences and promotes unity and peace. It embodies the idea of VasudhaivaKutumbhakam—the world is one family. Yoga reminds us of this truth: We are all connected, and through yoga, we can find peace and a deeper connection to the world and the cosmos.

    Conclusion: The Universal Path to Peace

    Yoga is a timeless practice that knows no boundaries. It is a journey toward physical well-being, mental clarity, and spiritual enlightenment. Its beauty lies in its inclusivity, bringing people together from all walks of life. Whether you’re new to yoga or a seasoned practitioner, yoga offers a path to inner peace, health, and unity.

    As ancient yogis and modern teachers have shown, yoga is not defined by religion, race, or nationality. It is a universal practice that belongs to everyone. Yoga is about connection—to the self, to others, and to the world around us. In embracing yoga, we are embracing the truth that we are all part of the same global family.

  • What Is Slow Flow Yoga

    What Is Slow Flow Yoga

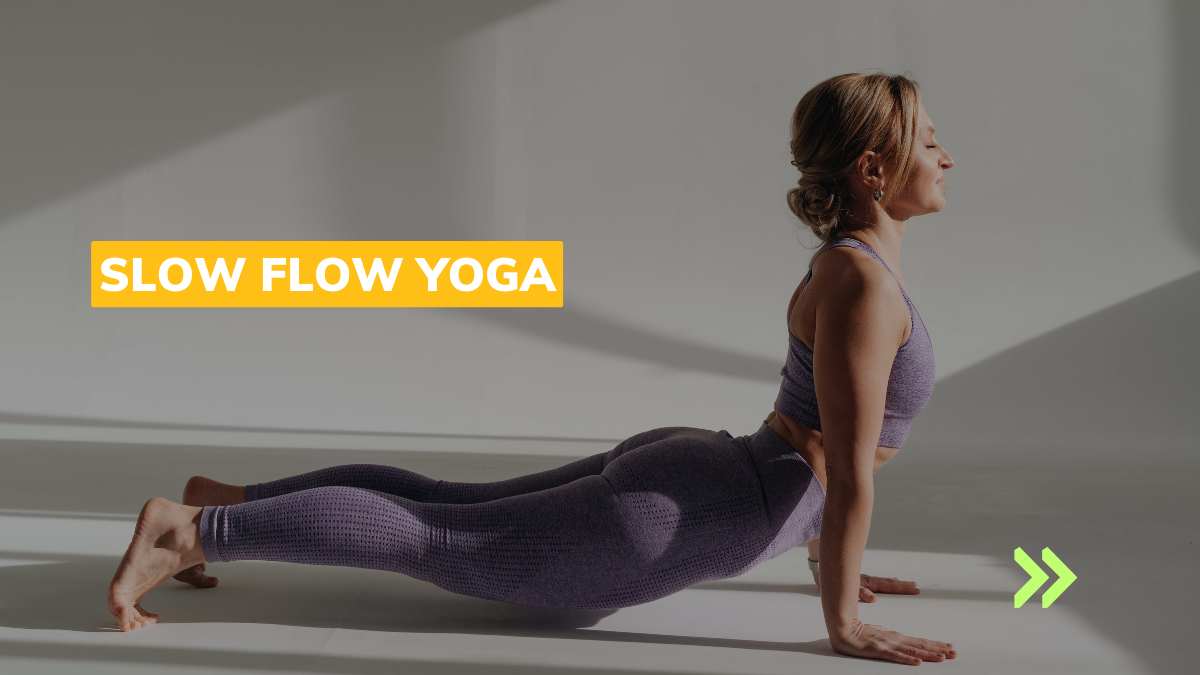
    Do you want a yoga style that’s both calming and energizing? Slow flow yoga might be what you’re looking for! This gentle practice combines mindful movements, steady breathing, and a sense of inner peace. It’s perfect for anyone who wants to connect with their body and mind without feeling rushed.

    In this blog, we’ll explore everything about slow flow yoga, including its benefits, tips for practicing, and how to make it enjoyable for all levels.

    What Does Slow Flow Yoga Mean?

    Slow flow yoga is a style of yoga where poses are linked together with smooth, gentle movements. The transitions are slow paced, allowing you to focus on each pose and your breath. Unlike faster-paced styles like vinyasa, slow flow yoga invites you to move with mindfulness.

    Think of it like a calming river. The flow is steady but unhurried, creating a sense of ease. It’s not about speed or difficulty but about enjoying the journey.

    Why Is It Called “Slow Flow”?

    The term “slow flow” highlights the way movements are done in a steady, flowing manner. Each pose connects to the next with grace and intention. This flow makes it feel more like a meditative practice than a workout.

    For beginners, this pace makes yoga feel accessible. For experienced yogis, it provides an opportunity to deepen their practice by focusing on alignment and breath.

    Who Can Practice Slow Flow Yoga?

    Slow flow yoga is for everyone, regardless of age or skill level. Here’s why it’s suitable for all:

    • Beginners: The gentle movements are easy to follow and don’t require prior experience.
    • Seniors: It’s a low-impact practice that helps improve mobility without straining the body.
    • Busy Professionals: It’s a great way to relax after a stressful day.
    • Kids: Slow flow yoga can be a fun and calming activity for children.

    Even athletes or advanced yogis can benefit by using slow flow yoga to improve flexibility and recover from intense training.

    What Is Slow Flow Yoga

    Benefits of Slow Flow Yoga

    Practicing slow flow yoga regularly has many benefits for both your body and mind.

    1. Reduces Stress

    Slow movements paired with deep breathing calm your nervous system, reducing stress and anxiety.

       2. Improves Flexibility

    The stretches in slow flow yoga gently lengthen your muscles, increasing flexibility over time.

       3. Builds Strength

    Poses like Warrior or Plank help build muscle strength while being gentle on joints.

       4. Boosts Mental Clarity

    The focus on mindfulness improves concentration and mental clarity.

       5. Improve Sleep

    Practicing slow flow yoga in the evening helps relax your body and mind, promoting restful sleep.

       6. Encourages Self-Awareness

    By moving slowly, you become more aware of how your body feels, improving posture and preventing injuries.

       7. Supports Emotional Well-Being

    This style of yoga creates a sense of calm and balance, supporting emotional health.

    How to Practice Slow Flow Yoga

    Starting slow flow yoga is easy! Here’s a step-by-step guide:

    1. Set the Mood

    Create a peaceful environment. Use a yoga mat and wear comfortable clothes. Incorporate calming music to make the session more relaxing. Instrumental or nature sounds work well.

       2. Warm-Up

    Begin with gentle stretches to prepare your body. Focus on your breathing as you move.

       3. Practice Basic Poses

    Here are a few beginner-friendly poses:

    • Child’s Pose (Balasana): Sit back on your heels, stretch your arms forward, and rest your forehead on the mat.
    • Cat-Cow Pose (Marjaryasana-Bitilasana): On all fours, gently arch and round your back.
    • Mountain Pose (Tadasana): Stand tall with your arms at your sides, focusing on your breath.

       4. Cool Down

    End your session with Savasana (Corpse Pose). Lie down, close your eyes, and relax completely.

       5. Follow a Sequence

    Try this simple 15-minute routine:

    1. Start in Mountain Pose and focus on your breath (1 minute).
    2. Transition to Forward Fold, allowing your arms to hang loose (2 minutes).
    3. Move into Cat-Cow Pose for gentle spinal movements (2 minutes).
    4. Rest in Child’s Pose for a calming stretch (3 minutes).
    5. Finish with Savasana to relax fully (5 minutes).

    Modifications for Different Levels

    Slow flow yoga is versatile and can be adapted for all levels:

    • Beginners: Use props like yoga blocks or straps to assist in poses. For example, place a block under your hands in Forward Fold if reaching the ground feels challenging.
    • Intermediate: Focus on holding poses slightly longer to build strength and stability.
    • Advanced: Incorporate advanced variations like balancing poses or deeper stretches to challenge yourself.

    The key is to listen to your body. Adjust each pose to match your comfort and ability.

    The Role of a Qualified Instructor

    While you can practice slow flow yoga at home, finding a qualified instructor has added benefits:

    • Guidance: They can teach proper alignment and techniques.
    • Safety: Instructors help prevent injuries by correcting your form.
    • Personalization: They can adapt sequences to fit your needs, whether you’re a beginner or advanced.

    Look for instructors certified in yoga and experienced in slow flow styles. If in-person classes aren’t possible, online classes are a great alternative.

    Slow Flow Yoga Experience with Music

    Music can be helpful in your slow flow yoga practice. Calming tunes help you relax and stay focused. Here are some tips for using music:

    • Choose instrumental tracks or nature sounds (e.g., flowing water, birds chirping).
    • Keep the volume low to avoid distractions.
    • Match the tempo of the music to the pace of your practice.

    Many yoga apps and platforms offer pre-made playlists designed for slow flow yoga.

    Adding Visual Aids

    Visual aids like images or videos can make learning slow flow yoga easier, especially for beginners. Here are some ideas:

    • Images: Look for yoga books or online resources with step-by-step images of poses.
    • Videos: Follow beginner-friendly yoga videos on platforms like YouTube.
    • Apps: Download yoga apps that guide you through sequences with visuals and voice instructions.

    Seeing the poses demonstrated can help you understand proper alignment and transitions.

    Upcoming Traditional Multi-Style 200 Hour Yoga Teacher Training

    Upcoming Traditional Multi-Style 200 Hour Yoga Teacher Training

    Date Shared Room Book Private Room Book

    Why Choose Slow Flow Yoga?

    In a fast-paced world, slow flow yoga offers a chance to slow down and reconnect with yourself. Its gentle movements and focus on mindfulness make it a perfect choice for relaxation and self-care.

    Here are some reasons why it stands out:

    1. Accessible to Everyone: It’s suitable for all ages and fitness levels.
    2. Flexible Practice: You can do it at home, in a studio, or even outdoors.
    3. Holistic Benefits: It nurtures both your physical and mental well-being.

    Tips for a Successful Practice

    To get the most out of your slow flow yoga practice, keep these tips in mind:

    1. Start Small: Begin with short sessions (10-15 minutes) and gradually increase the duration.
    2. Stay Consistent: Regular practice helps you see results faster.
    3. Focus on Your Breath: Deep, steady breathing is the foundation of slow flow yoga.
    4. Be Patient: Yoga is a journey. Don’t rush progress.
    5. Use Props: Blocks, straps, and cushions can enhance your comfort and alignment.

    Final Thoughts

    So, what is slow flow yoga? It’s a gentle yet powerful practice that connects your body, mind, and breath. Whether you’re a beginner or an experienced yogi, this style of yoga offers countless benefits, from reducing stress to improving flexibility.

    With calming music, visual aids, and the guidance of a skilled instructor, slow flow yoga can transform your daily routine into a peaceful ritual.

    Why not unroll your mat and try it today? Slow flow yoga could be the key to finding balance and calm in your life.

  • How To Do Kriya Yoga : Learning for Students and Teachers

    How To Do Kriya Yoga : Learning for Students and Teachers

    How to Do Kriya Yoga: A Complete Practical Guide for Students and Teachers

    How to Do Kriya Yoga: A Complete Practical Guide for Students and Teachers

    When an international student named Maria arrived in Rishikesh for her first Kriya Yoga class, she expected calm breathing and gentle postures. Instead, her teacher explained, “Kriya is not about movement. It is about energy discipline.” That insight changed her practice forever.

    If you’ve ever wondered how to do Kriya Yoga, this guide explains its authentic process — from technique basics to teacher training, cultural roots, and student experiences in India’s yoga capital.

    Before you start, you may like to read about Yoga before or after Meditation to balance your daily routine.

    Learning Kriya Yoga in Rishikesh

    Nestled along the Ganges and surrounded by the Himalayas, Rishikesh remains one of the most authentic places to study Kriya Yoga. For decades, it has been home to respected teachers who pass on this meditative science in traditional ashrams and certified yoga schools.

    Unlike modern fitness yoga, Kriya Yoga focuses on energy control (pranayama), inner stillness, and breath awareness. The calm environment of Rishikesh supports this inner discipline. Students wake to temple bells, study ancient texts, and meditate by the river — conditions ideal for learning how to practice Kriya safely and correctly.

    “Rishikesh offers silence as the first teacher. That’s where real Kriya begins,” says Swami Arjun, a senior instructor.

    How to Do Kriya Yoga

    Learn more about Kriya Yoga Schools and their global influence.

    Step-by-Step Kriya Yoga Practice

    Learning how to do Kriya Yoga involves more than memorizing techniques. It follows a gradual process: body preparation, breath regulation, and inner stillness.

    • Preparatory Asanas: Gentle postures like Padmasana, Vajrasana, and Siddhasana help align the spine. Read more about the Benefits of Asanas.
    • Breath Discipline (Pranayama): Deep, rhythmic breathing prepares the nervous system for higher energy control.
    • Kriya Techniques: These include energy circulation through the spine using concentration and controlled inhalation/exhalation.
    • Meditation Practice: Focused awareness at the Ajna Chakra refines mental stillness. If you’re new, explore how to do meditation at home.
    • Mantra Repetition: Repeated sound vibration stabilizes thought and emotion.

    “Never force your breath or attention,” advises teacher Meera Singh. “Patience in Kriya is strength.”

    To begin practice from home, follow this Kriya Yoga at Home Guide.

    Authentic Certification and Teacher Training

    For those interested in formal study, Rishikesh offers Yoga Alliance-certified courses that include Kriya Yoga as part of advanced meditation modules. While Kriya itself originates from Paramahansa Yogananda’s lineage, its methods are now taught responsibly at certified yoga schools following international standards.

    A typical certification program includes:

    • Yogic Science Foundations – Philosophy, history, and scriptural roots.
    • Energy Practices – Advanced pranayama and subtle body awareness.
    • Teaching Methodology – Ethics, adjustments, and guidance.
    • Daily Meditation & Journaling – Reflection and awareness growth.

    “Certification adds responsibility, not status,” says Ramesh Joshi, a senior yoga master.

    Daily Life During Kriya Yoga Study

    Most Kriya Yoga training schools in Rishikesh offer simple, clean accommodations suited to a meditative lifestyle. Meals are sattvic, and routines begin at 5:00 AM with meditation, breathwork, and Karma Yoga (voluntary service).

    “You realize Kriya is not a session — it becomes the rhythm of your day,” shares Lisa from Sweden, a 2024 graduate.

    For deeper programs, explore holistic wellness and pranayama-based training in Rishikesh.

    Course Fees & Value

    Course fees for Kriya Yoga teacher training in Rishikesh range between ₹70,000 and ₹1,20,000 INR for a 200-hour program, depending on facilities and inclusions.

    Fees typically cover:

    • Tuition and certification
    • Accommodation and sattvic meals
    • Weekend excursions and study materials

    “The real value is not in the certificate but in learning to calm your inner currents,” explains Om Prakash.

    Student Experiences

    Emily, USA: “I came for stress relief, but Kriya taught me patience with my thoughts.”

    Hiroshi, Japan: “Learning in Rishikesh gave me not only technique but cultural understanding.”

    Students appreciate structured breathing, ethical grounding, and silence as part of their growth. Explore more stories in Yoga for Inner Peace and Fitness.

    Conclusion: Practicing Kriya Yoga with Awareness

    Learning Kriya Yoga is not about mastering postures but about developing a calm, aware mind through breath and energy discipline. Rishikesh remains the most trusted destination for serious students who value traditional and certified learning.

    “When breath is steady, the mind finds its teacher,” concludes Swami Arjun.

    FAQ: How to Do Kriya Yoga - Practical Questions Answered

    Q1. What is the first step in Kriya Yoga?
    Start with preparatory breathing and seated postures like Padmasana. Never rush advanced techniques.

    Q2. Can beginners learn Kriya Yoga?
    Yes, but only under a qualified instructor who ensures safe breath control and posture alignment.

    Q3. How long should I practice daily?
    Begin with 15–20 minutes, gradually increasing as comfort grows.

    Q4. Is Kriya Yoga a religion?
    No. It is a spiritual science of breath and energy applicable to any belief.

    Q5. What are the benefits of Kriya Yoga?
    It enhances mental clarity, emotional stability, and natural energy flow.

    Q6. How is Kriya Yoga different from meditation?
    Kriya combines breath control and meditation for deeper concentration.

    Q7. Do I need to be vegetarian for Kriya Yoga?
    Sattvic food is encouraged for calmness but not mandatory.

    Q8. Is Kriya Yoga part of Yoga Alliance certification?
    Yes, in many advanced or multi-style teacher training programs.

    Q9. Where can I join Kriya Yoga training in Rishikesh?
    You can explore certified residential programs through FitFortunes’ Yoga Teacher Training in Rishikesh.

    Q10. What precautions should I take?
    Avoid overexertion, maintain regular guidance, and always practice after meals only after two hours.

    Upcoming Traditional Multi-Style 200 Hour Yoga Teacher Training

    Upcoming Traditional Multi-Style 200 Hour Yoga Teacher Training

    Date Shared Room Book Private Room Book
  • Winter Solstice Yoga Poses: Embrace the Darkness and Welcome the Light

    Winter Solstice Yoga Poses: Embrace the Darkness and Welcome the Light

    The Winter Solstice marks a powerful moment in nature—when the longest night of the year gives way to the return of the sun. This transition symbolizes a shift in energy, encouraging reflection, release, and renewal. For yoga practitioners, it’s the perfect time to connect deeply with the earth, calm the mind, and set intentions for the coming months. In this blog, we’ll explore some winter solstice yoga poses that can help you honor the stillness of the season while preparing to welcome the light back into your life.

    Why Practice Yoga on the Winter Solstice?

    The Winter Solstice is not only a celestial event, but also a time to pause and embrace the quieter energy of the season. As the days grow shorter, it’s natural to feel more introspective. Yoga can help you navigate these changes by fostering a sense of inner peace and balance. It’s a chance to slow down, let go of what no longer serves you, and nurture the seeds of your future intentions. Yoga poses that encourage grounding and heart-opening are especially beneficial during this time, as they help to balance the inward energy of winter while preparing you for the renewal that comes with the returning light.

    Grounding Poses to Connect with the Earth

    Winter is a season that invites us to connect with the earth and find stillness. Grounding yoga poses allow you to feel more rooted, calming the mind and body as the natural world slows down. Begin your practice with poses that build a strong foundation and help you feel centered.

    1. Mountain Pose (Tadasana)
      Start your practice with Mountain Pose to connect to the earth and set your intentions for the solstice. Stand tall with your feet hip-width apart, grounding into the floor. Reach your arms upward, lifting through your chest, and feel the energy of the earth supporting you. This simple yet powerful pose helps center your mind and body.
    2. Tree Pose (Vrikshasana)
      Tree Pose is a wonderful way to embody the grounded energy of winter while simultaneously promoting balance and flexibility. Stand tall and shift your weight onto one leg. Place the sole of your other foot on your inner thigh or calf (avoid the knee). Bring your palms together in front of your heart or extend them overhead. This pose nurtures stability and helps you feel more aligned during the colder months.
    3. Child’s Pose (Balasana)
      Child’s Pose is a deeply restorative posture that invites stillness and reflection. Begin by kneeling on the mat, lowering your forehead to the floor, and extending your arms in front of you. Allow your body to relax fully, surrendering to the moment. This pose helps you slow down and release any tension, making it a perfect option for a Winter Solstice practice.

    Heart-Opening Poses for Renewal

    As the solstice marks the return of light, it’s a wonderful time to focus on poses that open the heart and create space for new energy to flow. These poses help you release any emotional blockages and invite in positive, uplifting energy.

    1. Camel Pose (Ustrasana)
      Camel Pose is a deep backbend that opens the heart and chest. Kneel on the mat with your knees hip-width apart. Slowly arch your back, reaching your hands toward your heels. Keep your chest lifted, allowing your heart to open to the light of the solstice. This pose releases tension and allows you to embrace the renewal of the season.
    2. Bridge Pose (Setu Bandhasana)
      Bridge Pose is another excellent heart-opening pose that helps strengthen the back while creating space in the chest. Lie on your back with your knees bent and feet hip-width apart. Lift your hips toward the sky, interlacing your fingers underneath your body. Open your heart to the possibilities of the new year, inviting in fresh energy and positivity.
    3. Supported Fish Pose (Matsyasana)
      This restorative pose gently opens the chest and shoulders while promoting deep relaxation. Place a block or cushion underneath your upper back and allow your head and neck to rest gently on the mat. Extend your arms out to the sides, palms facing up. Supported Fish Pose helps release any tension in the upper body and invites peace and clarity.

    Inviting Light with Sun Salutations

    Winter Solstice is a time of transition from darkness to light. One of the most powerful ways to honor this shift is through a sequence of Sun Salutations (Surya Namaskar). These poses symbolize the sun’s return, energizing your body and lifting your spirit.

    1. Sun Salutation A (Surya Namaskar A)
      Start in Mountain Pose and inhale as you reach your arms overhead. Exhale as you fold forward into a forward bend. Step back into Plank Pose, then lower down into Chaturanga. Inhale into Upward-Facing Dog, and exhale into Downward-Facing Dog. Repeat the sequence several times, feeling the connection between each movement and the breath. Sun Salutations are a beautiful way to embrace the light and warmth of the season, preparing yourself for the months ahead.

    Closing Your Practice with Intention

    End your Winter Solstice yoga session with a moment of quiet reflection. Sit comfortably in a seated position or lie flat on your back in Savasana (Corpse Pose). Take a few deep breaths, and reflect on your intentions for the coming months. Set an intention to embrace the light that is returning and honor the stillness that winter brings. This quiet moment helps to solidify your practice and bring the energy of the solstice into your life.

    FAQs: Winter Solstice Yoga Poses

    1. Why should I practice yoga on the Winter Solstice?
      The Winter Solstice is such a special time. It marks the longest night and the return of the light, making it the perfect moment to pause and reflect. Yoga during this time helps you align with nature’s cycles—offering a peaceful break from the busy holiday season. It’s about connecting to the stillness of winter, letting go of the old, and setting intentions for the fresh energy of the coming months.
    2. What are the best yoga poses for the Winter Solstice?
      I recommend starting with grounding poses like Mountain Pose and Tree Pose to connect with the earth and find your center. These are great for calming the mind. To open your heart and invite light back into your life, try Camel Pose and Bridge Pose. These heart-opening stretches will help you feel renewed and ready for the months ahead.
    3. I’m new to yoga—can I still practice on the Winter Solstice?
      Yes, absolutely! Winter Solstice yoga is for everyone, no matter your experience level. The key is to listen to your body and take things at your own pace. If you’re just starting out, don’t stress about getting the poses perfect. Just focus on your breath and the intention behind each movement. Over time, you’ll notice how much calmer and more centered you feel.
    4. How long should my Winter Solstice yoga practice be?
      If you’re new to yoga, start with a shorter session—about 20 to 30 minutes. There’s no need to rush or force anything. The goal is to create a space for reflection and connection. As you feel more comfortable, you can extend your practice and explore more poses.
    5. Do I need any special equipment for Winter Solstice yoga?
      Not really! All you need is a yoga mat, some comfortable clothes, and a quiet space. If you want to get extra cozy, you can grab a cushion or blanket to support certain poses. You could also light a candle or put on some calming music to enhance the experience.
    6. Is it okay to practice Winter Solstice yoga on my own?
      Totally! In fact, the Winter Solstice is a wonderful time for some solo practice. It’s a personal time for reflection, and practicing yoga alone can help you tune in more deeply. But if you enjoy the energy of a group, you can always join a class or an online session—it can be nice to share this peaceful experience with others.
    7. When’s the best time to practice Winter Solstice yoga?
      While the Winter Solstice technically falls around December 21st, you don’t have to wait for the exact day. Practice leading up to the solstice, or even the days after, when the energy of renewal is still strong. Morning and evening are perfect times for your practice—they align beautifully with the quieter energy of the season.
  • How Many Calories Does Vinyasa Yoga Burn

    How Many Calories Does Vinyasa Yoga Burn

    Vinyasa yoga is a popular style of yoga. It combines flowing movements and synchronized breathing. Many people love it for its benefits. It builds strength, improves flexibility, and burns calories. But how many calories can it actually burn? Let’s explore this in detail.

    What Is Vinyasa Yoga?

    Vinyasa yoga is also called “flow yoga.” It links one pose to the next in a smooth sequence. The pace can be slow or fast, depending on the class. This continuous movement keeps your heart rate up, making it great for burning calories.

    Why Does Vinyasa Yoga Burn Calories?

    Unlike some yoga styles, Vinyasa is more dynamic. It engages multiple muscle groups at once. Moving constantly increases your metabolism. It’s almost like a workout, but with mindful breathing.

    How Many Calories Does Vinyasa Yoga Burn?

    Any calorie number for Vinyasa is only an estimate. Body size, pace, room temperature, class length, fitness level and how much time is spent moving all change the result.

    FactorHow it changes the estimate
    Body sizeLarger bodies may use more energy for the same movement
    Class paceContinuous flow usually raises energy use compared with long rests
    Session lengthA 30-minute class and a 75-minute class cannot be compared directly
    ExperienceEfficient movement may change effort at the same pace

    For weight management, use calorie estimates as context rather than a target. Compare our Vinyasa Flow guide, weekly yoga frequency guide, and Yogalates and weight-loss guide.

    How Many Calories Does Vinyasa Yoga Burn?

    The number of calories burned depends on several factors:

    1. Your Weight: Heavier individuals burn more calories.
    2. Session Intensity: A fast-paced class burns more than a slower one.
    3. Duration: Longer sessions burn more calories.

    On average, here’s what you might burn in a 60-minute session:

    • 120 lbs person: Around 260 calories
    • 150 lbs person: Around 320 calories
    • 180 lbs person: Around 400 calories

    Vinyasa Calorie Estimates: Quick Examples

    • Short beginner class: use the lower end of any estimate because there is often more instruction and rest.
    • Continuous moderate flow: energy use rises as movement becomes more continuous.
    • Strong fast flow: effort may be higher, but the exact number still varies by person.

    For a wider comparison, read what Vinyasa Flow Yoga is, Power Yoga, and how often to practise yoga.

    Factors That Affect Calorie Burn

    Body Composition

    Muscle burns more calories than fat. If you’re muscular, you’ll likely burn more calories.

    Age and Gender

    Younger people tend to burn calories faster. Men often burn more calories than women due to higher muscle mass.

    Effort Level

    Giving your best effort in each pose can increase calorie burn. Holding challenging poses for longer adds intensity.

    Comparing Vinyasa Yoga to Other Activities

    Here’s how Vinyasa yoga stacks up:

    • Walking: Burns around 200 calories per hour.
    • Running: Can burn up to 600 calories per hour.
    • Weightlifting: Around 300 calories per hour.

    Vinyasa yoga fits well in this range. Plus, it offers mental benefits, unlike many other workouts.

    Tips to Maximize Calorie Burn in Vinyasa Yoga

    1. Choose a Power Vinyasa Class: These are faster and more intense.
    2. Focus on Transitions: Move smoothly and with control.
    3. Engage Your Core: This adds effort to every pose.
    4. Hold Poses Longer: Staying in poses like Plank or Warrior builds strength and burns more calories.

    Vinyasa Calorie FAQ

    Does a faster class always burn more calories?

    Usually effort rises with pace, but technique, rest periods, body size and class design still change the total.

    Should calorie burn be the main reason to choose Vinyasa?

    No. Strength, mobility, coordination, enjoyment and consistency are also important. Use calorie estimates only as rough context.

    Related guides: Hatha vs Vinyasa, Power Yoga, yoga and short-term weight-loss claims, and Yin Yoga.

    Additional Benefits of Vinyasa Yoga

    Besides burning calories, Vinyasa yoga has many perks:

    • Improves Flexibility: Regular practice stretches muscles and reduces stiffness.
    • Builds Strength: It works your arms, legs, and core.
    • Boosts Mental Health: Breathing and flowing reduce stress and improve focus.

    How Often Should You Practice Vinyasa Yoga?

    To see results, aim for 3-5 sessions per week. Pair it with a balanced diet for better calorie management.

    Can Beginners Burn the Same Calories?

    Beginners might burn fewer calories initially. As they build strength and confidence, their calorie burn will increase. Start slow and focus on improving gradually.

    Conclusion

    Vinyasa yoga is an excellent way to stay fit. It’s more than just a workout; it’s a mind-body connection. Depending on your weight, effort, and session length, you can burn between 260 to 400 calories in an hour. Plus, it’s fun, energizing, and suitable for all levels. Ready to try it out? Grab your mat and flow!

    FAQs

    Is Vinyasa Yoga Enough for Weight Loss?

    Yes, but combine it with a healthy diet and other activities for the best results.

    Can I Do Vinyasa Yoga Every Day?

    Yes! Daily practice can improve flexibility and burn calories. Listen to your body and rest when needed.

    How Does Vinyasa Compare to Hot Yoga?

    Hot yoga might burn slightly more calories due to the heat. However, Vinyasa is more dynamic and versatile.

    Do I Need Any Special Equipment?

    No. Just a yoga mat and comfortable clothes are enough.

  • How to Meditate at Home for Beginners: A Gentle Start

    How to Meditate at Home for Beginners: A Gentle Start

    To meditate at home, sit comfortably, choose one focus and gently return whenever your attention wanders. Start with two to five minutes; a chair and an ordinary quiet corner are enough. You do not need to empty your mind, sit cross-legged or force deep breathing. This guide offers a short routine, alternatives to breath focus and advice on discomfort or distress.

    How to meditate at home for beginners

    Begin with a short, repeatable session rather than trying to produce a special state. Learning to meditate at home is a practice of attention, not a test of whether you can stop thinking. Choose breath, sounds or a simple body sensation as an anchor. The NHS beginner meditation guide provides a practical introduction.

    Five steps to meditate at home

    1. Sit on a chair, cushion or floor with a comfortable upright position.
    2. Set a timer for two to five minutes at first; ten minutes is optional when comfortable.
    3. Notice natural breathing without trying to make it perfect.
    4. When attention wanders, return gently to the breath.
    5. For the final minute, notice sounds and body sensations before finishing.

    Beginners do not need to stop thoughts. The practice is returning attention without judging yourself. See our yoga and meditation beginner guide, yoga before or after meditation, and meditation books guide.

    A home session gives you a familiar place to practise attention. It does not guarantee an empty mind, improved happiness or relief from a condition. Choose a method and duration you can change when needed. Breathing, sounds and an open-eyed visual focus are different options; none has to work for everyone. Notice your response rather than treating a calm feeling as the required result.

    Beginner Meditation Checklist

    • Choose a place where you can sit without interruption.
    • Use a chair if sitting on the floor is uncomfortable.
    • Set a short timer instead of watching the clock.
    • Keep the first week to 5–10 minutes.
    • Return to the breath whenever attention wanders.

    Related guides: yoga and meditation for beginners, yoga before or after meditation, and best meditation books.

    Where can you meditate at home?

    The environment plays a significant role in your meditation practice. Setting up a dedicated space at home can make a big difference in how comfortable and focused you feel. Choose a quiet corner or room where interruptions are minimal. Make it inviting by adding a cushion or chair for comfort. Turn off noisy devices and consider dimming the lights or lighting a candle to create a relaxing ambiance. If soft music or nature sounds help you unwind, feel free to include them in your setup.

    How to meditate at home with one simple focus

    Person sitting upright to meditate at home with relaxed shoulders

    Starting meditation can feel a little awkward, but remember that it’s a learning process. Begin by finding a comfortable position, whether sitting on a chair, the floor, or a cushion. Keep your back straight but relaxed. Close your eyes gently and focus on your breath. Notice how it flows in and out naturally, and let this awareness anchor you in the present moment. If your mind wanders, don’t worry—it’s entirely normal. Simply acknowledge your thoughts and guide your attention back to your breath. Start with 5-10 minutes a day and increase the duration as you get more comfortable.

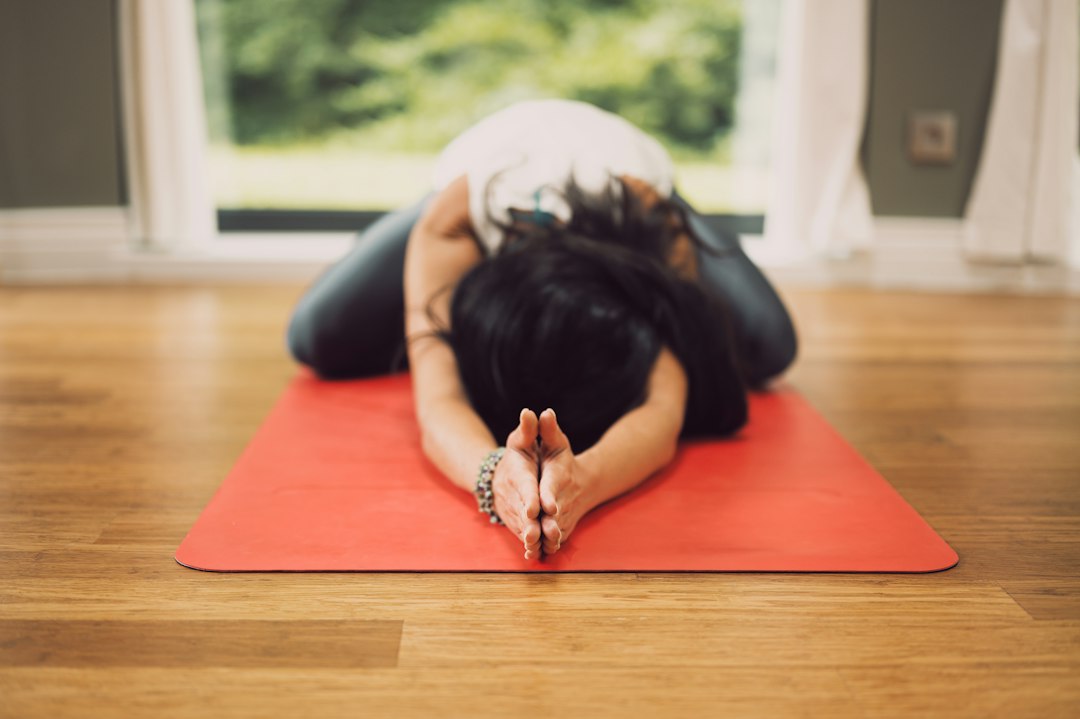
    Person resting forward on a yoga mat before seated practice
    Comfortable movement before you meditate at home is optional. Avoid kneeling when it causes pain. Editorial photograph.

    How can you meditate at home when attention wanders?

    Like any new habit, meditation can have its hurdles. You might feel restless during your sessions or notice your mind wandering frequently. Instead of getting frustrated, approach these challenges with patience. If restlessness is an issue, try meditating after light stretching to release excess energy. For distracting thoughts, remember that meditation isn’t about eliminating thoughts but learning to coexist with them peacefully. Set a specific time each day to build consistency, and don’t hesitate to use reminders to keep yourself on track.

    Use a brief walk or gentle movement before sitting when restlessness makes meditation at home uncomfortable. Set a repeatable cue, such as finishing breakfast, and choose a short session. If the method feels distressing, stop and change the approach rather than assuming every technique suits everyone.

    Exploring Different Types of Meditation

    As you grow more comfortable with meditation, you can experiment with different styles to find what resonates with you. Mindfulness meditation is a great starting point, focusing on your breath or bodily sensations. Loving-kindness meditation involves cultivating positive feelings for yourself and others. Guided meditations, available through apps or online videos, provide step-by-step instructions for beginners. Body scan meditation is another option, where you progressively relax each part of your body.

    Benefits of Meditating at Home

    Some meditation programmes show benefits for stress and certain symptoms, but results depend on the method and population. A home session is not equivalent to a clinical treatment programme. Meditation can also be unpleasant or distressing for some people. The NCCIH evidence and safety review discusses both the research and its limits. Continue appropriate healthcare rather than using meditation to explain away persistent symptoms.

    How can you make the first week manageable?

    To meditate at home consistently, keep the setup small and repeatable. Choose one ordinary cue, such as finishing breakfast, rather than waiting for a perfectly quiet day. Decide where you will sit and what you will use as an anchor before starting. A missed day does not require a longer session the next day. Return to the duration that felt manageable.

    Record the method, not a calmness score

    After each session, write one short note: which seat and focus you used, whether discomfort appeared, and what you would change. This helps you adapt practice without turning meditation into another performance task. You may find a chair easier than the floor, or sounds easier than watching the breath. Make one adjustment at a time so that the reason for a change remains clear.

    Choose guidance for the specific difficulty

    If posture is the problem, ask about seating and shorter sessions. If intrusive memories or distress appear, stop and seek suitable support rather than extending the practice. A qualified teacher can explain methods, but should not diagnose a condition. For a broader introduction to methods and terminology, see our home meditation overview; this page focuses on an adaptable first session.

    How to meditate at home: frequently asked questions

    How long should a beginner meditate at home?

    Start with two to five comfortable minutes, or a shorter session if needed. Ten minutes is an option, not a requirement. Choose a duration you can repeat without feeling trapped or exhausted. Keep your eyes open if that feels better and use a chair when floor sitting hurts. Increase gradually only when the current practice suits you.

    What if my mind keeps wandering?

    Wandering is normal. Notice it and return to the chosen focus without judging yourself. That return is part of learning to meditate at home, rather than evidence that you failed. You can use sounds, contact with the chair or natural breathing as the anchor. Avoid repeatedly checking a clock or measuring how many thoughts appear; those tasks may make it harder to settle.

    Must I close my eyes or focus on breathing?

    No. Use a soft, open-eyed gaze or listen to ordinary sounds if those choices feel more comfortable. Breath focus is one method among many. Keep breathing natural and skip strong breath control or retention. If body sensations increase worry, use an external focus. The movement-first practice guide offers another starting point.

    What should I do if meditation feels distressing?

    Stop the session, look around the room and return to an ordinary activity. Shorten or change the practice rather than forcing yourself through fear, intrusive memories or increasing distress. A qualified teacher can help with adaptations, and a mental health professional can advise when symptoms persist. Meditation should not replace established treatment or be used as a test of willpower.

    Should I do yoga before I meditate at home?

    A few comfortable movements may help if sitting feels stiff, but there is no universal order. Try movement first when it suits your body, or begin with seated attention when that feels easier. Keep both parts brief. Read our yoga before or after meditation guide for a fuller comparison. Choose the order that supports a sustainable practice.

    For more context, see our yoga and meditation comparison and meditation books guide.

    Meditate at home: build a repeatable practice

    Consistency is key to reaping the benefits of meditation. Start with short sessions, and gradually increase the duration as you feel ready. Establishing a routine, such as meditating in the morning or before bed, can make it easier to stick with the practice. Use reminders or meditation apps to keep yourself on track. If you enjoy community support, consider joining virtual or local meditation groups for added motivation and connection.

    Enjoy the Meditation Journey

    Meditation is not about perfection; it’s about progress. Each session is an opportunity to reconnect with yourself and find inner peace. Whether you meditate for a few minutes or an hour, what matters is that you show up for yourself. So, find a quiet corner, take a deep breath, and begin your meditation journey today.

  • Mind-Muscle Connection in Yoga: How to Practise It

    Mind-Muscle Connection in Yoga: How to Practise It

    The mind-muscle connection in yoga means directing attention to the way your muscles contribute to a pose. Use a simple cue, move slowly and notice effort without squeezing every muscle as hard as possible. Awareness can make instructions easier to understand. It does not prove that a pose builds more muscle or prevents injury. This guide explains practical cues, breathing and beginner modifications.

    There are two common attention choices: an internal cue focuses on a body sensation, while an external cue focuses on a movement task. “Notice the thigh working” is internal; “press the floor away” is external. Either may be helpful in a particular exercise. If one cue creates tension or confusion, try a simpler one. A teacher can help you choose language that fits the pose.

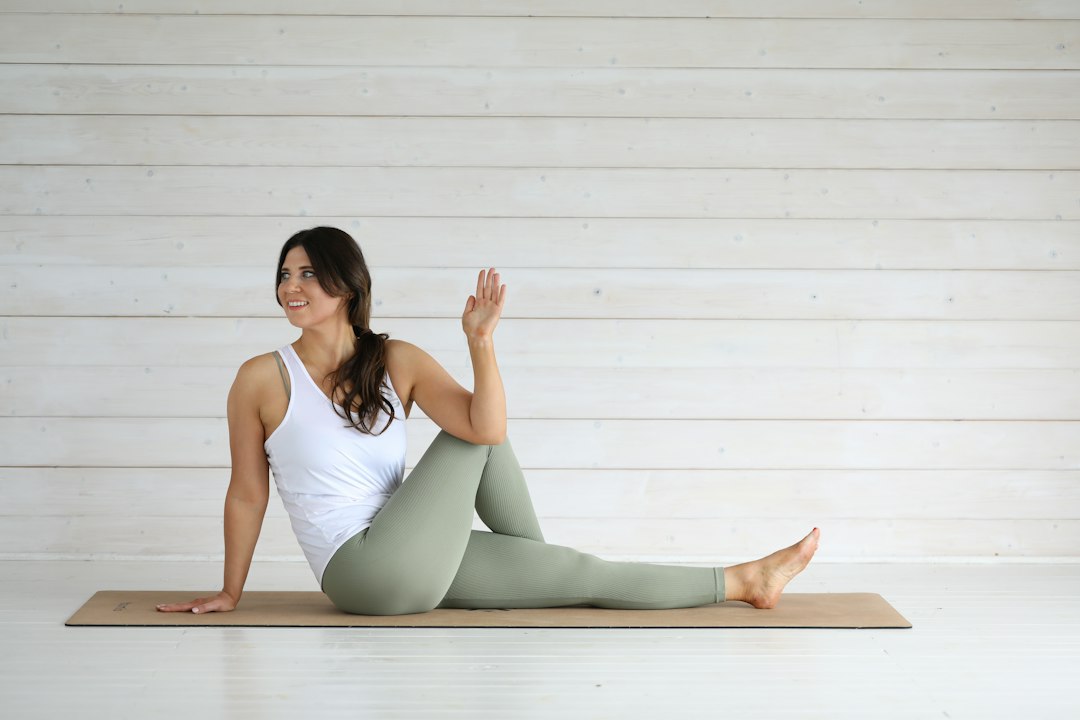
    Seated twist used to notice a comfortable mind-muscle connection in yoga

    What does mind-muscle connection in yoga involve?

    Yoga postures coordinate many muscles, joints and balance responses at once. You do not need to identify every muscle to practise well. Start with the action you can control: support through the feet, a comfortable knee position or the direction of the arms. Notice sensation as feedback, not proof of perfect alignment. Reduce effort if breath holding, strain or pain appears.

    When are muscle-awareness cues useful?

    Use a muscle-awareness cue when it clarifies a movement you already know. During Bridge Pose, notice the work around the hips while raising them a little. During Warrior II, attend to steady pressure through both feet. A stronger burning sensation is not automatically a better pose. Muscle growth depends on repeated training demands, recovery and nutrition; awareness alone cannot replace those factors.

    Internal and external cues to compare
    PoseInternal cueExternal cue
    BridgeNotice hip and leg effort.Press both feet into the floor.
    Wall PlankNotice steady work around shoulders and trunk.Push the wall away gently.
    TreeNotice the standing foot and leg.Keep your gaze on a stable point.

    Choose one cue at a time. Compare a small number of comfortable repetitions, then return to normal attention. Trying to monitor every muscle may make a simple movement harder. Mind-muscle connection in yoga should support a calm, manageable task rather than become another performance test.

    Techniques to Improve Mind-Muscle Connection in Yoga

    Several techniques can enhance the mind-muscle connection in yoga:

    1. Slow Down Your Practice: By slowing down and focusing on each pose, you’ll become more aware of the muscles being engaged. This deeper awareness allows you to activate muscles more effectively.
    2. Use Cues and Affirmations: Mentally or verbally affirm which muscles should be engaged during poses. For example, during Warrior II, you might mentally say, “Engage the core and feel the strength in your legs.” This strengthens your mind-muscle connection and improves muscle engagement.
    3. Consistency: Regular practice will gradually enhance your awareness of the muscles being activated, further improving the mind-muscle connection.
    4. Feedback from Teachers or Mirrors: Using mirrors or seeking guidance from an instructor helps ensure correct alignment and muscle engagement, reinforcing the mind-muscle connection.

    By practicing these techniques consistently, you’ll strengthen your mind-muscle connection, leading to a more enriching yoga practice.

    How should you breathe while practising?

    Keep breathing comfortable and continuous. You do not need to force deep breaths, hold the breath or match an advanced count to each contraction. If you cannot breathe easily in a pose, reduce the load or leave the position. Breath awareness is a way to notice effort; it is not evidence that extra oxygen reaches one selected muscle. See our diaphragmatic breathing guide for a separate introduction.

    Yoga Poses to Improve Mind Muscle Connection

    Certain yoga poses are excellent for enhancing the mind-muscle connection. Here are a few to focus on:

    Here’s a list of 10 yoga asanas to improve the mind-muscle connection, focusing on both muscle engagement and mindfulness:

    1. Warrior II (Virabhadrasana II)
    • Focus: Legs, core, arms
    • Engage your legs by pressing through the feet, activate the core, and extend your arms. This pose strengthens your lower body while helping maintain balance and stability.

       2. Bridge Pose (Setu Bandhasana)

    • Focus: Glutes, hamstrings, lower back
    • Lift your hips while engaging the glutes and hamstrings. This pose improves lower body strength and spine alignment, requiring focus on muscle activation.

       3.  Tree Pose (Vrikshasana)

    • Focus: Standing leg, core
    • Balance on one leg while engaging the standing leg and core for stability. This pose enhances balance and improves awareness of the body’s alignment.

       4. Plank Pose (Phalakasana)

    • Focus: Core, shoulders, arms
    • Engage your entire body, from your core to your arms and legs. Plank requires full-body awareness, making it excellent for developing the mind-muscle connection.

       5. Downward-Facing Dog (Adho Mukha Svanasana)

    • Focus: Shoulders, hamstrings, calves
    • In this pose, focus on extending your spine while pressing the heels towards the ground and actively engaging the arms and legs.

       6. Cobra Pose (Bhujangasana)

    • Focus: Lower back, shoulders, chest
    • Activate the back muscles and shoulders to lift the upper body, while keeping the legs grounded. Cobra helps open the chest and strengthens the back.

       7. Boat Pose (Navasana)

    • Focus: Core, hip flexors
    • Balance on your sit bones while engaging the core and hip flexors. This pose challenges the core muscles and increases body awareness.

       8. Chair Pose (Utkatasana)

    • Focus: Thighs, glutes, core
    • Focus on engaging the thighs, glutes, and core as you hold the pose, improving strength in the lower body and body awareness.

       9. Locust Pose (Salabhasana)

    • Focus: Lower back, glutes, legs
    • Lift the chest and legs off the ground while keeping the body active and engaged. Locust pose strengthens the back and glutes while developing a strong mind-muscle connection.

       10. Camel Pose (Ustrasana)

    • Focus: Core, thighs, chest, hip flexors
    • Engage the thighs and glutes as you open the chest and lift the ribcage. Camel pose increases flexibility and strengthens the core, requiring a deep mind-muscle connection for proper alignment.

    A five-minute mind-muscle connection practice

    1. Choose one familiar posture or supported variation.
    2. Try it once with ordinary attention and comfortable breathing.
    3. Repeat with one muscle-awareness cue.
    4. Repeat with one movement cue, such as pressing the floor.
    5. Keep the cue that improves control without strain. Rest and record one observation.

    For example, try a small Bridge lift two or three times, lowering slowly between repetitions. Do not repeatedly push higher to chase a sensation. If you feel pain, numbness or unusual weakness, stop. Persistent symptoms need professional advice. The same principle applies to the poses above: use a wall for balance, knees-down Plank for lower load, and smaller backbends.

    Person seated upright with shoulders relaxed
    Notice posture without tensing every muscle or forcing the breath. Editorial photograph.

    A practical cue comparison in one easy movement

    Try a small seated arm raise with feet supported. First notice the movement of the shoulder and arm without tightening everything deliberately. Lower the arm. On the next repetition, reach gently toward a point in front of you instead. Compare control and comfort. The first approach is an internal attention cue; the second directs attention toward a movement effect. Neither needs to produce a strong sensation to be useful.

    Repeat only a few times, keeping the range modest and breathing ordinary. If focusing on a muscle makes you tense the jaw, brace the abdomen or hold the breath, simplify the task. You can use a lighter cue or return to the external point. Mind-muscle connection is not a competition to feel every muscle working as strongly as possible.

    Use the same comparison in a familiar posture, changing only the cue. Record which instruction helped you move comfortably. Do not infer that an easier repetition proves greater muscle activation, a larger calorie burn or prevention of injury. Those claims require separate evidence. A useful practice result is that you understand the instruction and can control the movement you chose.

    Frequently asked questions

    Do I need to feel a muscle burning?

    No. A burning sensation is not required for useful movement or good technique. Sensation varies with position, fatigue, training history and the person. Look for a manageable movement, steady support and comfortable breathing. More discomfort does not prove more benefit. If a teacher’s cue creates pain or unusual symptoms, stop and ask for an alternative rather than trying harder.

    Will mind-muscle connection in yoga build bigger muscles?

    Attention alone does not establish a muscle-building effect. Research on attentional focus often studies resistance exercises with measured loads, rather than yoga programmes. Do not apply those results directly to every asana. Training stimulus, recovery and adequate nutrition remain relevant. Our yoga and strength-training guide explains why posture practice and progressive strength training can overlap without being identical.

    What if I cannot identify the target muscle?

    Use a movement cue instead. Press the wall, spread weight through the foot or keep the pelvis steady. You do not need an anatomy quiz before practice. Ask a qualified teacher to clarify the intended action and offer a supported version. The beginner poses guide provides a useful starting point. Sensation can develop with familiarity, but it is not a pass-or-fail test.

    Can these cues prevent injury?

    No cue guarantees injury prevention. Load, range, speed, fatigue, health and previous injury also affect practice. Awareness may help you notice that a movement feels uncomfortable, but it cannot diagnose a problem. Read NCCIH’s yoga safety guidance, use appropriate modifications and seek advice when a health condition changes what you can safely do.

    What to practise next

    Use one familiar posture for a week before adding several new cues. Keep a brief note about comfort and control, rather than rating your body harshly. For broader movement awareness, read our mind-body yoga guide. This article offers educational practice ideas; it does not claim a clinical rehabilitation effect or a proven yoga-specific hypertrophy method.

  • 300 Hour Yoga Teacher Training in Rishikesh: What Advanced Study Includes

    300 Hour Yoga Teacher Training in Rishikesh: What Advanced Study Includes

    Current FitFortunes course note: FitFortunes does not currently offer a 300-hour Yoga Teacher Training course. This article is informational and explains what advanced 300-hour study generally includes.

    If you love yoga and want to expand your practice, enrolling in a 300 Hour Yoga Teacher Training in Rishikesh is a great step. Rishikesh, located in the peaceful foothills of the Himalayas, is known as the “Yoga Capital of the World.” It’s the perfect place to immerse yourself in both the spiritual and physical aspects of yoga.

    This training is designed for those who have already completed a 200 Hour Yoga Teacher Training (YTT) and are ready to take their skills further. Whether you aim to teach yoga or simply develop your personal practice, this course offers valuable knowledge on advanced yoga poses, meditation, pranayama (breathing techniques), and yoga philosophy. By the end, you’ll feel more confident in your practice and teaching abilities, and you’ll gain a deeper understanding of the essence of yoga.

    What is the 300 Hour Yoga Teacher Training?

    A 300 Hour Yoga Teacher Training in Rishikesh is an advanced program for those who already have basic yoga teacher certification. This training helps you refine your skills, gain deeper knowledge of yoga philosophy, anatomy, and meditation, and become a more confident yoga teacher. It is the next step in your yoga journey, allowing you to teach advanced yoga practices with understanding and care.

    Why Choose Rishikesh for Your 300 Hour Yoga Teacher Training?

    Rishikesh is the perfect place to deepen your yoga knowledge. Surrounded by nature, the sacred Ganges River, and the Himalayas, it offers a peaceful environment for self-reflection and growth. Here’s why you should choose Rishikesh for your training:

    • Sacred and Peaceful Environment: The calm and serenity of Rishikesh creates the perfect atmosphere for learning. You will feel connected to the deeper spiritual aspects of yoga as you practice.
    • World-Class Teachers: Rishikesh attracts some of the best yoga teachers from around the world. You’ll learn from instructors who have years of experience in yoga and can share their wisdom in a simple, easy-to-understand way.
    • Holistic Approach: The 300 Hour YTTC in Rishikesh doesn’t just focus on poses. You’ll learn about meditation, pranayama (breathing exercises), and yoga philosophy, helping you become a well-rounded yoga teacher.

    What Will You Learn in the 300 Hour YTTC?

    300 Hour Yoga Teacher Training in Rishikesh

    In the 300 Hour Yoga Teacher Training, you will explore advanced techniques and deepen your understanding of key yoga elements:

    1. Advanced Asana Practice: You’ll learn how to improve your own yoga poses and how to teach them safely. The course covers different body types, how to make adjustments, and how to keep students comfortable during practice.
    2. Yoga Philosophy: Yoga is more than physical postures. You’ll study the teachings of ancient texts like the Yoga Sutras of Patanjali, Bhagavad Gita, and the Upanishads. These texts help you understand yoga from a spiritual and philosophical perspective.
    3. Anatomy and Physiology: A key part of the training is understanding how the body works during yoga practice. You will learn about muscles, joints, and how to prevent injuries while teaching and practicing.
    4. Pranayama and Meditation: Breathing exercises (pranayama) and meditation are important parts of yoga. These tools help calm the mind, improve focus, and bring peace. You’ll learn how to use them in your own practice and share them with your students.
    5. Teaching Methodology: You will learn how to lead yoga classes, create sequences, and work with different types of students. The course will help you become a skilled, confident, and compassionate yoga teacher.

    Why is the 300 Hour Yoga Teacher Training Important?

    The 300 Hour Yoga Teacher Training is for those who want to deepen their knowledge and become more confident in their yoga practice. After completing the 200 Hour YTT, this training is the next step for refining your skills and learning advanced techniques. It helps you prepare to teach specialized classes such as those for children, seniors, or people with special needs.

    Benefits of Completing the 300 Hour YTTC in Rishikesh

    Here are some of the benefits you’ll gain from this course:

    1. Personal Growth: Yoga is not just about physical poses. It helps you grow emotionally, mentally, and spiritually. By the end of the training, you will feel more connected to yourself and the world around you.
    2. Global Recognition: The 300 Hour YTTC in Rishikesh is recognized by Yoga Alliance, so you will be certified to teach yoga worldwide.
    3. Build a Successful Career: If you want to teach yoga professionally, this course will help you build a strong foundation. You’ll learn how to manage a class, design sessions, and make yoga accessible for everyone.
    4. Network with Others: You’ll meet like-minded people from all over the world during the training. This network can be helpful when you start teaching and building your career.

    Is the 300 Hour Yoga Teacher Training Right for You?

    If you’ve already completed your 200 Hour Yoga Teacher Training and want to expand your knowledge and skills, the 300 Hour Yoga Teacher Training in Rishikesh could be just what you need. This advanced course is perfect for yoga enthusiasts who are looking to go deeper into their practice, whether or not they plan to teach professionally.

    The course will provide you with more than just advanced poses. You will also dive into areas like yoga philosophy, anatomy, and meditation, gaining a more holistic view of the practice. As a result, you’ll not only improve your ability to lead classes but also grow on a personal level.

    If you’ve ever felt that there is more to yoga than just the physical postures, this course will guide you through the deeper, spiritual side of the practice. Whether you want to teach yoga to others or simply refine your personal practice, you’ll gain the confidence and tools to take your journey further.

    Conclusion: Start Your Journey with the 300 Hour Yoga Teacher Training in Rishikesh

    The 300 Hour Yoga Teacher Training in RishikeshThe 300 Hour Yoga Teacher Training in Rishikesh is more than just a course – it’s an experience that can change your life. It’s not just about learning how to do more advanced yoga poses; it’s about growing on every level—spiritually, mentally, and emotionally. Throughout the training, you’ll connect with yourself in ways you may never have before, helping you to not only improve your practice but also to develop a deeper understanding of life itself.

    When you complete the training, you’ll feel more confident in your abilities as a teacher and more connected to your own practice. You’ll have the tools to guide others, helping them lead healthier, balanced lives. The knowledge you gain will not only make you a skilled yoga teacher but also a better version of yourself.

    If you’re looking to take your yoga practice to the next level and become a more skilled teacher, Rishikesh is the perfect place to start. With its peaceful surroundings and experienced instructors, it’s the ideal setting for growth and learning.

  • Seven Chakras in Your Body: What They Are & Why They Matter

    Seven Chakras in Your Body: What They Are & Why They Matter

    The seven chakras in human body are essential energy centers that influence our physical, emotional, and spiritual well-being. These chakras, located along the spine from the base to the crown of the head, are believed to regulate the flow of energy throughout the body. When these chakras are balanced, they promote harmony in our health, emotions, and spiritual growth.

    Each chakra has a unique role in our lives, from stabilizing our emotions to deepening our intuition. For example, the Root Chakra is associated with grounding and security, while the Crown Chakra connects us to higher consciousness and spiritual enlightenment.

    In this article, we’ll read and know about the 7 chakras in the human body and their significance. We will learn how to identify signs of blockages or imbalances in these energy centers and know about techniques like meditation, yoga, and visualization to restore their natural flow.

    Deep understanding the chakras in human body is really helpful for improving overall health, fostering self-awareness. Whether you’re on a spiritual journey or simply seeking better balance in life, the ancient wisdom of the chakras offers wonderful benefits.

    What Are the 7 Chakras?

    The seven-chakra model is a traditional yogic and Tantric framework, not a map of seven anatomical organs. Modern teaching commonly describes seven major chakras from the base of the spine to the crown of the head.

    ChakraCommon Sanskrit nameTraditional symbolic area
    RootMuladharaBase of the spine
    SacralSvadhisthanaLower abdomen
    Solar plexusManipuraUpper abdomen
    HeartAnahataChest
    ThroatVishuddhaThroat
    Third eyeAjnaBetween the eyebrows
    CrownSahasraraCrown of the head

    For related context, read what Kundalini Yoga is, Kundalini Yoga and Tantra, and Kundalini Yoga safety.

    The concept of chakras originates from ancient Indian traditions, particularly Hinduism and Buddhism. Chakras are energy centers in the body that influence our physical, emotional, and spiritual well-being. Each chakra is linked to specific organs and systems, playing a vital role in maintaining overall health. The word “chakra” means “wheel” in Sanskrit, symbolizing the spinning energy that flows through these centers. Understanding the significance of these seven chakras in the human body is crucial, as blockages or imbalances can cause physical and emotional challenges.

    The human body is not just physical—it is also a complex system of energy. The chakras act as channels for life force energy, known as “prana”, which is essential for balance. When the chakras are aligned and functioning properly, they promote physical health, emotional stability, and spiritual growth. This alignment can lead to heightened awareness, better overall health, and a stronger connection to the world around us. On the other hand, blocked or unbalanced chakras may result in issues like stress, anxiety, and physical ailments.

    Each of the seven chakras in the human body has a unique purpose and influence. For example:

    1. Root Chakra: Muladhara

    1. The Root Chakra: Muladhara

    The root chakra, or Muladhara, is the first chakra located at the base of the spine. It represents security, stability, and grounding, forming the foundation for all other chakras. This energy center governs basic survival needs like food, shelter, and safety. When the root chakra is balanced, you feel secure, confident, and connected to the physical world.

    An imbalanced root chakra may lead to fear, insecurity, or disconnection. Physical signs can include lower back pain, leg issues, or problems with the feet.

    To balance this chakra, try grounding exercises like walking barefoot on grass, practicing yoga poses such as mountain pose or tree pose, and consuming red foods like apples or beets.

    2. Sacral Chakra: Svadhisthana

    The Sacral Chakra Svadhisthana

    The sacral chakra, or Svadhisthana, is located below the navel and is associated with emotions, creativity, and sexuality. This energy center influences relationships and helps us express our desires and creativity.

    A blocked sacral chakra can cause emotional instability, creative blocks, or reproductive issues. Symptoms may include lower back pain or problems with the urinary system.

    To activate it, engage in creative activities like painting or dancing, practice hip-opening yoga poses like pigeon pose, and eat orange-colored foods such as oranges and sweet potatoes.

    3. Solar Plexus Chakra: Manipura

    The solar plexus chakra, or Manipura, is located in the upper abdomen and governs personal power, confidence, and determination. It helps you assert yourself and make decisions.

    If the solar plexus chakra is unbalanced, you may feel powerless, indecisive, or struggle with self-worth. Physical symptoms include digestive issues or problems with the liver and pancreas.

    To restore balance, practice core-strengthening yoga poses like planks, recite affirmations for self-confidence, and include yellow foods like bananas and corn in your diet.

    4. Heart Chakra: Anahata

    The heart chakra, or Anahata, is located at the center of the chest and bridges the lower and upper chakras. It symbolizes love, compassion, and emotional balance.

    An imbalanced heart chakra may cause feelings of isolation, resentment, or difficulty in forming meaningful relationships. Physical symptoms can include chest tension or respiratory issues.

    To open the heart chakra, focus on self-love, practice heart-opening yoga poses like camel pose, and eat green foods such as spinach and avocados.

    5. Throat Chakra: Vishuddha

    The throat chakra, or Vishuddha, is located in the throat area and governs communication, self-expression, and authenticity. It enables you to express your truth confidently.

    Blockages in this chakra can lead to difficulty speaking up, fear of judgment, or neck tension. Physical symptoms may include sore throats or thyroid problems.

    To activate the throat chakra, try singing, chanting, or practicing yoga poses like fish pose. Blue foods such as blueberries and blackberries can also help nourish this chakra.

    6. Third Eye Chakra: Ajna

    The third eye chakra, or Ajna, is located between the eyebrows and is associated with intuition, insight, and higher consciousness. It helps you access inner wisdom and clarity.

    A blocked third eye chakra may result in confusion, lack of direction, or difficulty trusting your intuition. Physical symptoms can include headaches or vision problems.

    To balance this chakra, practice meditation and visualization, do yoga poses like child’s pose, and eat indigo-colored foods like eggplants and grapes.

    7. Crown Chakra: Sahasrara

    The crown chakra, or Sahasrara, is located at the top of the head and represents spiritual connection, enlightenment, and universal consciousness. It is your gateway to higher realms of awareness.

    An unbalanced crown chakra can cause feelings of disconnection, lack of purpose, or spiritual confusion. Physical symptoms may include headaches or insomnia.

    To nourish the crown chakra, meditate, practice mindfulness, spend time in nature, and consume light, nourishing foods like herbal teas and fresh fruits.

    How Should You Use Chakra Ideas in Practice?

    1. Treat chakra language as a traditional symbolic framework, not a medical diagnosis.
    2. Use meditation, breath awareness or journaling if those practices are meaningful to you.
    3. Do not use chakra explanations to delay medical care for pain, dizziness, mood changes or other symptoms.
    4. If a teacher makes strong healing claims, ask what evidence supports them.

    Three Common Chakra Misunderstandings

    • “Blocked chakra” is not a medical test result.
    • Chakras are not the same as endocrine glands or nerve plexuses.
    • Different Indian traditions describe subtle-body systems differently.

    Balancing and Activating the Seven Chakras

    Balancing and activating the seven chakras is essential for achieving overall well-being and harmony within oneself. By incorporating practices such as meditation, yoga, and energy healing, individuals can restore balance and deepen their connection to these vital energy centers. Meditation is especially effective, as it promotes mindfulness and self-awareness. Guided meditations focusing on each chakra, combined with breathwork, can help release blockages and enhance energy flow. Setting clear intentions for each session can further direct healing energy to areas that need attention.

    Yoga offers another powerful method for chakra balancing, with specific poses targeting each energy center. A personalized yoga routine can stimulate physical and energetic alignment, fostering a deeper connection with the body and its energy systems. Enhancing these practices with tools like sound healing, crystals, or aromatherapy can amplify their effects, creating a holistic approach to chakra balancing.

    Understanding and working with the chakras is a lifelong journey. By committing to practices that promote balance and harmony, individuals can unlock their full potential, cultivate a deeper sense of self-awareness, and lead a more vibrant and fulfilling life. The wisdom of the chakras not only fosters personal healing but also serves as a reminder of the interconnectedness of all beings and the vast potential within each of us.