Blog

  • Yoga Teacher Training Syllabus: What a Good YTT Should Include

    Yoga Teacher Training Syllabus: What a Good YTT Should Include

    A good yoga teacher training syllabus should tell you what you will study, how you will practise teaching, and how the school checks your learning. The longest syllabus is not automatically the best one. A clear structure with real teaching time, practical work, and assessment is more useful than a page filled with impressive subject names that receive almost no attention.

    Curriculum and syllabus are not the same thing

    The curriculum is the larger learning plan for the course, while the syllabus is the practical map of what students study inside that plan. A useful syllabus should show subjects, learning goals, practice teaching, and assessment clearly enough that a student can understand how the training is organised. Two schools can both advertise 200 hours and still use those hours in very different ways.

    This distinction matters when you compare schools. A curriculum may say that anatomy, philosophy, methodology, and practicum are all included, but the syllabus should help you see how much attention those areas actually receive and how they connect with the daily training. The hour number by itself does not tell you whether the education is balanced.

    Asana and movement practice

    The syllabus should name the main physical practice clearly and explain how it is taught. Ask whether the course is centred on Hatha Yoga, another defined asana method, or a combination of practices, then ask how much real time each one receives. A course that lists many yoga styles may only provide a short introduction to most of them, which is very different from serious study.

    Also watch for unclear use of the word Ashtanga. Patanjali’s Ashtanga Yoga refers to the eight-limbed path and is not automatically the same thing as a modern asana system using the Ashtanga name. A good syllabus should use terminology precisely enough that a student knows whether the school is talking about philosophy, physical practice, or both.

    What should a traditional Hatha Yoga teacher training syllabus include?

    A Hatha-focused syllabus should show more than a list of postures. At FitFortunes, the traditional practical framework is organised around Asana, Pranayama, Mudra and Bandha, and Nadanusandhana (Nada Yoga). These practices sit alongside meditation, philosophy, functional anatomy, alignment, teaching methodology, observation, and practicum. Students comparing a 200-hour Hatha Yoga teacher training in Rishikesh should ask how each area develops across the course rather than assuming every school uses the word “Hatha” in the same way.

    Pranayama and meditation

    A good syllabus should show whether breathing is taught as basic awareness, formal pranayama, or both. It should also explain how meditation develops through the course rather than listing many techniques with no progression. Preparation, posture, effort, and safe practice matter more than collecting the largest number of breathing exercises.

    Students should understand why a technique is being used and how to recognise when it needs to be simplified. Meditation should also be taught as a practice that develops attention over time, not as a promise of instant mental change. Clear progression is usually more useful than novelty.

    Anatomy and movement science

    Anatomy should help future teachers make better decisions in real classes. Useful topics include joints, basic muscle action, breathing mechanics, range of motion, balance, load, and common movement limits. The subject becomes valuable when students can connect what they learn with the postures and movements they are practising instead of only memorising names.

    Be careful with courses that promise one perfect alignment for every body. Structure, mobility, injury history, and proportions differ between students, so a teacher needs to understand the purpose of a posture and recognise when a variation is more appropriate. Anatomy should improve observation and judgement rather than create rigid rules.

    Yoga philosophy and history

    Look for named texts and clear topics instead of broad claims about “ancient wisdom.” Patanjali’s Yoga Sutras, the Bhagavad Gita, and selected Hatha Yoga texts can all be relevant, but they come from different historical and philosophical contexts. A short teacher-training course cannot teach the whole history of Indian philosophy, but it can give students enough context to avoid common misunderstandings.

    Good philosophy teaching also connects ideas with practice and professional behaviour. Ethics, discipline, self-study, meditation, and the purpose of yoga should not appear as isolated quotations. Students should leave with a clearer sense of what a text is saying and where their own knowledge still has limits.

    Teaching methodology and practicum

    This is one of the most important parts of a teacher-training syllabus because personal practice and teaching are different skills. Students need to learn how to plan, cue, demonstrate, observe, manage time, sequence, offer appropriate options, and communicate professional boundaries. Those skills become useful only when trainees have repeated chances to apply them.

    • Class planning and sequencing.
    • Clear verbal cueing.
    • Demonstration and observation.
    • Time management and pacing.
    • Simple modifications and options.
    • Teacher boundaries and ethics.
    • Repeated practice teaching.
    • Specific feedback after practicum.

    A course with many posture names but almost no practicum is missing an important part of teacher education. Trainees need to discover what happens when they stand in front of real people, explain a movement, watch the room, and adjust a plan. That experience cannot be replaced by reading or listening alone.

    How should students be assessed?

    Completion should involve more than simply being present. The exact assessment system can differ between schools, but the school should be able to explain what students must do to complete the training and how practical teaching is evaluated. Clear assessment helps students understand that the certificate represents participation and demonstrated learning rather than attendance alone.

    • Attendance requirements.
    • Written work or study tasks.
    • Practical teaching.
    • Observation and feedback.
    • Quizzes, oral checks, or other knowledge review.
    • A final teaching assessment where the course uses one.

    Red flags in a YTT syllabus

    A weak syllabus is often unclear about how learning actually happens. One warning sign alone does not automatically make a school poor, but several together should make you ask more questions before paying. A serious school should be able to explain its teachers, practicum, assessment, and use of course time without relying on vague promises.

    • Too many yoga styles for the available time.
    • Little or no supervised practicum.
    • No named teachers for important subjects.
    • Medical or therapy claims outside teacher-training scope.
    • “Internationally recognised” with no explanation of what that means.
    • Yoga terminology used in a confusing or inconsistent way.
    • Guaranteed job or income claims after graduation.

    How this differs from the FitFortunes curriculum page

    This article explains how to judge any yoga teacher training syllabus, so its purpose is comparison rather than selling one school. If you want the actual subject areas used at FitFortunes, read the FitFortunes Yoga Teacher Training Curriculum. Keeping these two pages separate helps each one answer a different search question instead of repeating the same information.

    For the day-to-day experience, read what yoga teacher training is really like. That guide shows how practical classes, theory, meals, practicum, and study can fit into a residential routine, while this page focuses on what should appear in the learning plan itself.

    Frequently asked questions

    How detailed should a YTT syllabus be?

    It should be detailed enough to show the main subjects, teaching practice, and assessment without becoming an unreadable list of every lesson. A prospective student should be able to understand what the course prioritises and ask sensible follow-up questions. If the school cannot explain how its hours are used, the hour number alone is not very informative.

    Should every 200-hour syllabus look the same?

    No. Schools can organise foundational training differently while still covering important educational areas. What matters is whether the program has a coherent structure, qualified teachers, enough practical work, and a clear assessment process. Differences are not automatically a problem when the school can explain why the syllabus is designed that way.

    How much practicum should I look for?

    There is no single useful number without context, but practicum should be substantial enough that students teach more than once and receive real feedback. Ask whether practice teaching begins early, whether students teach both short sections and longer classes, and whether they get a chance to correct mistakes before the final assessment.

    Does a longer syllabus mean a better course?

    No. A long list can hide shallow coverage if each subject receives only a short introduction. A shorter, clearer syllabus may provide deeper learning when important areas receive enough time and practise. Judge the structure, teachers, practicum, and assessment rather than counting how many topics appear on the sales page.

    One simple rule before you book

    Do not choose a course because the syllabus looks long. Choose it because the school can explain what it teaches, who teaches it, how students practise, how they receive feedback, and how learning is assessed. Clear answers make it much easier to compare two programs that both use the same 100-hour or 200-hour label.
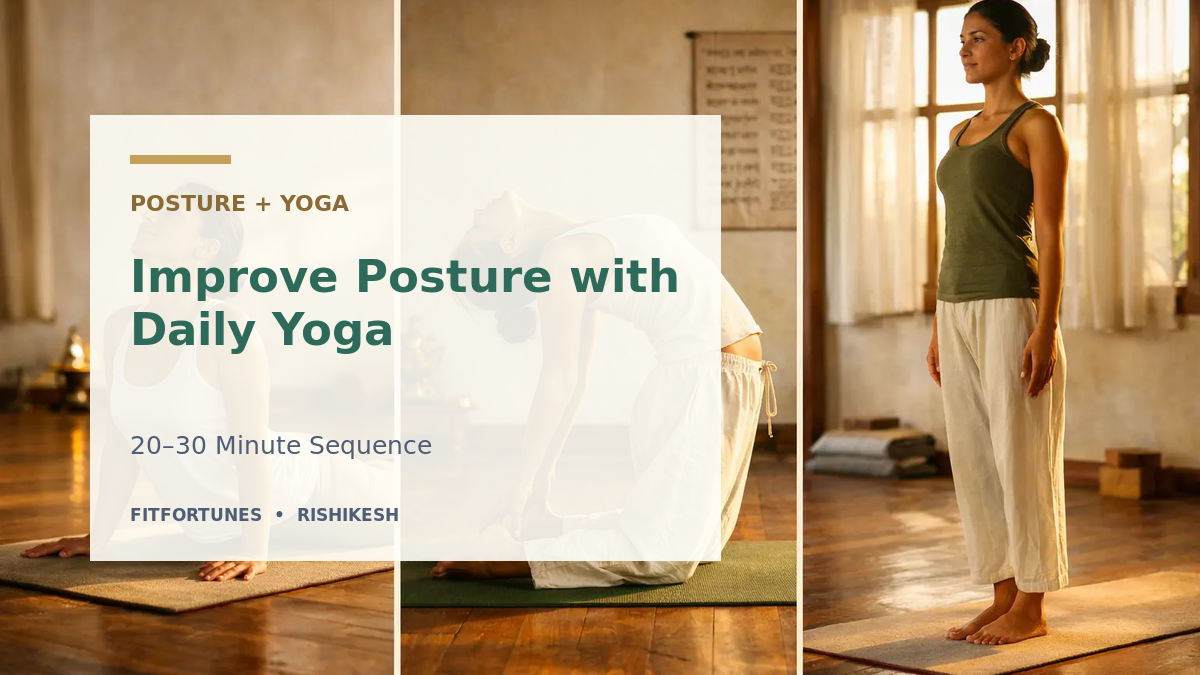
  • How to Improve Posture with Daily Yoga Routine | 20–30 Minute Sequence

    How to Improve Posture with Daily Yoga Routine | 20–30 Minute Sequence

    This 20–30 minute yoga routine is designed to support better posture habits, not to force your body into one perfect shape. The sequence moves the spine, encourages easier breathing, wakes up the hips and upper back, and finishes with simple sitting and rest. Good posture should feel steady and comfortable enough to use in normal life, not like a position you can hold only by bracing every muscle.

    Minute 0–5: move before you correct

    Begin on your back, on hands and knees, or in an easy seated position and take a few quiet breaths before trying to “fix” anything. Move the spine gently through comfortable ranges with small cat-cow movements, side bends, easy twists, and shoulder circles. The aim is not to create a dramatic stretch; it is to notice where the body feels easy, where it feels stiff, and how movement changes from one day to the next.

    • Easy cat-cow movements.
    • Small side bends.
    • Gentle twists.
    • Slow shoulder rolls.

    Minute 5–10: practise quiet breathing

    Place one hand around the lower ribs and the other on the belly, then breathe through the nose without trying to make the breath as large as possible. Let the lower ribs and abdomen move gently while the neck and shoulders stay relaxed. Exhale slowly without pulling the stomach in hard. If the shoulders keep lifting, make the breath smaller because an easy breath with less tension is more useful than a very deep breath done with effort.

    This part of the routine is about coordination rather than “perfect” diaphragmatic breathing. Breathing patterns vary between people and positions, so the goal is to reduce unnecessary upper-body tension and let the breath move comfortably. For a more detailed explanation, read our diaphragmatic breathing guide.

    Minute 10–18: standing posture practice

    The standing section is not about pulling the shoulders back or holding the stomach tight. It gives you a chance to feel how the feet, legs, pelvis, ribs, and head organise while you move and breathe. Use a range that feels controlled, bend the knees when needed, and treat the poses as movement practice rather than a test of flexibility.

    Tadasana

    Stand with your feet in a comfortable position instead of forcing them together. Feel both feet on the floor, keep the knees soft rather than locked, and let the ribs settle over the pelvis without pushing the chest forward. Keep the chin easy and breathe normally for three to five breaths while noticing whether you can stand with less unnecessary effort.

    Slow forward fold and rise

    Fold only as far as your body allows and bend the knees whenever that makes the movement more comfortable. Pause briefly, then come back up slowly instead of throwing the head or chest backward at the top. The useful part is the controlled transition and the way the hips and spine share the movement, not how close your hands come to the floor.

    Low lunge

    Step one foot back and keep the front knee in a position that feels stable and comfortable. Stay more upright or bring the hands down depending on your balance, mobility, and experience. Take several normal breaths, notice the front of the back hip without forcing a deep stretch, then change sides and compare how each side feels.

    Downward-Facing Dog

    Bend the knees if that helps you lengthen the spine and keep the shoulders more comfortable. Straight legs are not required, and chasing the heels toward the floor can make the pose more tense without improving the goal of the practice. Stay for three to five steady breaths, then come out before the pose turns into a struggle.

    Minute 18–23: move the upper back

    People who sit for long periods often notice stiffness through the chest and upper back, but the answer is not to force a large backbend. Use a gentle Cobra or Sphinx position and keep the movement small enough that the chest can lift without compressing the lower back. Two or three slow repetitions with comfortable breathing are enough to practise extension without turning this section into a strength test.

    Minute 23–27: practise sitting without strain

    Sit on the floor, on a cushion, or on a chair and choose the option that lets you stay comfortable for a few minutes. Instead of telling yourself to “sit straight,” notice whether your weight feels reasonably even, whether the ribs are pushed far forward, and whether the neck can stay easy. This part matters because posture is most useful when it transfers into normal sitting, standing, and working habits rather than existing only on a yoga mat.

    Minute 27–30: let the body settle

    Finish in Savasana or another comfortable resting position and stop correcting yourself for a few minutes. Notice how the floor supports the body, how the breath feels, and whether any area feels different after the sequence. Rest gives you a chance to compare the body before and after practice without immediately turning the result into another posture task.

    How often should you do this routine?

    Three to five times a week is a practical starting point for many people, but consistency matters more than hitting an exact number. A shorter routine you can repeat comfortably is usually easier to maintain than one long session followed by several days of nothing. You can also use only one or two sections on busy days rather than treating the full 30 minutes as an all-or-nothing rule.

    If a movement causes sharp pain, numbness, dizziness, unusual weakness, or another symptom that concerns you, stop and seek appropriate healthcare advice rather than trying to “stretch through it.” Persistent pain or a significant posture change can have causes that a general yoga routine cannot diagnose.

    What this routine can and cannot do

    This routine can help you practise movement, breathing, body awareness, and more comfortable positions. It may make you more aware of habits such as bracing the abdomen, lifting the shoulders, or sitting in one position for too long. It cannot diagnose the cause of pain, change every structural difference, or guarantee that one posture problem will disappear, so persistent symptoms may need medical or physiotherapy assessment.

    Common posture mistakes during yoga

    Many posture routines become less useful when people replace one rigid habit with another. Pulling the shoulders back all day, holding the stomach tight, pushing the chest up, or stretching aggressively can create more effort without improving comfort. The better goal is to move regularly, use several positions during the day, and learn where you can reduce unnecessary tension.

    • Pulling the shoulders back all day.
    • Holding the stomach tight constantly.
    • Forcing the chest upward.
    • Stretching very hard because a body part feels stiff.
    • Ignoring pain or neurological symptoms.
    • Doing the routine once and expecting a permanent change.

    How this page differs from our main posture guide

    This page gives you a specific daily yoga sequence with a clear time structure, so its purpose is practical practice. For the broader subject of desk habits, standing, sitting, movement breaks, strength, and home setup, read How to Improve Posture at Home. Keeping the two pages separate helps each one answer a different question instead of repeating the same article twice.

    Frequently asked questions

    Can yoga fix bad posture permanently?

    Yoga can help you practise mobility, strength, breathing, and awareness, but “fix permanently” is too simple for a habit that changes with work, sleep, pain, stress, activity, and many other factors. Posture also varies naturally between people. A useful routine gives you more comfortable options and better movement habits rather than promising one permanent ideal position.

    Is 10 minutes of posture yoga enough?

    Ten careful minutes can be useful when you practise consistently and choose movements that match your needs. You do not have to complete the whole routine every day for it to have value. A short practice that you repeat regularly may be more practical than a longer sequence that you avoid because it feels difficult to fit into your schedule.

    Should I force myself to sit straight?

    No. Holding one position rigidly can become uncomfortable even when the position looks “correct.” Aim for a comfortable, supported position and change it regularly during the day. Movement variety is usually more useful than trying to freeze the spine in one shape for several hours.

    Start small and make it repeatable

    You do not need 30 perfect minutes every day. Ten careful minutes done regularly can be a better start than a difficult routine you cannot repeat. Use the full sequence when you have time, shorten it when needed, and pay attention to whether the practice makes normal sitting, standing, and movement feel easier rather than only judging how you look in a pose.

  • How to Improve Posture at Home: Simple Daily Habits That Help

    How to Improve Posture at Home: Simple Daily Habits That Help

    You can improve posture habits at home, but the goal is not to hold one “perfect” position all day. A more useful approach is to change position often, build strength, move areas that feel stiff, breathe without unnecessary tension, and make your desk or daily setup easier on the body. Posture should support normal movement and breathing rather than become another position you force yourself to maintain.

    If you have strong or persistent pain, numbness, weakness, symptoms after an injury, or a sudden change that concerns you, general posture advice from a blog is not enough. Seek appropriate medical or physiotherapy assessment because pain and posture can be influenced by many different factors.

    Table of contents

    What does good posture actually mean?

    Good posture does not mean keeping the spine perfectly straight. Your spine has natural curves, your body shape is individual, and your joints are designed to move. A useful posture is one you can maintain without excessive effort while still breathing and changing position easily. Even a comfortable sitting position can become irritating if you stay there for hours without moving.

    This is why posture is better understood as a changing relationship between your body, task, and environment. Sitting to read, standing in a queue, lifting a bag, and walking all need different positions. The goal is not one frozen shape; it is having enough strength, mobility, and awareness to move between positions comfortably.

    Five simple ways to improve posture habits at home

    Small daily changes usually matter more than one dramatic correction. The most useful habits are the ones you can repeat during normal work, phone use, cooking, reading, and rest. Start with the parts of your day that last the longest instead of trying to monitor every position from morning to night.

    1. Change position more often

    Do not stay in one chair or one standing position for a long period when your day allows you to move. Stand up, walk for a few minutes, stretch gently, or change where and how you sit. A regular movement break gives your body variety and can be more useful than spending the whole day trying to maintain one “correct” posture.

    2. Bring screens closer to a comfortable viewing height

    If you bend your head toward a laptop or phone for long periods, the neck and upper back can become tired simply because the position is repeated for too long. Raise the screen when practical and keep the keyboard or mouse close enough that the shoulders do not have to reach forward constantly. The best setup is one that makes the task easier without creating a different awkward position.

    3. Give your feet support when sitting

    Place the feet on the floor or use a stable footrest when the chair is too high. When the legs hang without support, some people find it harder to sit comfortably for a long period. You do not need to keep both feet in exactly one position all day; the point is to have support available and enough room to change position.

    4. Use your whole body when standing

    Avoid locking the knees, pushing the chest forward, or pulling the shoulders back hard just to look upright. Feel both feet, let the knees stay easy, allow the ribs to settle over the pelvis, and keep the jaw and shoulders relaxed. Standing should feel organised but not rigid, and you should still be able to breathe and shift your weight naturally.

    5. Build strength as well as flexibility

    Stretching can feel good when an area feels stiff, but posture also depends on strength, endurance, and the ability to tolerate normal daily activity. Walking, yoga, body-weight exercise, and general strength training can all contribute. A balanced routine is usually more useful than repeatedly stretching the same area because it feels “tight.”

    How yoga may help posture

    Yoga gives you time to notice how you stand, sit, breathe, balance, and move through different ranges. It can help practise spinal movement, hip mobility, upper-back movement, breathing awareness, balance, and body control. Yoga is not the only way to work on posture, and it should not be sold as a guaranteed cure, but it can be one useful part of a broader movement routine.

    • Spinal flexion, extension, rotation, and side bending.
    • Hip mobility and leg strength.
    • Upper-back and shoulder movement.
    • Balance and weight shifting.
    • Breathing awareness.
    • Body control and movement confidence.

    Simple yoga movements to practise

    You do not need advanced postures for a useful posture-focused practice. Choose a few movements that let you explore standing, spinal movement, hip mobility, and upper-back extension without forcing range. The quality of the movement and how comfortably you breathe matter more than how impressive the posture looks.

    Tadasana

    Stand comfortably and feel both feet on the floor while keeping the knees soft. Let the ribs and pelvis organise without pushing the chest forward or pulling the shoulders hard behind you. Use the pose to notice balance and breathing rather than trying to create a military-looking position.

    Cat-Cow

    Move the spine slowly between comfortable flexion and extension while breathing naturally. Keep the range smaller if the neck or lower back feels uncomfortable. The purpose is to explore movement and reduce stiffness, not to make the shapes as large as possible.

    Low Lunge

    A low lunge can help people who sit for long periods explore movement at the front of the hip. Use padding under the back knee when needed and keep the front leg in a position that feels stable. Stay within a range where you can breathe normally instead of chasing a very deep stretch.

    Sphinx or gentle Cobra

    Use a small backbend to practise upper-body extension without crushing the lower back. Keep the movement controlled and let the chest lift only as far as it can without strain. Several gentle repetitions may be more useful than one maximum hold when the goal is comfortable movement.

    Supported Child’s Pose

    Use this as a rest position when it feels comfortable for the knees, hips, and back, and place support under the body if needed. Not everyone finds Child’s Pose restful, so another comfortable resting position is completely acceptable. For a full timed sequence, use our 20–30 minute daily yoga routine for posture.

    Desk and phone habits matter

    One yoga session cannot cancel a full day of uncomfortable sitting if nothing else changes. Adjust the work setup so the screen is easier to see, the keyboard and mouse stay within easy reach, and the chair lets your feet rest on the floor or a stable footrest. Mayo Clinic’s office-ergonomics guidance also recommends keeping frequently used objects close, supporting the feet, and placing the monitor in front of you at a comfortable height. Phone use matters because repeatedly holding the device low or trapping it between the ear and shoulder can add strain. The most useful setup is not the one that looks perfect in a photograph; it is the one that lets you work with less reaching and gives you room to change position often.

    • Use a chair that supports you comfortably.
    • Keep the screen near a comfortable viewing height.
    • Bring the keyboard and mouse close enough that you do not reach constantly.
    • Use both hands for the phone when practical.
    • Avoid holding the phone between your ear and shoulder.
    • Take short movement breaks during long work periods.

    Breathing and posture

    Breathing should not require constant lifting of the shoulders or bracing of the abdomen. Slow, comfortable breathing can help you notice when the neck, chest, or stomach is working harder than necessary. The goal is not to force a large belly breath in every position, but to find a breathing pattern that feels calm and does not add extra tension.

    Our diaphragmatic breathing guide explains a simple way to explore lower-rib and abdominal movement. Use it as a practice rather than a rule that every breath must look exactly the same.

    Sleep and rest

    No pillow or mattress can create perfect posture for every person. Choose a sleep position that is comfortable and lets you rest well, then look at the whole picture if you regularly wake with pain. Pillow height, mattress condition, sleep position, daytime activity, and existing health issues can all matter, so blaming one item is often too simple.

    Posture mistakes to avoid

    Trying too hard to look “correct” can create another kind of stiffness. Pulling the shoulders back all day, keeping the stomach tight, forcing the chin backward, or stretching aggressively may increase effort without solving the reason you feel uncomfortable. Aim for movement variety and usable strength rather than constant self-correction.

    • Pulling the shoulders back all day.
    • Keeping the stomach tight all day.
    • Forcing the chin backward.
    • Stretching aggressively because you feel tight.
    • Trying to look perfectly symmetrical.
    • Ignoring pain because you assume posture is the only cause.

    A simple daily posture plan you can actually repeat

    A practical posture routine does not need to become another long workout. Use short changes across the day instead of waiting until the evening to undo several hours in one position. In the morning, spend a few minutes moving the spine and hips; during work, change position and walk briefly; later in the day, add a little strength or yoga. The aim is to build variety into normal life so better habits do not depend on motivation. If a movement causes sharp pain, numbness, or weakness, stop and get appropriate advice rather than forcing the routine.

    1. Morning: 3–5 minutes of gentle spinal movement, shoulder movement, and easy standing.
    2. During desk work: change position regularly and take a short walking or standing break when practical.
    3. Midday: check screen height, foot support, and whether you are reaching unnecessarily for the keyboard or phone.
    4. Later: include strength, walking, or a short yoga session rather than relying only on stretching.
    5. Evening: notice which positions made you feel better or worse and adjust the next day instead of chasing one perfect posture.

    If you want a longer practice, use the 20–30 minute yoga routine for posture. If the main problem is stiffness from sitting, start with the shorter habit changes above before adding more exercises. This keeps the advice realistic and makes it easier to stay consistent. Progress should be judged by comfort, movement options, and daily function rather than by whether your body matches one ideal posture picture.

    Frequently asked questions

    How long does it take to improve posture?

    There is no fixed timeline because posture habits are influenced by activity, strength, mobility, pain history, work setup, stress, and how often you move. Some people notice comfort changes quickly while other changes take longer. Consistent movement and useful environmental changes matter more than chasing a promised number of days.

    Can yoga fix bad posture?

    Yoga can help with movement, strength, balance, breathing, and body awareness, but “bad posture” can have many causes and is not always a medical problem that needs fixing. Yoga should not be presented as a guaranteed cure. It is one useful movement approach among several that can support more comfortable daily habits.

    Is a posture brace useful?

    Some people may use a brace for a specific medical reason, but it should not automatically replace movement, strength, or professional assessment. If you think you need one because of pain, injury, or a diagnosed condition, ask an appropriate healthcare professional whether it is suitable for your situation and how it should be used.

    Is the gym better than yoga for posture?

    They can work together rather than competing. Strength training can build capacity and endurance, while yoga can add mobility, balance, movement variety, and body awareness. The better choice is the one that matches your needs, is practised consistently, and does not make pain or other symptoms worse.

    Can you improve posture as an adult?

    Adults can change posture habits, strength, mobility, endurance, and the way they organise common tasks, although not every structural difference needs to be “corrected.” Improvement usually means having more comfortable movement options and less unnecessary effort rather than forcing the body into one ideal shape. Work setup, activity level, pain history, and how much time you spend in one position all influence the result. If a posture change is limited by significant pain, injury, neurological symptoms, or a diagnosed condition, general exercises may not be enough. In that situation, individual assessment is more useful than chasing a generic before-and-after posture picture.

    Does improving posture make you taller?

    Improving posture does not lengthen adult bones or permanently increase your anatomical height. Some people may look or measure slightly taller when they stand more comfortably upright instead of collapsing or bending, but that is a change in position rather than true growth. Height also varies slightly during the day because the spine is loaded differently between morning and evening. Use posture work to improve comfort, movement, and function rather than as a height-increase method. Claims that a short posture routine will permanently add several centimetres should be treated cautiously.

    The best posture is not one fixed posture

    Your body is made to move, so aim for comfortable positions, useful strength, and regular movement rather than trying to hold yourself perfectly all day. A home setup that makes movement easier, plus a routine you can repeat, is usually more useful than constantly checking whether every joint is in the “right” place.

  • How to Do Diaphragmatic Breathing (Belly Breathing Guide)

    How to Do Diaphragmatic Breathing (Belly Breathing Guide)

    Diaphragmatic breathing is a slow breathing practice that helps you notice and use the diaphragm with less unnecessary effort. The diaphragm is the large breathing muscle under the lungs. During a comfortable inhale it moves downward, the lower ribs can widen, and the abdomen may move gently. You do not need to push the belly out or make every breath as deep as possible.

    Table of contents

    What is diaphragmatic breathing?

    The diaphragm is a dome-shaped muscle below the lungs and one of the main muscles involved in breathing. When you inhale, it contracts and moves downward as the lungs fill, while the lower ribs can expand and the abdomen may rise slightly. During exhalation, the diaphragm relaxes and the abdomen can soften again. This is why the practice is often called belly breathing or abdominal breathing.

    The name can be misleading if it makes people think the belly should be the only part that moves. Normal breathing is three-dimensional and the ribs, chest, and abdomen can all move. The purpose of this practice is usually to reduce unnecessary shoulder lifting and bracing, not to freeze the chest or exaggerate abdominal movement. The Cleveland Clinic describes a similar basic method.

    How to do diaphragmatic breathing step by step

    Begin in a position where you can relax rather than trying to control the breath immediately. Lying on your back with the knees bent is often easiest for beginners, but a supported chair also works. Keep the jaw, shoulders, and hands soft, and use your hands only to notice movement rather than forcing the body to breathe in a particular way.

    1. Lie on your back with the knees bent, or sit comfortably with the feet supported.
    2. Relax the jaw, shoulders, and hands.
    3. Place one hand on the upper chest and the other around the lower ribs or abdomen.
    4. Breathe in quietly through the nose.
    5. Let the lower ribs and abdomen move gently without pushing them outward.
    6. Breathe out slowly and allow the abdomen to soften.
    7. Continue for two to five minutes if the breathing remains comfortable.

    The upper chest does not have to remain completely still. If you try to hold it rigid, the breathing may become less natural instead of more efficient. Aim for quieter breathing, less shoulder lifting, and a sense that the lower ribs can move rather than trying to make the hands rise by a certain amount.

    Is it easier lying down or sitting?

    Both positions can be useful, but they teach slightly different things. Lying down reduces the work needed to hold the body upright and can make lower-rib and abdominal movement easier to notice. Sitting is more practical for daily life because you learn to breathe comfortably while the trunk is supporting itself. Start in the position that feels easiest, then practise in other positions once the pattern feels familiar.

    Lying down

    Lying on the back can help a beginner feel the abdomen and lower ribs more clearly because the floor supports the body. Bend the knees if that makes the lower back more comfortable and avoid trying to flatten the spine. Use the position to observe how the breath moves rather than trying to create the biggest possible abdominal rise.

    Sitting

    Sit with the feet supported and choose a chair height that lets the body stay comfortable without bracing. Keep the neck easy and allow the ribs to move instead of lifting the chest on every inhale. Once the practice feels natural in sitting, you can notice the same quieter breathing while standing or walking without turning normal movement into another breathing exercise.

    Common mistakes

    The most common problem is trying too hard. People may push the belly outward, take oversized breaths, freeze the chest, or slow the breath so much that they become uncomfortable. A useful breathing practice should make the body feel less strained rather than creating dizziness, air hunger, or anxiety.

    Pushing the belly out hard

    The abdomen should respond to the pressure changes created by breathing; it does not need to be pushed forward on purpose. Forcing the belly outward can create tension and teach a movement that is different from relaxed breathing. Let the movement happen rather than trying to perform it for the hand resting on your abdomen.

    Trying to take the biggest possible breath

    A very large inhale can make some people feel light-headed, tense, or short of breath afterward. Use a comfortable breath size and let the rhythm stay easy. The aim is not maximum lung volume; it is more efficient, aware breathing with less unnecessary effort.

    Holding the chest rigid

    The ribs and upper chest normally move during breathing, so trying to stop all movement above the abdomen is unnecessary. Think of the lower ribs widening and the whole trunk responding softly instead of dividing the body into a moving belly and a frozen chest. More natural breathing usually feels less mechanical.

    Breathing too slowly too soon

    Long inhales and exhales are not automatically better. If slowing the breath creates air hunger, dizziness, panic, or a strong urge to gasp, return to normal breathing. Build comfort first and only extend the breath when it remains easy rather than forcing a target count.

    Diaphragmatic breathing in yoga

    Breath awareness is an important base for many yoga and pranayama practices because it teaches students to notice effort before adding more control. Before learning stronger breathing techniques, it is useful to know whether you can breathe quietly without lifting the shoulders, gripping the abdomen, or becoming tense. That basic awareness can also help during asana and meditation.

    This does not mean every pranayama method is simply belly breathing. Different practices use different patterns, ratios, positions, and levels of control and should be learned with appropriate preparation. Students in teacher training also study how breathing changes with posture and movement; see the FitFortunes YTT curriculum for the wider context.

    Can diaphragmatic breathing help with stress?

    Slow breathing is associated with changes in autonomic measures and can support relaxation for some people. A 2018 systematic review of slow-breathing research reported changes in heart-rate variability and other measures related to autonomic regulation. A later systematic review of diaphragmatic breathing included multiple randomised trials but also noted substantial variation in methods and limitations in the evidence.

    The careful conclusion is that slow diaphragmatic breathing may be a useful relaxation practice, but it should not be presented as a cure for anxiety or another health condition. People can respond differently, and breathing exercises that feel calming for one person may feel uncomfortable for another. Sources include the systematic review of slow breathing and the systematic review of diaphragmatic breathing.

    When should you be careful?

    Stop the exercise if you feel dizzy, faint, very short of breath, panicked, or otherwise unwell. If you have COPD, asthma, heart disease, are recovering from surgery, or have another significant medical concern, ask an appropriate healthcare professional whether a breathing exercise is suitable for you. Breathing practice should support care, not replace prescribed treatment or delay medical attention.

    How often should a beginner practise?

    Start with two to five minutes once or twice a day if the practice feels comfortable. There is no need to force a long session, especially while you are still learning what relaxed breathing feels like. Once the pattern becomes familiar, you can extend the time gradually or simply use a few quiet breaths before meditation, yoga practice, or sleep.

    A simple three-position breathing progression

    Once the basic pattern feels comfortable, practise it in more than one position so it does not become a technique you can only do while lying on the floor. Start on your back because the body is supported and lower-rib movement is easier to notice. Then try the same quiet breathing in a chair with the feet supported and the spine comfortable rather than rigid. Finally, notice the breath while standing naturally without pulling the chest up or tightening the abdomen. The goal is to keep the breathing easy as the body takes on more postural work, not to make every position look identical.

    1. Lie down: practise for 2–5 minutes and notice lower-rib and abdominal movement without forcing it.
    2. Sit: keep the feet supported, relax the shoulders, and let the breath stay quiet while the trunk supports itself.
    3. Stand: keep the knees easy and notice whether you can breathe without lifting the shoulders or bracing the stomach.

    This progression also connects breathing practice with posture awareness. If you tend to brace while sitting or standing, the posture-at-home guide explains how screen height, foot support, movement breaks, and general strength can reduce unnecessary effort during the day. For students studying pranayama in a wider yoga context, the YTT curriculum guide explains how breath work relates to meditation, asana, and teaching methodology. Keep the practice brief enough that it still feels calm and repeatable.

    Frequently asked questions

    Why does belly breathing feel strange?

    You may simply be paying close attention to breathing in a way you normally do not. It can also feel unfamiliar if you usually use a lot of chest and shoulder movement or tend to hold the abdomen tight. Keep the breath small and comfortable instead of trying to make the technique look obvious.

    Should the belly move on every breath?

    Some abdominal movement is common, especially when you are lying down, but the lower ribs and chest also move during normal breathing. Do not try to make the belly the only moving part. The useful goal is coordinated, comfortable breathing rather than one visible movement pattern.

    Can I do diaphragmatic breathing before meditation?

    Yes. A few quiet breaths can help you settle before sitting, especially when you use the practice to notice tension rather than control every breath. Keep it simple and return to normal breathing if counting or slowing the breath makes meditation feel more difficult.

    Can diaphragmatic breathing cure anxiety?

    No. Slow breathing may help some people relax or manage a stressful moment, but anxiety can require wider support and professional care. A breathing exercise should not be treated as a replacement for mental-health treatment when someone needs it.

    How long until it feels natural?

    There is no fixed timeline. Some people become comfortable after a few sessions, while others need more time because breathing habits, posture, stress, and health conditions differ. Practise briefly and regularly rather than judging progress by how large the belly movement looks.

    Can you do diaphragmatic breathing all day?

    You do not need to consciously control the diaphragm all day. The diaphragm already works automatically during normal breathing, and constantly monitoring every inhale can make some people more tense rather than more relaxed. Use the exercise for short practice periods to notice unnecessary shoulder lifting, breath holding, or abdominal bracing. Outside practice, let breathing return to a natural rhythm unless a healthcare professional has given you a specific respiratory program. The goal is better awareness and less unnecessary effort, not permanent conscious control of every breath.

    Can I practise diaphragmatic breathing while walking?

    Yes, once quiet breathing feels comfortable while lying, sitting, and standing, you can notice the same pattern during easy walking. Do not force a slow count that makes you short of breath or changes your natural walking pace. Movement increases the body’s need for air, so the breath may become faster and larger than it is at rest. Use walking practice to reduce unnecessary tension rather than trying to keep the abdomen moving in a fixed way. If you become dizzy, unusually breathless, or unwell, stop the exercise and return to normal breathing.

    Keep the breath simple

    The goal is not to breathe as deeply or slowly as possible. The goal is to breathe with less unnecessary effort and more awareness, while staying comfortable enough that the breath does not become another source of tension. A quiet, repeatable practice is more useful than forcing a technique because it sounds healthier.

  • Is Rishikesh Safe for Solo Female Yoga Students and Travellers?

    Is Rishikesh Safe for Solo Female Yoga Students and Travellers?

    Rishikesh is visited by many solo female travellers and yoga students, but no destination is risk-free. A safer trip starts with practical planning: choose known accommodation, arrange your arrival, use reliable transport, avoid isolated places when you are alone, and keep emergency contacts ready. This guide does not promise that Rishikesh is completely safe; it explains simple ways to reduce avoidable risk.

    Current UK and U.S. government travel advice for India includes specific warnings for women about harassment and sexual assault. The UK advice warns about attacks on female foreign visitors and recommends avoiding isolated areas, while the U.S. advisory recommends strict security precautions for women travellers. Read the official advice for your own country before travel because government guidance can change.

    Before you travel

    Good safety planning begins before the flight rather than after something goes wrong. Share your flight and accommodation details with someone you trust, save the school or hotel address offline, keep copies of important documents, and understand how you will reach Rishikesh. Travel insurance should match your planned activities and should be read carefully instead of being treated as a box to tick.

    • Share your flight and accommodation details with someone you trust.
    • Save the school or hotel address and phone number offline.
    • Keep digital copies of your passport, visa, and insurance details.
    • Check current government travel advice for India.
    • Keep an emergency contact on your phone and on paper.

    Useful official sources include the UK FCDO India safety advice and the U.S. State Department India travel advisory. Travellers from other countries should also check their own government’s current advice.

    Plan your arrival before you land

    A late-night arrival in a new country can be harder to manage than a daytime arrival because you may be tired, unfamiliar with the area, and carrying luggage. If possible, arrange the first transfer before you fly and use a known driver, hotel pickup, official airport taxi, or established app-based service. Share ride or driver details with someone you trust when that option is available.

    For the main route options, read our Delhi to Rishikesh travel guide. The simplest route is often worth more than saving a small amount of money when you are arriving alone after a long flight.

    Choose accommodation carefully

    Look for accommodation with a real address, recent reviews, clear contact details, and staff who can be reached when you arrive. For residential yoga training, ask whether the rooms are in the same building or nearby, how students return after evening activities, who can access the accommodation, and whether there is someone to contact at night. A beautiful room photo is less useful than clear information about access and support.

    • Is accommodation in the same building or nearby?
    • Is staff support available if there is a problem at night?
    • How do students return after an evening class or event?
    • Does the room have a secure lock?
    • Who has access to the accommodation building?

    Keep your room number, door code, and other access information private rather than sharing it casually with people you have just met. If something about the accommodation feels wrong on arrival, ask the school or property staff directly instead of ignoring the concern because you have already paid.

    Getting around Rishikesh

    Busy areas can be straightforward to navigate during the day, but roads, alleys, and river paths can become quieter later. Keep your phone charged, check the route before leaving, and use transport you recognise when possible. If you are going somewhere unfamiliar alone, tell another person where you are going and roughly when you expect to return.

    • Keep your phone charged and carry a small power bank when useful.
    • Use known or established transport services.
    • Check the route before you leave.
    • Tell someone where you are going when travelling alone.
    • Keep a small amount of cash separate from your main wallet.
    • Avoid getting into an unmarked vehicle when you are unsure who the driver is.

    Be more careful after dark

    Walking alone in isolated places at night increases risk in many destinations, and official travel advice for India also tells women to use extra caution and reliable transport. In Rishikesh, prefer busier roads and known routes after dark. If a class or event finishes late, arranging a ride or walking with other students is a simple precaution that can reduce unnecessary exposure.

    Harassment, unwanted attention, and boundaries

    Female travellers in India can experience staring, comments, unwanted photographs, touching, or more serious harassment. Current UK and U.S. travel advisories both warn about sexual assault risks. You do not need to stay polite when someone is making you uncomfortable; move toward a busy public place, ask staff or other people for help, and contact emergency services when you feel threatened.

    • Move toward a busy public place.
    • Say “no” clearly when you want contact or attention to stop.
    • Ask hotel, school, shop, or other staff for help.
    • Call emergency services if you feel threatened or are in immediate danger.
    • Be cautious about accepting food or drinks from people you do not trust.

    Ganga river and outdoor safety

    The river is an important part of Rishikesh, but moving water can be dangerous even when it looks calm from the bank. Do not enter deep or fast-moving water simply because other people are doing it, and follow local restrictions or warnings. Conditions can change during monsoon or after heavy rain, so use extra caution around river edges and outdoor paths when the weather is poor.

    If you go hiking, rafting, or join another outdoor activity, use an established operator and ask what safety equipment, training, and emergency procedures are provided. Travel insurance should also cover the activity you actually plan to do rather than only general sightseeing.

    Money, phone, and documents

    Keep your passport secure and carry a copy when appropriate rather than taking the original everywhere without a reason. Use more than one payment method and keep a backup card separate from your main wallet. Avoid displaying large amounts of cash, keep the phone charged, and store important travel details somewhere you can reach even if the phone is lost or damaged.

    Emergency help in India

    India’s national emergency number is 112 for police, ambulance, and fire. Current UK travel advice also lists the Indian Ministry of Tourism helpline as 1800 11 1363. Save your embassy or consulate contact before travel as well, and if you are the victim of a crime, seek local police help and contact your embassy or consulate when needed.

    Emergency information can change, so recheck the official India getting-help page or the equivalent advice from your own government shortly before travel. Saving the numbers before an emergency is easier than searching for them while stressed.

    Safety and consent inside a yoga school

    A yoga school should also have clear professional boundaries. Before booking, ask how the school handles hands-on adjustments, student complaints, room access, medical help, emergency contacts, and transport support. Consent matters in yoga teaching, and a student should be able to decline touch or an adjustment without being pressured or embarrassed.

    Frequently asked questions

    Is Rishikesh safe for a woman travelling alone?

    Many women visit Rishikesh alone, but no responsible guide can guarantee that a destination is safe for every traveller. Current government advice for India warns women about harassment and sexual assault risks. Plan reliable transport, choose known accommodation, avoid isolated situations, and use your own government’s travel advice to make an informed decision.

    Can I walk alone during the day?

    Busy daytime areas are usually easier to navigate than isolated places, but stay aware of traffic, crowds, valuables, and the route you are taking. Keep your phone and important belongings secure and avoid assuming that daylight removes every risk. Use the same practical caution you would use when exploring another unfamiliar destination alone.

    Should I arrive at night?

    A daytime arrival is easier for many first-time visitors because transport, directions, and accommodation check-in are simpler when you are less tired and the area is active. If you must arrive late, arrange transport and accommodation in advance and share your arrival plan with someone you trust.

    What should I do if a driver makes me uncomfortable?

    Share ride information when possible, contact someone you trust, and ask to stop in a safe public place if you need to leave the vehicle. If you believe you are in immediate danger, call 112. The goal is not to argue with the driver; it is to move toward a safer situation and get help.

    Should I dress differently in Rishikesh?

    You do not need special clothing, but simple modest dress can be practical in temples, ashrams, pilgrimage areas, and more traditional local settings. Clothing never makes harassment the traveller’s responsibility. The reason to understand local dress customs is comfort and cultural respect, not to suggest that clothing guarantees safety.

    Plan for freedom, not fear

    Solo travel can be rewarding, and good planning gives you more freedom to enjoy it. Know where you are staying, how you are getting there, who to contact, and what you will do if a situation feels wrong. International students should also read the India YTT planning guide and the Rishikesh packing guide before travel.

    Safety note: This guide provides general travel information and cannot guarantee personal safety. Government advisories, local conditions, and emergency information can change, so check current official advice close to your travel date.

  • What is the Yoga Pose Named After Two Animals

    What is the Yoga Pose Named After Two Animals

    The yoga movement most people mean when they ask for a pose named after two animals is Cat-Cow. It combines Cat Pose and Cow Pose into one repeated spinal movement, usually called Cat-Cow in modern yoga classes. Cat Pose rounds the spine, while Cow Pose moves the spine in the opposite direction. It is better described as a linked sequence of two postures than as one classical pose with a single Sanskrit name.

    What is the yoga pose named after two animals?

    Cat-Cow is the clearest answer. The two parts are commonly taught as Marjaryasana, Cat Pose, and Bitilasana, Cow Pose. Students move between them on hands and knees, matching the movement of the spine with the breath. Because the two postures are almost always taught together, English-speaking yoga classes often use the combined name Cat-Cow even though each part has its own name and shape.

    This is different from inventing a new pose by joining two animal names. Yoga already has many postures inspired by animals, including Cobra, Camel, Eagle, Pigeon, Frog, Fish, Tortoise, Peacock, and Downward-Facing Dog. Some names describe the shape of the body, while others come from older stories, symbols, or teaching traditions. A useful yoga article should keep established names separate from modern creative variations.

    How Cat-Cow is practised

    Begin on hands and knees with the hands roughly under the shoulders and the knees under the hips. On one phase of the movement, the spine rounds and the head follows naturally without being forced; this is the Cat shape. On the other phase, the chest moves forward, the pelvis tilts, and the spine extends into the Cow shape. The movement should stay comfortable and controlled rather than becoming the largest curve you can make.

    1. Come to a stable hands-and-knees position.
    2. Exhale and gently round the spine into Cat Pose.
    3. Inhale and move gradually into Cow Pose.
    4. Repeat slowly for several comfortable breaths.
    5. Keep the neck part of the spinal movement instead of throwing the head backward.

    Why are Cat and Cow linked together?

    The two postures move the spine in opposite directions, so linking them creates a simple repeated pattern of flexion and extension. That makes Cat-Cow useful near the beginning of many yoga practices because students can notice how the spine, ribs, pelvis, shoulders, and breath move together. The purpose is not to force flexibility. A smaller movement with steady breathing is often more useful than pushing into a large curve that creates pressure in the neck or lower back.

    Is Cat-Cow one asana or two?

    Technically, it is clearer to think of Cat and Cow as two linked postures rather than one single asana. Modern teachers often say “Cat-Cow” because the sequence is familiar and easy to cue, but the two shapes can also be practised separately. This distinction matters in teacher training because students should learn both the common English classroom name and the individual posture names instead of assuming that every combined phrase is an old Sanskrit posture.

    Other animal-named yoga poses

    Animal names appear throughout modern and traditional yoga vocabulary. Some are easy to recognise from the body shape, while others make more sense when the Sanskrit name and traditional context are studied. Learning these names can make a class easier to follow, but memorising a long animal list is less important than understanding how to enter, hold, modify, and leave each posture safely. A teacher should also avoid inventing Sanskrit names for modern variations.

    • Bhujangasana: Cobra Pose.
    • Ustrasana: Camel Pose.
    • Garudasana: Eagle Pose.
    • Mayurasana: Peacock Pose.
    • Matsyasana: Fish Pose.
    • Adho Mukha Svanasana: Downward-Facing Dog.

    Common mistakes in Cat-Cow

    Most problems come from trying to make the movement too large or moving only one part of the body. Some students collapse strongly into the lower back during Cow, push the head far upward, or round only the upper spine during Cat. Others rush through the sequence so quickly that the breath no longer guides the movement. Slowing down makes it easier to spread the movement through the spine and notice where the body is moving freely or staying stiff.

    • Do not force the lower back into a deep arch.
    • Keep the shoulders away from the ears instead of collapsing between them.
    • Let the neck follow the spine rather than making a separate sharp movement.
    • Use padding under the knees if the floor feels uncomfortable.
    • Reduce the range if wrist, knee, neck, or back discomfort appears.

    How teacher training should explain pose names

    Teacher training should help students understand names rather than simply memorise them. A trainee benefits from knowing the common English name, the Sanskrit term when it is established, the basic movement pattern, and how the posture is used in a sequence. It is also important to separate traditional names from modern studio language. This reduces confusion when graduates teach students from different countries or read books that use a different naming system.

    FitFortunes covers asana, teaching method, sequencing, philosophy, and practicum in its yoga teacher training curriculum. Students who want a broader look at posture teaching can also read our YTT syllabus guide. The aim is not to collect unusual pose names; it is to understand how to teach recognised movements clearly and responsibly.

    Frequently asked questions

    What are the two animals in Cat-Cow?

    The two animals are a cat and a cow. Cat Pose rounds the spine, while Cow Pose moves it into extension. Teachers often link the two with the breath and call the repeated movement Cat-Cow. The combined English name is common in modern classes, but each posture still has its own Sanskrit name and can be discussed separately.

    Is Frog-Camel a traditional yoga pose?

    No established classical posture is commonly recognised under the name Frog-Camel. A teacher could create a modern sequence that moves from a frog variation into Camel Pose, but it should be described as a creative sequence rather than presented as an old or standard asana. Clear naming helps students understand what is traditional and what is a contemporary teaching variation.

    Why do so many yoga poses have animal names?

    Many posture names use animals because the body shape, movement, or traditional imagery reminded practitioners of a particular creature. The meaning is not always obvious from the English translation alone, and some names have stories or symbolic associations behind them. Studying the Sanskrit term and the tradition around a posture gives more context than treating every animal name as a simple visual comparison.

    Is Cat-Cow suitable for beginners?

    It is commonly used in beginner classes because the movement can be made small and controlled, but no movement is right for every person. Wrist, knee, neck, or back problems may require a different setup or a smaller range. A beginner should focus on comfortable movement and breathing rather than trying to create the deepest possible curve in either direction.

    The simple answer

    If someone asks for a yoga pose named after two animals, Cat-Cow is the most useful answer. It links Cat Pose and Cow Pose into one familiar movement pattern and is widely used in modern yoga classes. Keeping that answer simple also avoids inventing new animal combinations and presenting them as traditional yoga. Learn the two parts, practise them with control, and understand why teachers often use them together.

  • The Best Yoga Mat Carrier: Your Guide to Choosing the Right Yoga Accessory

    The Best Yoga Mat Carrier: Your Guide to Choosing the Right Yoga Accessory

    A good yoga mat carrier should make your mat easier to carry without making the bag itself a problem. The best choice depends on the size and weight of your mat, how far you usually walk, whether you carry clothes or a water bottle, and how much protection you want from dust or rain. A simple sling can be enough for a short walk to class, while a full bag or backpack makes more sense for commuting or travel.

    Why use a yoga mat carrier?

    A carrier keeps the mat rolled, gives your hands more freedom, and reduces the chance of dragging the mat against the ground or a dirty floor. It can also protect the surface from dust, light rain, and contact with other items in a car or public transport. The useful question is not whether every yogi needs one, but whether carrying your particular mat is awkward enough that a strap, bag, or backpack would make daily use easier.

    The main types of yoga mat carriers

    Yoga mat carriers fall into a few simple groups, and each solves a different problem. A sling uses very little material and is quick to put on. A zippered mat bag gives more protection. A tote adds room for small items, while a backpack is usually the better choice when the mat is only one part of what you carry to class, work, or travel.

    Yoga mat sling

    A sling is the lightest option because it is usually just one adjustable strap with loops at both ends. It works well when you walk a short distance and do not need weather protection or extra storage. The downside is that the mat remains exposed, so the outer surface can still collect dust or rain while you carry it.

    Zippered yoga mat bag

    A full bag covers the mat and usually includes a shoulder strap, zipper, and one or more small pockets. It is useful when you want the mat protected in a car, train, locker, or storage area. Before buying one, measure the rolled length and diameter of your mat because thick mats can be surprisingly difficult to fit inside bags designed for thin studio mats.

    Yoga tote

    A tote works well when you normally carry a towel, bottle, notebook, or light clothing together with the mat. Some totes place the mat through external straps, while others use a large central compartment. This style can be convenient for short urban trips, but check the shoulder straps carefully because a large bag becomes uncomfortable quickly when it is loaded unevenly.

    Yoga backpack

    A backpack is often the most practical option for longer walks, cycling, airports, or commuting because the weight sits across both shoulders. Some designs hold the mat outside the bag while others use a dedicated vertical compartment. The extra storage is useful, but the backpack should still feel balanced when the mat is attached instead of pulling to one side.

    What to check before you buy

    Start with the actual size of your rolled mat rather than the product photo. Check the carrier length, opening diameter, strap adjustment, stitching, ventilation, and whether the material can be cleaned easily. If you already use a thick mat, read our 3mm vs 5mm yoga mat guide because mat thickness changes both weight and the amount of space the carrier needs.

    • Measure the rolled mat length and diameter.
    • Choose a strap that adjusts enough for your height and clothing.
    • Look for strong stitching around the strap attachment points.
    • Check whether the carrier needs ventilation after sweaty classes.
    • Decide whether you really need pockets for a phone, keys, bottle, or clothes.
    • If you walk outdoors often, consider a fabric that handles light rain better.

    Which carrier is best for a thick yoga mat?

    Thick mats usually need either an adjustable sling or a bag with a clearly stated large opening. Do not rely on labels such as “fits most mats” because two mats with the same length can have very different rolled diameters. Measure your mat after rolling it normally, then compare that number with the carrier dimensions so you are not forcing the zipper every time you leave class.

    What works best for travel?

    For travel, the carrier should be light enough that it does not cancel the advantage of bringing a travel mat. A sling is easy to pack inside luggage, while a slim backpack can be useful when you also carry documents, water, and a light layer. If the mat will go through airports or bus storage, a closed bag gives more protection than an open strap system.

    Material matters less than good construction

    Cotton, canvas, polyester, recycled fabrics, hemp, and mixed materials can all work well when the stitching and design are good. Natural fibres may appeal to someone who prefers them, while synthetic fabrics can dry faster and resist moisture better. Instead of choosing from marketing words alone, look at seam quality, strap strength, cleaning instructions, and whether the carrier suits the way you actually travel to practice.

    How to keep a mat carrier clean

    Do not put a very wet or sweaty mat straight into a closed bag for hours. Let the mat dry when possible, empty small pockets regularly, and follow the washing instructions for the carrier fabric. A clean bag will not replace cleaning the mat itself, so use our yoga mat cleaning guide for care instructions based on the mat material.

    Do you need an expensive yoga mat bag?

    No. A simple carrier can work for years when the size, stitching, and strap are right. Paying more may give you better fabric, stronger hardware, extra storage, or a particular design, but price alone does not tell you whether the carrier will be comfortable. For most students, fit and daily usefulness matter more than branding.

    Frequently asked questions

    Is a yoga sling better than a bag?

    A sling is lighter and faster to use, while a bag protects the mat and usually provides storage. The better option depends on how far you carry the mat, the weather, and whether you take other items to class. Someone walking five minutes to a studio may be happier with a sling than with a large bag.

    Can a yoga mat carrier fit a 5mm mat?

    Some can and some cannot. A 5mm mat rolls thicker than a thin travel mat, so compare the rolled diameter of your mat with the carrier opening before buying. Adjustable slings usually handle different diameters more easily than tightly fitted zippered bags.

    Can I use a normal backpack for a yoga mat?

    Yes, if the backpack has external straps or another secure way to hold the rolled mat. Do not leave the mat hanging loosely where it can hit people, catch on doors, or shift your balance. A dedicated yoga backpack is convenient, but it is not essential if your existing bag already carries the mat safely.

    Should the carrier be waterproof?

    Full waterproofing is unnecessary for many students, but some water resistance is useful when you regularly walk outside. Remember that a water-resistant outer fabric does not mean the zipper and seams are completely waterproof. In heavy rain, keep the mat inside a more protected bag or use an additional cover.

    Choose for your real routine

    The best yoga mat carrier is the one you can use without thinking about it every time you leave home. Measure the mat, decide how much storage you need, and choose the lightest design that handles your normal route comfortably. If you are still choosing the mat itself, compare our travel yoga mat guide and yoga mat thickness chart before buying the carrier.

  • Should Christians Do Yoga? Knowing Yoga Tradition and Philosophy

    Should Christians Do Yoga? Knowing Yoga Tradition and Philosophy

    Christians do not all answer the yoga question in the same way. Some Christians practise yoga mainly as movement, breathing, and attention. Others avoid it because they connect parts of yoga with Hindu philosophy, mantra, or religious symbolism. A useful answer begins by separating the physical practice from the wider history of yoga, then allowing each person to make a choice that fits their faith, church teaching, and conscience.

    Why do Christians ask whether yoga is acceptable?

    The question comes up because yoga developed in India and is connected with several Indian philosophical and religious traditions. Modern classes may include only posture and breathing, while other classes may also include Sanskrit chanting, meditation, devotional ideas, or references to Hindu texts. These are not all the same thing. A Christian deciding whether to attend a class should look at what that particular class teaches instead of judging every form of yoga from one example.

    Yoga is more than exercise, but it is not one single belief system

    Yoga has a long history with different schools, texts, methods, and aims. Patanjali’s Yoga Sutras describe an eight-limbed discipline that includes ethics, posture, breath regulation, concentration, meditation, and samadhi. The Bhagavad Gita also uses the word yoga in several ways, including disciplined action, knowledge, and devotion. Modern studio yoga often gives much more attention to physical postures than these older texts do.

    Because the word covers many traditions, saying that yoga is either “only exercise” or “one religion” can both be too simple. A gym-based posture class and a devotional ashram practice may share the word yoga while teaching very different things. For Christians, the practical question is therefore not only “Is this yoga?” but also “What exactly am I being asked to do, repeat, believe, or take part in?”

    What Guru Gorakh Nath says about divisions

    A verse attributed to Guru Gorakh Nath presents yoga as something that goes beyond social division and is linked with discipline, truth, and compassion. The verse is often used in Nath tradition to stress that yoga should not be reduced to caste or social separation. It does not settle a Christian theological question, but it helps show that Indian yoga traditions themselves have included broad ideas about who may practise.

    जोग अवरण जोग अभेद,
    जोग अखंडित जोग अछेद।
    जोग जति सति जोग दया,
    येहा ग्यान जति गोरख कह्या।।

    A simple meaning is: yoga is beyond social division; yoga points toward wholeness. Yoga includes discipline, truth, and compassion; this is wisdom, says Gorakh. Christians may read this as historical information about one Indian teaching rather than as a statement they are required to accept as part of Christian doctrine.

    Which parts of a yoga class may concern Christians?

    Most concerns are not about stretching itself. They are usually about prayer, mantra, deity names, spiritual initiation, ritual, or claims that conflict with a person’s beliefs. Some Christians are comfortable with neutral breath awareness and posture but prefer not to repeat a mantra they do not understand. Others avoid yoga altogether because they see the physical and spiritual history as too closely connected to separate.

    • Ask whether the class includes chanting or mantra.
    • Ask whether the teacher uses religious or devotional language.
    • Check whether meditation is simple attention practice or tied to a specific spiritual teaching.
    • Decide in advance which parts you are comfortable joining and which parts you will skip.
    • If church teaching matters to you, speak with a pastor, priest, or trusted Christian teacher who understands the actual class format.

    Can Christians practise yoga only for physical health?

    Some Christians do choose yoga mainly for mobility, strength, balance, breathing, or relaxation. In that setting, they may treat postures much like other movement exercises and leave out chanting or devotional material. Other Christians still prefer another form of exercise because the historical connection matters to them. Neither choice should be hidden behind a claim that every yoga class is spiritually identical, because the content of classes varies widely.

    If your goal is physical practice, ask the teacher directly what happens during class. A clear teacher should be able to explain whether the session contains posture, breath work, meditation, chanting, philosophy, or ritual. You can then decide with accurate information rather than relying on social-media arguments. This is especially useful when visiting India, where the word yoga may include more philosophy and traditional study than in a fitness studio.

    What about meditation, breathing, and prayer?

    Breathing and quiet sitting are methods, but the meaning given to them can differ. A Christian may use slow breathing to settle before prayer, while another yoga tradition may use breath as part of pranayama with a different philosophical framework. The same is true of meditation. Christians who want to keep the practice within their own faith can choose silence, Scripture reflection, or Christian prayer instead of repeating material they do not accept.

    It is also useful not to make medical promises about breath or meditation. These practices may help some people feel calmer, but they are not replacements for treatment of anxiety, trauma, heart disease, or another health condition. Our diaphragmatic breathing guide explains a simple breathing method without requiring a religious interpretation.

    Can yoga philosophy conflict with Christian belief?

    It can, depending on the teaching being discussed and the Christian tradition of the student. Classical Indian texts contain ideas about self, liberation, karma, rebirth, devotion, and ultimate reality that do not always match Christian theology. A teacher should not hide those differences by saying every religion teaches exactly the same thing. Respect is easier when similarities and differences are both explained clearly.

    Studying a text is also different from agreeing with every statement in it. Universities study Greek philosophy, Buddhism, Christianity, Islam, and Hindu traditions without requiring students to adopt each worldview. A Christian can read a yoga text historically or philosophically while keeping Christian beliefs, but whether that kind of study feels appropriate is a personal and denominational decision.

    How to choose a class when faith matters to you

    Look for a teacher who answers questions clearly and does not pressure students to repeat words or take part in practices they do not understand. A respectful class can explain the traditional name of a posture or breathing method without telling every student what they must believe. Consent should also apply to chanting, touch, hands-on adjustment, and personal spiritual discussion, not only to physical movement.

    • Read the class description before booking.
    • Ask what happens at the beginning and end of class.
    • Tell the teacher if you prefer not to chant or receive hands-on adjustments.
    • Choose another class if the teacher dismisses reasonable questions about belief or consent.
    • Do not assume that every Indian yoga school or every Western studio teaches the same philosophy.

    How FitFortunes teaches students from different faiths

    FitFortunes teaches yoga as an Indian tradition that includes physical practice, breath, meditation, and philosophy. Students are told where ideas come from instead of being told that all traditions are identical. A student can study Patanjali, the Bhagavad Gita, Hatha Yoga, or meditation as part of yoga education without being required to change religion. Questions and respectful disagreement are part of serious study.

    For students considering formal training, the yoga teacher training curriculum shows the main subjects taught at the school. The purpose of a curriculum page is to make the content clear before a student pays or travels. Someone whose faith places limits on chanting, ritual, or philosophy should ask those questions before joining any residential course.

    Frequently asked questions

    Is yoga a religion?

    Yoga is not a single organised religion with one creed, but it has deep links with Indian philosophical and religious traditions. Some modern classes are mostly physical, while others include devotional or spiritual practices. It is therefore more accurate to ask what a particular class teaches than to treat every form of yoga as exactly the same.

    Can a Christian skip chanting in yoga class?

    Yes, a student can choose not to repeat a chant or mantra. A responsible teacher should explain what is being used and allow students to stay quiet without pressure. If chanting is a central part of a particular course, ask before booking so you know whether the format fits your beliefs and comfort.

    Is doing a yoga posture an act of worship?

    A physical posture by itself does not tell you the intention of the person doing it. The same body position can be used for stretching, exercise, meditation, ritual, or prayer depending on the setting and meaning given to it. Christians who are concerned about worship should look at the intention and teaching of the class rather than only the shape of the body.

    Can Christians use yoga breathing before prayer?

    Some Christians use simple slow breathing to settle attention before prayer, while others prefer not to use methods associated with yoga. The breathing itself can be taught in a neutral physical way, but more formal pranayama may carry additional traditional ideas. If this matters to you, choose a simple method and keep the purpose clear.

    Should I ask my church before doing yoga?

    If your denomination has guidance on yoga, or if the question causes a real conflict for you, speaking with a trusted pastor, priest, or church leader can be useful. Give them the actual class description rather than asking only about the word yoga. That makes the discussion more specific and helps you make your own informed decision.

    A clear way to decide

    You do not need to accept a slogan from either side of the debate. Find out what the class contains, understand which parts are physical and which parts are philosophical or devotional, and compare that with your own beliefs. If you are comfortable with the practice, take part with clear boundaries. If you are not, there are many other ways to build mobility, strength, breathing awareness, and quiet attention.

  • Restorative Yoga Teacher Training Online: What to Check Before Enrolling

    Restorative Yoga Teacher Training Online: What to Check Before Enrolling

    An online restorative yoga teacher training can be useful when the course gives enough time to practise, observe, teach, and receive feedback. Restorative yoga may look simple because many poses are supported and held for longer periods, but teaching it well requires more than knowing where to place a bolster. A good online course should explain positioning, prop use, breath, class planning, contraindications, scope of practice, and how to adapt the same idea for different bodies and home setups.

    What is restorative yoga teacher training?

    Restorative yoga teacher training focuses on supported, low-effort postures that allow students to stay comfortable for longer periods. The teaching skill is not about pushing range or building a hard sequence. It is about choosing useful shapes, setting up props carefully, observing breathing and comfort, and knowing when a position should be changed. Training should also help teachers understand that relaxation practice is not the same as medical treatment or physical therapy.

    Online study can teach this material when the program is designed for the limits of remote learning. Video demonstrations, live practice, small-group teaching, recordings, written notes, and feedback can work well together. The weak version is a course made only from pre-recorded videos and a final certificate. Before enrolling, ask how much live interaction you receive and whether anyone actually watches you teach.

    What should an online restorative yoga course include?

    The course should explain the principles behind the practice rather than giving students a list of poses to copy. You should learn why a particular support is used, how to reduce strain, how long a position may be held, and what signs suggest that a student needs a different option. A teacher also needs to know how restorative work fits into a normal class, a private session, or the end of a more active yoga practice.

    • Purpose and principles of restorative yoga.
    • Use of bolsters, blankets, blocks, straps, chairs, and simple home alternatives.
    • Comfortable positioning and ways to reduce unnecessary effort.
    • Breath awareness without forcing deep breathing.
    • Sequencing for short and longer restorative classes.
    • Observation, communication, consent, and teacher boundaries.
    • Contraindications and when to refer a health question to an appropriate professional.
    • Practice teaching with feedback.

    Why practicum matters even more online

    Restorative teaching depends on details that are easy to miss when you practise alone. A student may look comfortable on camera while the neck is unsupported, the lower back is tense, or a prop is making it harder to breathe freely. Live practicum gives the trainer a chance to watch how you set up a posture, how clearly you explain options, and whether you can change the plan when the first setup does not work.

    Ask how practicum is assessed before you pay. A useful online course may require you to teach a short class to classmates, submit a recorded session, receive written or live feedback, and repeat part of the lesson after correction. That is much more meaningful than watching every video and automatically receiving a certificate. Teacher education should show that you can communicate and adapt, not only that you completed the lessons.

    What equipment do you need at home?

    You do not need a studio full of expensive props, but you do need enough support to practise the setups you are learning. A firm bolster is useful, and folded blankets can change height or support the head and limbs. Blocks, a strap, a stable chair, and wall space are common tools. If the training encourages home substitutes such as cushions or folded towels, the teacher should also explain their limits rather than pretending every household object works exactly like a yoga prop.

    • One firm bolster or a similar stable support.
    • Two or more blankets.
    • Two yoga blocks.
    • One yoga strap.
    • A stable chair without wheels.
    • A yoga mat and clear wall space.

    Can restorative yoga be called therapeutic?

    Be careful with that word. Restorative yoga can be used in wellness settings and may help some people rest, move comfortably, or pay attention to breathing, but a yoga teacher should not diagnose or treat a medical condition unless they also hold an appropriate healthcare qualification. Training should teach clear scope of practice. Claims about curing trauma, fixing hormones, treating anxiety, or healing injuries need far stronger evidence and professional responsibility than a general yoga certificate provides.

    This matters especially online because the teacher has less ability to observe a person from every angle or respond physically if something goes wrong. A responsible instructor asks useful screening questions, keeps instructions conservative, offers alternatives, and tells students when a medical issue is outside the class. The goal is not to make restorative yoga sound less valuable; it is to describe its value accurately without turning a wellness practice into a medical promise.

    How is restorative yoga different from Yin Yoga?

    The two styles can look similar because both may use props and slower pacing, but the intention is different. Restorative yoga normally uses enough support to reduce effort and make the position easy to maintain. Yin Yoga often uses longer holds with deliberate, mild stress on certain tissues and does not always try to remove sensation. A good teacher training should explain this difference so graduates do not use the two names as if they mean the same method.

    That distinction also affects sequencing and cueing. In restorative work, adding another blanket or changing the angle may be the correct decision if the body keeps working too hard. In Yin, some controlled sensation may be part of the method, though pain should still not be treated as progress. Teachers who study both approaches need to be able to explain which method they are using and why.

    Does an online certificate qualify you to teach?

    A certificate shows that you completed the course described by the training provider. It does not create one worldwide licence to teach restorative yoga, and different studios, insurers, employers, and registration organisations may have their own requirements. If a course advertises outside registration, check that organisation’s current rules and confirm whether the online format and the specific training are eligible before you enrol.

    If you are new to teaching altogether, a short restorative specialty course is not the same thing as a full foundational teacher training. A broader program normally gives more time to anatomy, philosophy, class management, teaching methodology, sequencing, practicum, and professional responsibilities. FitFortunes explains these foundation areas in its yoga teacher training curriculum and YTT syllabus guide.

    How to compare online restorative yoga trainings

    Start with the trainer rather than the sales page. Look for a clear professional background, real teaching experience, a published curriculum, live contact hours, practicum, assessment, and policies for refunds or course access. Then check the technical side: time zone, recording access, required props, class size, assignment deadlines, and whether you can ask questions outside live sessions. These details decide whether an online course is workable in your real schedule.

    • Who teaches the course and what restorative training have they completed?
    • How many hours are live rather than pre-recorded?
    • Is practice teaching required?
    • Will a trainer watch and correct your prop setups?
    • What equipment is required before the course starts?
    • How is the final assessment completed?
    • What exactly does the certificate represent?

    Online or residential training?

    Online training can be easier to fit around work and family, and it lets students practise with the props and space they actually have at home. Residential training gives more direct observation, easier partner practice, and more time around teachers and classmates. Neither format is automatically stronger. The important question is whether the course uses its format well and gives you enough supervised practice to become clearer and safer as a teacher.

    If you are comparing a specialty online course with a full residential foundation, make sure you are comparing the same educational goal. FitFortunes currently focuses its residential teacher-training offer on broader foundation programs in Rishikesh rather than presenting this article as a current restorative certification course. Students considering residential study can review the 200-hour teacher training in Rishikesh for current dates, subjects, room choices, and fees.

    Frequently asked questions

    Can beginners take restorative yoga teacher training online?

    Some specialty courses accept beginners, but that does not mean the course replaces a full foundation in yoga teaching. A beginner can still learn restorative practice for personal study or as an introduction, provided the school explains the level clearly. If your goal is professional teaching, check whether the provider expects a previous 200-hour qualification or another foundation before the restorative certificate.

    How long should an online restorative yoga training be?

    There is no one correct number because the purpose of courses varies. A short continuing-education course may focus on a limited group of poses, while a larger specialty training may include anatomy, sequencing, practicum, assignments, and assessment. Instead of judging only by hours, check how those hours are used and how much direct feedback you receive from a qualified trainer.

    Can I learn restorative yoga without expensive props?

    You can learn many principles with a modest home setup, but support needs to be stable and comfortable. Blankets, cushions, and a firm chair can sometimes replace specialist props for practice, while a bolster and yoga blocks make many setups easier to repeat. A good course should teach how to judge the support rather than telling students that any soft household item is automatically safe.

    Is restorative yoga the same as Yoga Nidra?

    No. Restorative yoga uses supported physical positions that are held with low effort, while Yoga Nidra is a guided relaxation or meditation practice commonly done while lying down. They can appear in the same class because both may involve stillness, but their teaching structures are different. Our Yoga Nidra guide for beginners explains that practice separately.

    Will an online restorative yoga certificate be accepted everywhere?

    No provider can guarantee universal acceptance. A studio may care mainly about your foundation qualification and teaching ability, while an insurer or registry may have specific requirements for training hours or delivery format. Ask the organisation that matters to you before paying for the course. The useful certificate is the one that matches your actual teaching goal, not simply the one with the strongest marketing claim.

    Choose a course that teaches, watches, and corrects

    An online restorative yoga teacher training can be useful when it combines clear theory with real supervised practice. Look for a teacher who explains the purpose of each setup, watches your practicum, corrects mistakes, and keeps health claims within the scope of yoga education. The screen is not the main problem with online learning. The bigger problem is a course that gives information without enough observation, feedback, or responsibility.

  • Yoga Nidra for Sleep: A Beginner Guide to Deep Rest

    Yoga Nidra for Sleep: A Beginner Guide to Deep Rest

    Yoga Nidra for sleep is a guided deep-rest practice done mainly while lying down. You stay physically still and follow a voice through body awareness, breathing, sensations, and quiet attention. Many people use it before bed because it can make the body feel settled without demanding effort or flexibility. Yoga Nidra is not the same as ordinary sleep, and it should not be sold as a cure for insomnia. Research is promising, but the studies are still small and use different methods. For a beginner, the useful goal is simple: practise conscious rest, notice how your body responds, and let sleep come naturally if it comes.

    In this guide

    What is Yoga Nidra?

    Yoga Nidra is often translated as “yogic sleep,” but that name can cause confusion. In practice, it is usually a guided method of deep relaxation in which the body rests while some awareness remains. Most sessions are done in Savasana, or another comfortable reclining position, with the eyes closed. A teacher or recording may guide attention through different body parts, the natural breath, feelings, images, or a short personal intention called a sankalpa.

    You do not need to be flexible and you do not need to hold a yoga pose. The practice is closer to structured rest than to an asana class. Some people remain awake for the whole session, some move in and out of light sleep, and some fall asleep. None of these experiences needs to be treated as a failure. The practice is learning to rest without constantly doing, fixing, or forcing.

    Claims such as “20 minutes of Yoga Nidra equals several hours of sleep” are common online, but they should not be treated as established medical facts. A short rest practice may leave you feeling refreshed, yet it does not replace the biological need for regular sleep.

    Yoga Nidra for beginners during a guided deep-rest practice
    Yoga Nidra is usually practised lying down in a comfortable, supported position.

    Does Yoga Nidra help with sleep?

    There is a real reason Yoga Nidra is being studied for sleep, but the evidence needs careful language. A 2025 systematic review of randomized controlled trials included six studies with 244 participants. Most of the studies reported improvements in measures such as sleep quality, time taken to fall asleep, total sleep time, or sleep efficiency. However, the review also found important limits, including different Yoga Nidra methods, small samples, incomplete reporting, and moderate to high risk of bias in several studies.

    A smaller randomized study in people with chronic insomnia also reported improvements after Yoga Nidra practice. This is useful early evidence, not proof that Yoga Nidra will treat every sleep problem. Persistent insomnia, loud snoring with breathing pauses, severe daytime sleepiness, depression, or other ongoing sleep problems deserve proper medical assessment.

    For everyday use, a better way to think about Yoga Nidra is as a low-effort wind-down practice. It may help some people move from an alert evening state toward rest. If evenings are already part of your yoga routine, our guide on doing yoga at night explains which kinds of practice are usually easier to place close to bedtime.

    How Yoga Nidra works

    A Yoga Nidra session is not just “lie down and relax.” Traditional and modern schools arrange the stages differently, but there is usually a clear movement from outer awareness toward quieter inner awareness and then back again. The guide gives the mind one simple task at a time, so you are less likely to keep planning, scrolling, or replaying the day.

    A typical session may begin by noticing the room and the contact of the body with the floor. The teacher then guides a rotation of awareness through the body. Breath awareness may follow, without forcing the breath into a special rhythm. Some methods include opposite sensations, simple images, or a short sankalpa. At the end, attention returns slowly to the room before you move.

    The important point is not to chase a special state. If you spend the whole practice checking whether you are “deep enough,” the checking itself becomes work. Comfort, steady guidance, and regular practice matter more than trying to manufacture a dramatic experience.

    Beginner creating a quiet space for meditation and Yoga Nidra
    A quiet room, simple lighting, and fewer phone alerts can make deep-rest practice easier.

    A simple 20-minute Yoga Nidra practice for beginners

    For a first practice, keep the method simple. You can use a calm recording or ask a trained teacher to guide you. If you are practising alone, the following sequence gives you a basic structure without turning rest into another complicated task.

    1. Get comfortable. Lie on your back, or choose another position that lets the body rest without strain. Use a folded blanket under the head or knees if that helps.
    2. Arrive for one minute. Notice the room, the floor under you, and the simple fact that you do not need to go anywhere for the next few minutes.
    3. Choose a simple intention. If you use a sankalpa, keep it short and personal. Do not turn it into a long list of goals.
    4. Move awareness through the body. Notice the right hand, arm, shoulder, then other areas in a steady order. You are noticing, not stretching or contracting each part.
    5. Notice natural breathing. Feel the breath at the nose, chest, or abdomen. Let it change by itself rather than trying to make every breath slow or deep.
    6. Notice sensations. Warmth, coolness, heaviness, lightness, comfort, or restlessness can be observed without needing to fix them.
    7. Rest in wider awareness. For a few minutes, allow sounds, breath, and body sensations to be present together.
    8. Return slowly. Notice the room again, move the fingers and toes, bend the knees if comfortable, and open the eyes when you feel ready.

    Twenty minutes is not a rule. Ten minutes can be useful on a busy evening, while a longer guided practice may suit another day. Music is optional. A quiet voice and clear instructions are usually more useful than a complicated soundtrack.

    Yoga Nidra vs meditation and NSDR

    Yoga Nidra, meditation, and the modern term NSDR, or non-sleep deep rest, overlap but they are not exact synonyms. Meditation is a broad family of practices and is often done seated, although it does not have to be. Yoga Nidra is usually reclined and guided in a more structured sequence. NSDR is a newer umbrella term used for practices that encourage deep rest without ordinary sleep, and Yoga Nidra is often discussed under that umbrella.

    Yoga Nidra itself comes from Indian yoga traditions and has its own teaching lineages and methods. It does not need a newer label to make it useful. If seated meditation feels difficult when you are tired, a reclined guided practice can be an easier place to start. Our beginner guide to yoga and meditation explains how the two practices can fit together without making either one complicated.

    What is the best time to practise Yoga Nidra?

    There is no single best time for everyone. Before bed is popular because there is nothing else to do afterward. An afternoon session can also work when you want rest without automatically taking a long nap. Some students use Yoga Nidra after a gentle asana or pranayama practice because the body is already quieter.

    Try not to practise immediately after a very heavy meal if lying flat feels uncomfortable. If your goal is better sleep, consistency matters more than chasing the perfect hour. A familiar 15- or 20-minute practice at roughly the same part of the evening is easier to judge than changing the method every night.

    Yoga student taking a calm breath before a guided rest practice
    A few quiet minutes before Yoga Nidra can help you settle. The practice itself does not require forced breathing.

    Safety and common mistakes

    Yoga Nidra is physically gentle for most people, but gentle does not mean that every session feels comfortable for every nervous system. Lying still with closed eyes can feel vulnerable for some people, especially when there is a history of trauma, panic, or strong anxiety. You can keep the eyes open, sit instead of lying down, shorten the session, or stop. A good teacher gives choices rather than insisting that everyone follow the same position.

    Do not use a Yoga Nidra recording while driving, cooking, bathing, or doing anything that needs full attention. If lying flat causes pain, reflux, breathing difficulty, dizziness, or another symptom, change position and seek appropriate professional advice when needed. Yoga Nidra can support rest, but it should not be used to delay care for a serious sleep or mental-health problem.

    Common beginner mistakes

    • Trying so hard to relax that the practice becomes another performance.
    • Forcing deep breathing when natural breathing feels better.
    • Using an uncomfortable position because Savasana seems “more correct.”
    • Changing recordings every day and never learning one simple method.
    • Feeling guilty for falling asleep during an evening practice.
    • Believing extreme online claims about replacing several hours of sleep.

    Yoga Nidra in yoga teacher training

    For a yoga teacher, guiding Yoga Nidra requires more than reading a script. Pacing, clear language, silence, choice of position, room temperature, props, and how you bring students back all affect the experience. Teachers also need to understand the difference between offering relaxation and making medical or psychological treatment claims.

    At FitFortunes, Yoga Nidra sits inside the wider study of relaxation, meditation, breath, philosophy, and teaching skills rather than being presented as a miracle technique. You can see how these subjects connect in our yoga teacher training curriculum guide. Students considering residential study can also check the current curriculum and practicum for the 200-hour yoga teacher training in Rishikesh before deciding whether the course matches their goals.

    Is Yoga Nidra for sleep worth trying?

    Yoga Nidra for sleep is worth trying as a simple rest practice if you enjoy guided relaxation and want a calmer way to end the day. It is easy to begin, needs little space, and can be adapted to your body. Research on sleep is encouraging, but it is still developing, so the practice is best approached with realistic expectations. Use it to build a better relationship with rest, not to prove that you can force yourself to sleep.

    Frequently asked questions

    Is Yoga Nidra the same as sleep?

    No. Yoga Nidra is usually a guided state of rest in which some awareness may remain. You may fall asleep during the practice, but ordinary sleep and Yoga Nidra are not the same thing.

    Can Yoga Nidra help insomnia?

    Some small clinical studies and recent reviews report better sleep outcomes, so the practice is promising. The evidence is not strong enough to treat it as a guaranteed cure. Persistent insomnia should be assessed properly, especially when it affects daily life.

    How long should a beginner do Yoga Nidra?

    Ten to twenty minutes is a practical starting range. A shorter practice you can repeat comfortably is more useful than forcing yourself through a long session.

    Can I do Yoga Nidra every night?

    Many people can use a gentle practice nightly if it feels comfortable. If it makes you more alert, distressed, or physically uncomfortable, change the timing, method, or position.

    What if I fall asleep during Yoga Nidra?

    Falling asleep is common, especially when you practise at bedtime. You do not need to feel that you failed. If your aim is to learn the full method while staying aware, try practising earlier in the day when you are less sleepy.

    Do I need headphones?

    No. Headphones can help when the room is noisy, but a speaker at a comfortable volume is fine. The important thing is that the guidance is easy to hear without being startling.

    Is Yoga Nidra safe for anxiety?

    Some people find it calming, while others may feel uncomfortable with stillness, closed eyes, or inward attention. Keep choices available, stop if distress rises, and seek qualified support when anxiety is severe or persistent.

    Is Yoga Nidra better than meditation for sleep?

    Not necessarily. They are different tools. Yoga Nidra can be easier when you are tired because you lie down and follow a guide. A seated meditation may suit someone else. The better practice is the one you can use consistently without strain.