Category: Health

  • Ashtanga Yoga Safety: Risks, Injuries and Safer Practice

    Ashtanga Yoga Safety: Risks, Injuries and Safer Practice

    Many students ask me, “Is Ashtanga yoga safe for beginners?” or “Why do so many people talk about injuries in yoga?” These are important questions. As teachers, we must speak honestly about both the beauty and the risks of practice.

    The truth is, Ashtanga yoga has many benefits. It builds strength, flexibility, and discipline. But we also need to talk about the dangers of Ashtanga yoga especially when practiced without proper guidance, rest, or modifications. In this article, I will share real classroom insights, common mistakes I’ve seen, and practical ways to practice Ashtanga safely.

    What Makes Ashtanga Yoga Intense?

    Ashtanga yoga is a structured system created by Pattabhi Jois. It follows set sequences, moving from one posture to the next with breath and focus. This makes it powerful, but also demanding.

    Unlike Hatha yoga or slower styles, Ashtanga asks the body to work hard. Jumps, forward bends, backbends, and strong arm balances are repeated often. Without awareness, these movements can strain joints, muscles, and even the nervous system.

    Still, intensity is not always a danger. The problem comes when students push too far, too soon.

    Common Risks in Ashtanga Yoga

    1. Overstretching and Joint Strain

    Many students force themselves into deep forward bends or lotus positions. Knees and lower backs are especially vulnerable. Once injured, these areas take months to heal.

    1. Repetitive Stress Injuries

    Because the sequence is fixed, the same postures repeat daily. Wrists, shoulders, and hamstrings face continuous strain. Without variation or rest, this can lead to chronic pain.

    1. Back Pain from Inversions and Backbends

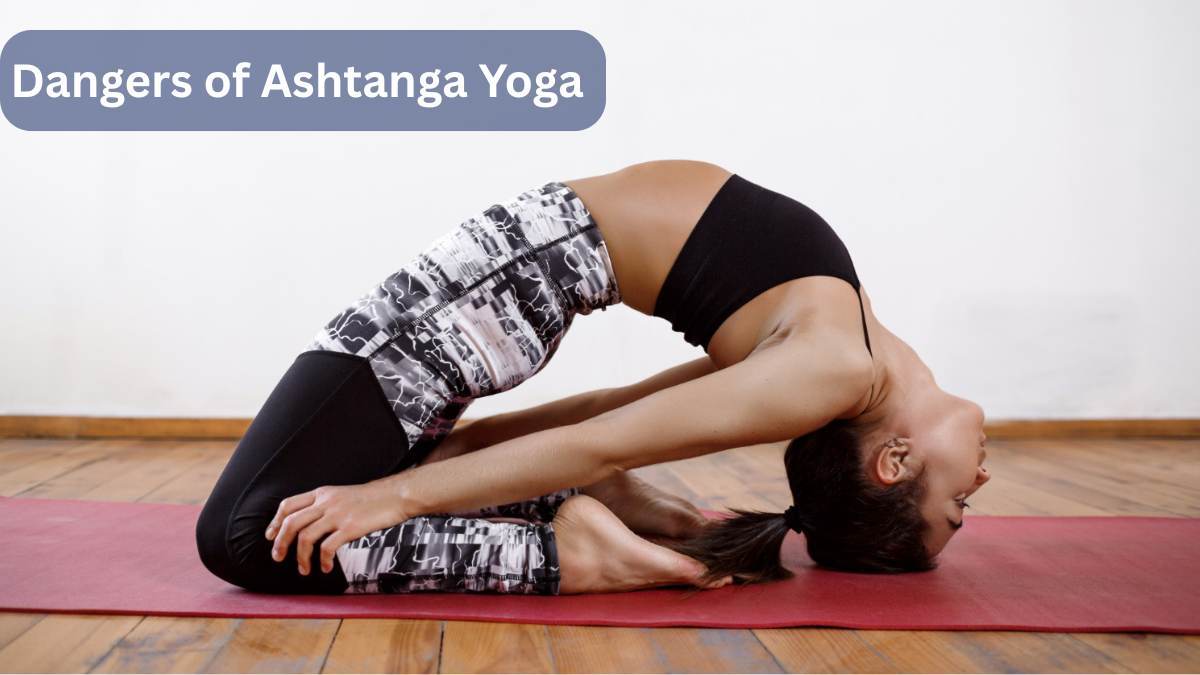
    Strong backbends like Kapotasana look impressive but can compress the spine. Beginners often copy advanced students without preparation. The result is stiffness or injury instead of strength.

    1. Breath Misuse

    Ujjayi breathing should feel steady, not forced. Many students hold their breath in tough poses. This raises blood pressure and causes fatigue.

    1. Mental Pressure and Burnout

    Ashtanga encourages six-day-a-week practice. While discipline is valuable, some students feel guilty if they miss a day. This mental stress can be as harmful as physical strain.

    Who Should Be Careful with Ashtanga Yoga?

    • Beginners without prior yoga experience.
    • Older students with joint stiffness.
    • Pregnant women (unless guided by a specialist).
    • People with back, knee, or wrist issues.
    • Those recovering from injuries.

    It’s not that these people should never practice Ashtanga. But they must do it slowly, with guidance, and with modifications.

    Practical Advice for Students

    For Beginners

    • Start with 2–3 classes a week, not daily.
    • Focus on alignment instead of depth.
    • Use props if needed, even if others don’t.
    • Learn basic Hatha yoga before diving deep.

    For Intermediate Students

    • Respect rest days. The body needs time to heal.
    • Alternate with restorative yoga to balance intensity.
    • Ask your teacher before adding advanced postures.
    • Keep a journal of what feels good and what feels painful.

    For Advanced Students

    • Never skip warm-up. Even if you know the sequence by heart.
    • Pay attention to small pains. Sharp pain is always a warning.
    • Practice pranayama and meditation to balance physical work.
    • Remember: mastery is not in doing harder poses, but in staying injury-free.

    Dangers vs. Benefits: Finding Balance in Yoga

    It’s important to see both sides. The dangers of Ashtanga yoga are real, but so are the rewards. Strength, discipline, and mental clarity all come from consistent practice.

    The key is awareness. Yoga was never about competition. In India, we remind students that “Yoga is for health, not harm.” Listening to the body is the first step toward real progress.

    At FitFortunes, our Multi Style Yoga Teacher Training in India includes Ashtanga, but also Hatha, Yin, and restorative practices. This gives students balance and prevents injuries from one single style.

    Conclusion

    So, is Ashtanga yoga dangerous? Not if practiced wisely. The dangers of Ashtanga yoga come from rushing, competing, or ignoring signals from the body. With patience, guidance, and balance, the practice becomes a source of growth instead of pain.

    As a teacher, I remind every student: Yoga should support your life, not take it over. Practice sincerely, but also gently. That’s the way yoga was meant to be.

    FAQ Section

    1. Is Ashtanga yoga dangerous for beginners?
      It can be, if practiced without guidance. Beginners should take it slow, use props, and start with Hatha yoga.
    2. Can Ashtanga yoga cause back pain?
      Yes, especially if backbends or forward folds are forced. Always move gradually and stop if pain feels sharp.
    3. Why do so many students get injured in Ashtanga yoga?
      Because of repetitive sequences and rushing into advanced poses. Balance with rest and restorative yoga reduces risks.
    4. Is Ashtanga yoga safe during pregnancy?
      Generally, no unless under the care of a very experienced teacher. Gentle prenatal yoga is safer.
    5. What’s the safest way to start Ashtanga yoga?
      Learn from a certified teacher, practice only 2–3 times a week, and listen carefully to your body.
    6. How is Multi Style Yoga TTC safer than strict Ashtanga training?
      It balances intensity with gentle styles like Yin and restorative yoga, preventing repetitive stress injuries.
  • Yoga Age Limit: Can You Start Yoga at Any Age?

    Yoga Age Limit: Can You Start Yoga at Any Age?

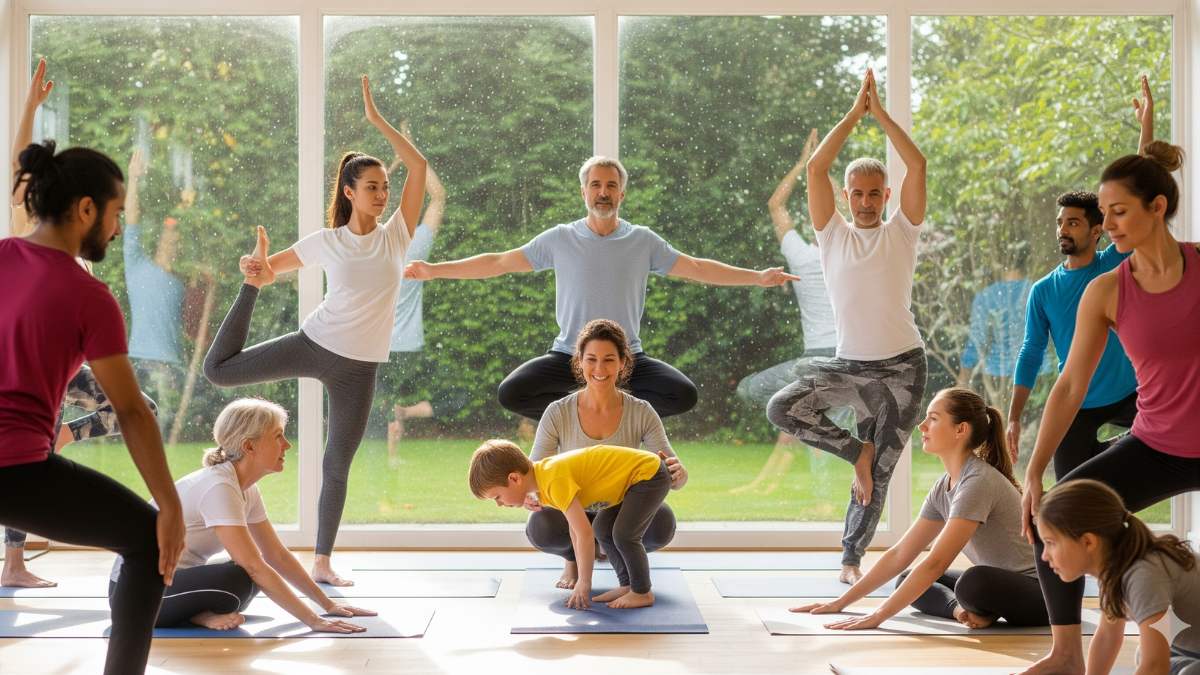
    A question I hear often from students is, “Is there a yoga age limit? Am I too old… or maybe even too young to start?”

    The short answer is simple: yoga has no strict age limit. The long answer is richer, because the way we practice, teach, and even breathe changes with age. I’ve seen six-year-olds twist into postures playfully, and I’ve also guided students in their late seventies to hold a gentle pose with incredible peace.

    In this article, I’ll share my personal teaching insights on yoga across age groups, especially for those curious about yoga teacher training in India. We’ll look at what works for kids, young adults, seniors, and even people above 70. If you’ve ever wondered about the right time to start yoga—or whether you’ve crossed the so-called yoga age limit you’ll find clarity here.

    Does Yoga Really Have an Age Limit?

    The truth is, yoga is less about age and more about awareness. Unlike competitive sports, there’s no “retirement age.” A ten-year-old might focus on flexibility, while a fifty-year-old may turn toward yoga for strength or stress relief. What changes is how we approach the practice.

    Think of yoga as a river. At different stages of life, we step into it differently. Children splash and play, teenagers test their limits, adults dive for balance, and elders walk in gently for healing. But the river keeps flowing for everyone.

    Yoga for Kids (Ages 5–12)

    This is an age group often overlooked in blogs. Parents ask me, “Can my 5-year-old do yoga?” The answer is yes with the right guidance.

    • Focus: Playful movement, storytelling postures, balance games.
    • Benefits: Builds attention span, improves posture, helps with hyperactivity.
    • Caution: Avoid long holds, advanced inversions, or forced flexibility.

    I often remind parents—don’t push your child into “perfect poses.” At this stage, yoga is about fun and foundation, not discipline. A short daily practice (10–15 minutes) is plenty.

    👉 Related blog: Yoga Poses for Two People – Fun Partner Yoga

    Yoga for Teens & Young Adults (Ages 13–30)

    This is the most energetic phase. Students here are drawn to yoga for fitness, flexibility, or even Instagram-worthy postures. And that’s okay it’s how many begin.

    • Focus: Ashtanga, Vinyasa, Power Yoga styles.
    • Benefits: Builds strength, reduces stress from studies, supports emotional balance.
    • Tip: For those interested in yoga teacher training, this is an excellent time to build strong practice habits.

    Still, I encourage young practitioners not to reduce yoga to exercise alone. Learn pranayama, meditation, and philosophy early you’ll carry these tools for life.

    Yoga in Your 30s and 40s

    This is when life gets busy. Careers, families, and responsibilities pull us in many directions. Many people “return” to yoga at this stage after dabbling in gyms or running.

    • Focus: Balanced styles Hatha, Iyengar, Restorative.
    • Benefits: Stress relief, better sleep, improved digestion, prevention of back and neck issues.
    • Tip: If you’re considering yoga teacher training in India, your 30s and 40s are perfect you have maturity, focus, and life experience to share as a teacher.

    A student once told me, “I wish I had started yoga earlier.” I reminded her—it doesn’t matter when you begin. What matters is that you begin now.

    Yoga After 50: Breaking the Myth of Age Limit

    This is where the question “Is there a yoga age limit?” really surfaces. Many assume yoga is only for the young and flexible. But the reality is, I’ve seen some of my most inspiring students start at 55, 60, or even 70.

    • Focus: Gentle Hatha, Chair Yoga, Pranayama, Yoga Nidra.
    • Benefits: Improves mobility, balances blood pressure, reduces joint stiffness.
    • Caution: Always check with a doctor if you have chronic conditions. Skip extreme inversions or deep backbends unless guided.

    Yoga after 50 is not about pushing harder it’s about moving wiser. Even five minutes of deep breathing daily can change one’s quality of life.

    Yoga for 70+ and Beyond

    Most blogs stop at “Yoga for seniors,” but I believe this group deserves special mention.

    I had a student in her late 70s who came with arthritis and limited mobility. Within six months of gentle chair yoga, her confidence and energy were glowing.

    • Practice: Seated stretches, supported standing poses, breathing exercises.
    • Mindset: Consistency over intensity.
    • Reality: Yoga may not reverse aging, but it helps us age gracefully.

    For anyone in their 70s or 80s, the message is simple: yoga is about enjoying your body, not fighting against time.

    Minimum Age for Yoga Teacher Training

    A common query is, “What is the age limit for yoga teacher training in India?”

    Most Yoga Teacher Training Courses (TTCs), including at FitFortunes, require students to be at least 18 years old. This is because teacher training involves maturity, discipline, and deep study beyond just postures.

    But is there a maximum age limit? No. I’ve had trainees in their 60s successfully complete a 200-hour YTT. The key is your health and intention.

    👉 Also read: Brahmacharya in Daily Life – Yoga’s Discipline for All Ages

    Yoga Age Limit vs. Other Fitness Practices

    • Gym vs Yoga after 40: Yoga supports joints and balance, while gyms often push heavy loads that may stress aging bodies.
    • Yoga vs Physiotherapy: Many senior students compare the two. While physio targets specific recovery, yoga offers a holistic, ongoing way to maintain health.

    This is why yoga remains relevant across every age it adapts to you.

    Practical Tips by Age Group

    • Beginners (all ages): Start small 10 minutes daily. Focus on breath before complex poses.
    • Intermediate (20s–40s): Explore dynamic practices but balance with meditation.
    • Advanced (50+): Prioritize gentle flows, pranayama, and yoga philosophy for inner strength.

    Conclusion

    So, is there really a yoga age limit? The honest answer is no. Whether you’re 5 or 75, yoga meets you exactly where you are. What changes is not whether you can practice, but how you practice.

    If you’re thinking of joining a yoga teacher training in India, remember you’re never too young to begin, and never too old to deepen. Yoga isn’t about bending your body into a shape. It’s about shaping your life at any age.

    FAQ: Yoga Age Limit

    1. Can children under 5 do yoga?
      Not formal yoga. Simple breathing and playful movement is enough. Formal asana practice is better from age 5 onward.
    2. Is there an upper age limit for yoga teacher training?
      No. Students in their 60s and even 70s can enroll, provided they are healthy.
    3. Can seniors with arthritis practice yoga?
      Yes—with modified postures like chair yoga and focus on breathing. Always consult a doctor first.
    4. Am I too old to start yoga at 50 or 60?
      Absolutely not. Many people start at this age and find tremendous benefits.

    5. What if I can’t do difficult postures due to age?
    Yoga isn’t about difficult postures. You can practice breathwork, meditation, and gentle movement and still receive full benefits.

  • 28 Day Chair Yoga for Seniors: A Safe Practice Framework

    28 Day Chair Yoga for Seniors: A Safe Practice Framework

    Yoga is an ancient practice that offers countless benefits, from boosting flexibility to improving mental clarity. For seniors, it’s especially helpful in promoting overall well-being, mobility, and relaxation. 28 Day Chair Yoga for Seniors provides a gentle way to stay active, especially for those with limited mobility or who are just starting their yoga journey. In this blog, we will explore how a structured 28-day chair yoga program can help seniors improve their physical and mental health.

    What is Chair Yoga?

    Chair yoga is a modified form of yoga that allows you to perform many traditional poses while seated in a chair. It’s an accessible way for seniors, particularly those with joint pain, arthritis, or limited mobility, to experience the benefits of yoga. By using the support of a chair, seniors can safely practice yoga without worrying about falling or straining themselves.

    Chair yoga focuses on gentle stretching, breathwork, and balance exercises that increase flexibility, improve strength, and reduce stress. Whether you’re just starting yoga or want a routine to complement your existing fitness plan, chair yoga is a great place to begin.

    Why Choose Chair Yoga for Seniors?

    As we age, it’s normal to experience changes in our bodies. Reduced joint mobility, balance issues, and muscle stiffness can make traditional yoga poses challenging. This is where 28 Day Chair Yoga for Seniors comes into play. Here’s why it’s an excellent choice:

    1. Gentle on the Body: Chair yoga provides a low-impact way to engage in physical activity without putting too much strain on your joints.
    2. Improves Flexibility: Even with limited movement, chair yoga helps stretch the muscles, enhancing flexibility over time.
    3. Boosts Balance and Coordination: Many chair yoga poses focus on balance, which can reduce the risk of falls.
    4. Increases Strength: Strengthening exercises, such as seated leg lifts or arm stretches, help build muscle and promote better posture.
    5. Mental Calmness: The breathwork and mindfulness practiced in chair yoga reduce stress and improve mental clarity.

    What to Expect from a 28-Day Chair Yoga Program for Seniors


    A 28-day chair yoga program is a great way for seniors to gradually build a consistent yoga routine. Over the course of a month, the program focuses on improving flexibility, strength, and balance. Each day brings a new series of stretches and poses that can be performed while seated, allowing seniors to experience the benefits of yoga at their own pace.

    The program can be modified to suit the individual’s needs, allowing beginners to start with basic poses and progress to more challenging movements as they gain confidence. The beauty of chair yoga lies in its adaptability – whether you are dealing with arthritis or simply want to stay fit, there’s a chair yoga pose for you.

    Week 1: Gentle Introductions to Chair Yoga

    The first week of a 28-day chair yoga program is all about becoming familiar with basic seated poses and breathing techniques. During this week, you’ll learn:

    • Seated Cat-Cow Stretch: This gentle stretch improves spinal flexibility and relieves back pain.
    • Seated Side Stretch: A great way to stretch the torso and improve flexibility in the sides and waist.
    • Neck and Shoulder Rolls: This helps to release tension from the neck and shoulders, which are common problem areas for seniors.

    By the end of week one, you’ll feel more relaxed and ready to continue the practice.

    Week 2: Building Strength and Flexibility

    In week two, you’ll start incorporating more strength-building poses. These exercises focus on toning the muscles, especially in the legs and arms. You’ll practice:

    • Seated Leg Lifts: These lifts strengthen the lower body and improve joint mobility.
    • Seated Twist: This pose targets the spine and improves overall flexibility.
    • Seated Knee Extensions: These extensions work the quadriceps and help improve balance.

    At this stage, you should feel more stable and notice some improvements in your overall mobility.

    Week 3: Improving Balance and Coordination

    Week three is all about enhancing balance and coordination. We’ll focus on exercises that improve your ability to sit tall and maintain stability, even when standing. Some of the exercises include:

    • Seated Leg Extensions: Extending one leg at a time while seated helps to improve balance and strength.
    • Chair Pose: A seated version of the traditional yoga chair pose that strengthens your thighs and improves posture.
    • Ankle and Wrist Circles: These help with joint flexibility and improve circulation.

    This week will challenge your balance and stability, but with practice, you’ll feel more confident and steady.

    Week 4: Enhancing Mindfulness and Relaxation

    The final week is focused on integrating mindfulness and relaxation with the physical practice of yoga. This week’s poses emphasize deep breathing and stress relief:

    • Seated Breathing Exercises: Deep breathing helps reduce stress and promotes mental clarity.
    • Seated Meditation: A short, seated meditation can help calm the mind and provide mental clarity.
    • Seated Forward Bend: This stretch releases tension from the lower back and helps with relaxation.

    By the end of the 28 days, you will have built a strong foundation in chair yoga. Your flexibility, strength, balance, and mental clarity will all improve, making chair yoga a valuable part of your daily routine.

    The Benefits of Chair Yoga for Seniors

    Yoga is often seen as a physical practice, but for seniors, it can be even more beneficial mentally and emotionally. Chair yoga provides numerous health benefits:

    1. Better Posture: Chair yoga strengthens core muscles, which improves posture.
    2. Improved Circulation: Regular chair yoga exercises help with blood circulation, reducing stiffness and promoting better overall health.
    3. Enhanced Mental Health: Practicing mindfulness and deep breathing lowers stress levels and helps with anxiety or depression.
    4. Social Interaction: Joining a chair yoga class provides an opportunity to meet others and enjoy the community aspect of yoga.
    5. Independence: As seniors improve their mobility, they may experience more independence in their daily activities.

    How to Get Started with Chair Yoga for Seniors

    Getting started with 28 Day Chair Yoga for Seniors is easy. You don’t need any special equipment other than a sturdy chair. A yoga mat is optional but can provide additional comfort.

    Here are a few tips to get started:

    1. Choose a Sturdy Chair: Make sure the chair is stable and has no wheels. A solid, armless chair works best.
    2. Wear Comfortable Clothing: Opt for clothes that allow you to move freely.
    3. Take Your Time: Chair yoga is meant to be gentle, so go at your own pace.
    4. Listen to Your Body: Always modify poses to suit your body’s capabilities.

    Conclusion: Embrace the Benefits of Chair Yoga for Seniors

    The 28 Day Chair Yoga for Seniors program is an excellent way for older adults to improve flexibility, strength, and balance in a safe and accessible manner. Whether you’re new to yoga or looking to enhance your mobility, chair yoga is the perfect way to stay active and healthy.

    Remember, yoga is about progress, not perfection. Even a few minutes of chair yoga each day can make a significant difference in your overall well-being. Start your journey today, and experience the transformative power of chair yoga.


    FAQ

    1.How often should seniors practice chair yoga?

    Practicing chair yoga 3-4 times a week is ideal for seniors, but you can start with just a few minutes each day.

    2. Is chair yoga safe for seniors with arthritis?

    Yes, chair yoga is gentle on the joints and can be beneficial for arthritis. Always listen to your body and modify poses as needed.

    3. Can chair yoga help improve balance?

    Yes, many chair yoga poses focus on balance, which can help reduce the risk of falls and improve stability.

    4. Do I need special equipment for chair yoga?

    All you need is a sturdy chair. A yoga mat is optional for added comfort, but not necessary.

  • Beginning Yoga for Seniors: A Safe Starting Guide

    Beginning Yoga for Seniors: A Safe Starting Guide

    Aging brings changes to the body and mind, but movement is key to staying healthy and active. Yoga offers a gentle yet powerful way to maintain flexibility, balance, and mental clarity. Unlike intense workouts, it is low-impact and adaptable for all fitness levels. Whether you’re new to yoga or have limited mobility, starting slowly and mindfully can make a big difference in your overall well-being.

    Yoga for Seniors: A Path to Better Health

    Yoga is more than just physical exercise—it is a practice that nurtures both the body and mind. With age, muscles and joints lose flexibility, making simple movements feel difficult. Gentle yoga stretches can ease stiffness and improve mobility, helping you stay active and independent for longer. As balance naturally declines with age, yoga strengthens the core and legs, reducing the risk of falls. Simple poses, practiced regularly, enhance stability and coordination, giving seniors more confidence in daily movements.

    Beginning Yoga for Seniors

    Beyond the physical benefits, yoga is a natural remedy for stress and anxiety. Breathing exercises calm the nervous system, promoting relaxation and mental clarity. Slow, mindful movements combined with deep breathing lower blood pressure, improve circulation, and support heart health. For those dealing with arthritis or chronic pain, yoga provides relief through gentle poses that ease discomfort and improve joint function.

    Getting Started: A Safe and Enjoyable Practice

    Starting yoga at any age can feel overwhelming, but a few simple steps ensure a smooth beginning. Choose a quiet, clutter-free space with enough room to move comfortably. A yoga mat or soft carpet adds extra support. Comfortable, stretchable clothing allows ease of movement, making practice more enjoyable. Yoga props like blocks, straps, or a chair provide additional stability, making poses more accessible for seniors with limited mobility.

    Before diving into poses, warming up is essential. Gentle movements like shoulder rolls, neck stretches, and wrist circles prepare the body, preventing strain and discomfort. Slow, mindful transitions between poses ensure safety and allow the body to adjust gradually.

    Gentle Yoga Poses for Seniors

    Practicing yoga does not require advanced flexibility or strength. Simple, beginner-friendly poses provide all the benefits without strain.

    • Seated Mountain Pose: Helps improve posture and breathing while building awareness of body alignment.
    • Cat-Cow Stretch: Keeps the spine flexible, easing back pain and stiffness.
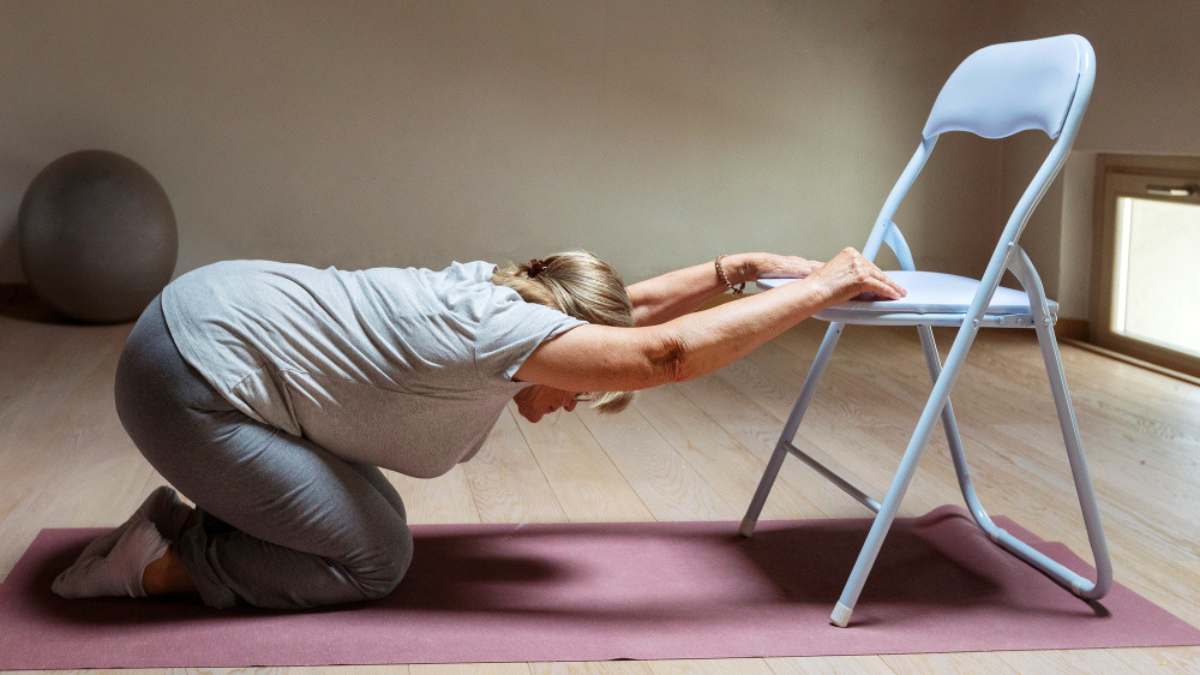
    • Chair Forward Bend: Relaxes the back and stretches the hamstrings without putting pressure on the lower back.
    • Tree Pose (with Chair Support): Strengthens the legs and core while improving balance.
    • Legs-Up-The-Wall Pose: Encourages relaxation, reduces swelling in the legs, and promotes better circulation.

    These gentle movements help seniors feel more comfortable in their bodies while improving flexibility and strength over time.

    The Power of Breathwork and Relaxation

    Yoga is not just about movement; breathing plays a crucial role in relaxation and stress relief. Deep belly breathing helps calm the mind, while alternate nostril breathing brings balance and mental focus. Even a few minutes of controlled breathing each day can reduce anxiety and improve overall well-being. Seniors can incorporate these techniques into their routine, whether seated comfortably or lying down in a restful position.

    Practicing with Confidence: Safety and Modifications

    Yoga should always feel comfortable and supportive. Listening to the body is essential—pushing too hard can lead to discomfort or injury. A chair can provide stability for standing poses, ensuring confidence while practicing balance. Staying hydrated, taking breaks, and practicing in a peaceful environment all contribute to a safe and enjoyable yoga experience. Consulting a doctor before starting yoga is always a good idea, especially for seniors with medical conditions.

    Enjoying Yoga for Lifelong Well-Being

    Yoga is not about perfection; it is about movement, breath, and feeling good in your body. With consistent practice, seniors can experience better flexibility, improved balance, and a greater sense of inner peace. By starting with simple poses and gradually building confidence, yoga becomes a lifelong companion in maintaining health and happiness.

    There’s no better time to begin. Find a quiet space, take a deep breath, and start your practice today!

  • 100-50 Method Safety: Who Should Avoid or Modify It?

    100-50 Method Safety: Who Should Avoid or Modify It?

    Losing weight can be overwhelming with so many diet plans available. One method gaining attention is the 100-50 Method for Weight Loss. This structured plan helps manage portion control while ensuring balanced nutrition.

    But what exactly is the 100-50 method? How does it work? And is it effective for long-term weight loss?

    In this guide, we will explore the 100-50 weight loss method, how it works, its benefits, and practical ways to implement it.

    What is the 100-50 Method for Weight Loss?

    The phrase 100-50 has several competing online meanings. Some refer to protein and fat targets, while older descriptions refer to calorie amounts per meal or changes in daily intake. This article focuses on safety, not a prescribed low-calorie meal plan. Read our 100-50 method overview for the definitions. A pattern of 100-calorie meals is not a balanced diet for most adults. The concept is simple:

    • Some older online descriptions suggest 100-calorie meals, but these are too small to serve as a balanced meal for most adults.
    • Choose snacks of 50 calories each.
    • Maintain a balanced diet to ensure proper nutrition.

    By following this method, you create a calorie deficit—which is essential for losing weight safely and sustainably.

    Why is Portion Control Important?

    Overeating is one of the primary reasons for weight gain. The 100-50 method emphasizes portion control, making it easier to consume fewer calories without feeling deprived.

    How Does the 100-50 Weight Loss Method Work?

    The 100-50 method relies on structured calorie intake. Here’s a step-by-step breakdown of how it works:

    1. Plan Your Meals Carefully
      • Do not use a 100-calorie meal ceiling: it is too restrictive to meet the nutritional needs of most adults.
      • Snack portions should reflect individual energy needs, rather than an arbitrary 50-calorie ceiling.
      • Focus on nutrient-dense foods to avoid malnutrition.
    2. Distribute Calories Throughout the Day
      • Consume 4-5 small meals daily.
      • Include 2-3 snacks between meals.
      • Drink plenty of water to stay hydrated.
    3. Prioritize Nutritional Balance
      • Include lean proteins, healthy fats, and fiber-rich foods.
      • Avoid processed foods and sugary snacks.
    4. Monitor Portion Sizes
      • Use measuring cups or food scales for accurate portions.
      • Avoid eating directly from packages, as it leads to overeating.
    5. Stay Active
      • Combine the 100-50 method with regular exercise.
      • Engage in walking, yoga, or strength training for better results.

    Benefits of the 100-50 Weight Loss Method

    The term 100-50 is used for different plans, and effectiveness has not been established for the named method. Here are some key benefits:

    1. Easy to Follow

    Unlike complex diets, this method provides a straightforward approach with fixed calorie limits.

    1. Encourages Portion Control

    Helps prevent overeating, which is a major cause of weight gain.

    1. Prevents Starvation

    Eating frequency alone does not prevent undernutrition, fatigue or hunger.

    1. Reduces Cravings

    Having regular snacks prevents hunger spikes and unhealthy cravings.

    1. Supports Sustainable Weight Loss

    Encourages a healthy calorie deficit without extreme dieting.

    1. Not Appropriate for All Age Groups

    Fixed calorie rules may be inappropriate for children, teenagers, older adults, pregnant people and people with medical conditions.

    What Foods Fit Into the 100-50 Weight Loss Method?

    When following this diet, choosing the right foods is essential. Here are some healthy options:

    Examples of Foods That Should Not Be Used as Complete 100-Calorie Meals

    Food Item

    Serving Size

    Grilled chicken breast

    50g

    Scrambled eggs with veggies

    1 egg

    Oatmeal with almonds

    ½ cup

    Greek yogurt with berries

    ½ cup

    Lentil soup

    ½ cup

    Small Snack Portions Are Not a Complete Eating Plan

    Food Item

    Serving Size

    Almonds

    7 pieces

    Apple slices

    ½ small apple

    Cucumber slices with hummus

    4 slices

    Low-fat cottage cheese

    ¼ cup

    Dark chocolate (85%)

    1 small square

    By incorporating these nutrient-rich foods, you can stay full and energized while losing weight.

    Common Mistakes to Avoid

    While the 100-50 method is effective, some mistakes can reduce its benefits:

    1. Ignoring Nutrient Density

    Not all 100-calorie meals are healthy. Focus on whole foods instead of processed snacks.

    1. Skipping Meals

    Skipping meals does not automatically slow metabolism; regular eating patterns should reflect personal needs and adequate total intake.

    1. Not Drinking Enough Water

    Hydration is key for digestion and metabolism.

    1. Overestimating Portions

    Always measure portions to stay within the calorie limit.

    Can You Exercise While Following the 100-50 Method?

    Absolutely! Physical activity supports health, but very low energy intake may make exercise unsafe or difficult.

    • Try yoga, brisk walking, or bodyweight exercises.
    • Avoid high-intensity workouts if energy levels drop.
    • Focus on consistency rather than extreme workouts.

    For better results, combine this method with strength training and mindful eating.

    Who Can Benefit from the 100-50 Weight Loss Method?

    Fixed calorie targets are not suitable for everyone. Consider individual nutritional needs instead of following very low-calorie meal rules.

    ✔️ Beginners looking for an easy weight loss plan.
    ✔️ Busy professionals needing a structured approach.
    ✔️ People struggling with portion control.
    ✔️ Anyone wanting to maintain long-term weight loss.

    However, individuals with medical conditions should consult a doctor before starting.

    Is the 100-50 Method Effective for Long-Term Weight Loss?

    Yes, but only if you:

    • Stay consistent with meal planning.
    • Choose whole, nutrient-rich foods.
    • Combine the method with exercise and healthy habits.

    Weight loss is not just about calories but also about nutritional balance and lifestyle choices.

    Conclusion

    The term 100-50 describes several different diet approaches. Extremely small meals are not a safe general recommendation for weight management. Meals of only 100 calories and snacks limited to 50 calories can make adequate nutrition difficult and should not be promoted as a weight-loss plan.

    For the best results, combine this method with balanced nutrition, portion control, and regular physical activity.

    Are you ready to try the 100-50 method? Let us know your thoughts in the comments!

    Frequently Asked Questions (FAQs)

    1. How fast can I lose weight with the 100-50 method?
      Results vary, but There is no reliable weight-loss rate established for this named method. Results vary with total food intake, activity and health.
    2. Can I eat out while following this plan?
      Yes! Just choose smaller portions and opt for healthy menu items.
    3. Is this method safe for diabetics?
      Consult a doctor before trying any new diet, especially if you have medical conditions.
    4. Can I adjust the calorie limit?
      Yes, but maintaining a calorie deficit is key for weight loss.
  • 100-50 Diet Claims Explained: Protein, Fat & Calorie Cycling

    100-50 Diet Claims Explained: Protein, Fat & Calorie Cycling

    The 100-50 Diet Method is gaining popularity as a structured approach to calorie control and weight management. It focuses on balanced meal planning, metabolic support, and sustainable eating habits. Many nutritionists believe that caloric cycling and portion control help improve metabolism and promote fat loss without extreme restrictions.

    This method involves a calorie intake strategy where one consumes 100% of their daily calorie requirement on certain days and 50% on alternate days. Alternating calorie intake can change total energy intake, but this pattern is not proven to prevent metabolic adaptation or reliably improve mindful eating.

    Understanding the 100-50 Diet Method

    The 100-50 Diet Method works on a simple principle: alternating between full intake days (100%) and caloric restriction days (50%). This approach changes calorie intake across days, but it does not reliably prevent metabolic adaptation or guarantee fat loss and muscle preservation.

    Benefits of the 100-50 Diet Method

    This diet method offers several advantages:

    • Supports Metabolic Flexibility: The body learns to function efficiently on varying calorie levels.
    • Encourages Mindful Eating: Helps develop sustainable eating habits and reduces binge eating.
    • Weight Loss Depends on Overall Energy Intake: A caloric deficit on 50% days leads to gradual, healthy weight loss.
    • May Help Some People Plan Meals: Structured meal timing prevents excessive calorie consumption.
    • Does Not Guarantee Stable Energy: Alternating intake prevents extreme fatigue or nutrient deficiency.

    How to Follow the 100-50 Diet Method

    To implement the 100-50 diet plan, follow these steps:

    1. Calculate Daily Caloric Needs

    Use a calorie calculator to determine your Total Daily Energy Expenditure (TDEE). This helps set accurate intake levels.

    1. Plan Meal Distribution
    • 100% Days: Eat a balanced diet with proteins, healthy fats, and complex carbs.
    • 50% Days: Reduce calorie intake but prioritize nutrient-dense foods to maintain energy levels.
    1. Include Nutrient-Rich Foods

    Choose foods that provide essential vitamins, minerals, and fiber:

    • Proteins: Eggs, tofu, fish, lean meat
    • Healthy Fats: Nuts, seeds, avocados, olive oil
    • Complex Carbs: Whole grains, legumes, vegetables
    1. Maintain Proper Hydration

    Drink enough water to support digestion, metabolism, and detoxification.

    1. Incorporate Intermittent Fasting (Optional)

    Combining substantial calorie restriction with intermittent fasting may increase the risk of inadequate nutrition. It should not be promoted as automatically improving fat loss or insulin sensitivity.

    Scientific Basis of the 100-50 Diet Method

    Research on alternate-day fasting does not show that it consistently outperforms ordinary daily calorie reduction. A 12-month randomized trial found similar weight loss in both groups. The label 100-50 is not a standardized medical diet. For definitions and evidence, read our 100-50 weight loss method guide. Research has not established that calorie cycling prevents metabolic adaptation or improves hormone regulation more than other approaches to energy restriction.

    According to dieticians, maintaining a structured diet like the 100-50 method helps control hunger hormones, such as ghrelin and leptin, leading to better appetite regulation.

    Common Mistakes to Avoid

    1. Skipping Nutrients on 50% Days – Always include proteins, fiber, and healthy fats.
    2. Overeating on 100% Days – Stick to moderate portion sizes.
    3. Ignoring Hydration – Dehydration affects metabolism and digestion.
    4. Lack of Meal Planning – Preparing meals in advance prevents nutrient deficiencies.

    Comparing 100-50 Diet with Other Diet Plans

    Diet TypeMain PrincipleEffect on Weight Loss
    100-50 DietAlternating calorie intakeSustainable and balanced
    Intermittent FastingRestricting eating hoursEnhances fat metabolism
    Keto DietHigh-fat, low-carbRapid fat loss, restrictive
    Mediterranean DietBalanced whole foodsLong-term health benefits

    Who Can Benefit from the 100-50 Diet Method?

    This approach is not suitable for everyone. Review individual energy requirements and consult a qualified clinician before major dietary restriction.

    • People Seeking Sustainable Weight Loss – Helps avoid extreme dieting.
    • Those Managing Metabolism Issues – Supports insulin sensitivity and energy balance.
    • Individuals Looking for Flexible Eating – Offers caloric variation without full restriction.

    Final Thoughts

    The 100-50 Diet Method is a balanced and structured approach to caloric control and mindful eating. It promotes metabolic health, weight loss, and sustainable nutrition. The suitability of this approach depends on nutritional adequacy and individual health; it should not be promoted as a proven tool for healthy living.

    If you’re looking for a diet that supports long-term wellness without extreme restrictions, the 100-50 method is worth trying. Start today and experience the benefits of a structured, mindful eating pattern!

  • Free Chair Yoga for Seniors: Gentle Movements for a Healthier Life

    Free Chair Yoga for Seniors: Gentle Movements for a Healthier Life

    As we age, staying active becomes essential for maintaining good health. However, traditional exercises might feel challenging for seniors with limited mobility or health concerns. This is where chair yoga comes in—a safe, gentle, and effective form of exercise. Even better, you can practice it for free in the comfort of your home or local community centers offering free classes.

    Let’s explore the benefits, poses, and how seniors can get started with free chair yoga.

    What is Chair Yoga?

    Chair yoga is a form of yoga designed for people who may find it difficult to perform standing or floor-based poses. It involves using a sturdy chair as a support for seated or modified poses. This makes it perfect for seniors, individuals with mobility issues, or anyone new to yoga.

    Chair yoga combines gentle stretches, breathing exercises, and mindfulness techniques to improve flexibility, strength, and relaxation.

    Benefits of Chair Yoga for Seniors

    Chair yoga offers a host of benefits that go beyond physical health:

    1. Improved Flexibility
      Gentle stretches help loosen stiff joints and muscles, making daily movements easier.
    2. Enhanced Strength
      Simple movements build muscle strength, supporting better posture and balance.
    3. Better Balance
      Regular practice can reduce the risk of falls, a common concern for seniors.
    4. Reduced Stress
      Breathing techniques and mindfulness calm the mind, easing anxiety and stress.
    5. Boosted Circulation
      Gentle movements improve blood flow, promoting overall health.
    6. Social Connections
      Attending free chair yoga classes can foster friendships and reduce loneliness.

    Who Can Practice Chair Yoga?

    Chair yoga is suitable for almost everyone, especially:

    • Seniors with joint pain or arthritis.
    • Individuals recovering from surgery or illness.
    • People who want low-impact exercises.

    Free Chair Yoga Classes: How to Find Them

    You don’t need to spend money to reap the benefits of chair yoga. Here’s how seniors can find free chair yoga sessions:

    1. Local Community Centers
      Many senior centers or community halls offer free or donation-based chair yoga classes.
    2. Libraries
      Check local libraries, as they often host free wellness events for seniors.
    3. Online Platforms
      Platforms like YouTube provide free chair yoga tutorials. Channels like “Yoga with Adriene” and “Chair Yoga with Sherry” are great places to start.
    4. Non-Profit Organizations
      Some organizations focused on senior health offer free virtual or in-person yoga sessions.
    5. Healthcare Centers
      Hospitals or wellness centers might provide free chair yoga as part of their outreach programs.
    Upcoming Traditional Multi-Style 200 Hour Yoga Teacher Training

    Upcoming Traditional Multi-Style 200 Hour Yoga Teacher Training

    Date Shared Room Book Private Room Book

    Chair Yoga in Iyengar Style

    Iyengar yoga focuses on using props like chairs to make yoga safe and effective for everyone, including seniors. In chair yoga, the chair helps support the body so poses can be done easily and with correct alignment. Simple movements like twists, forward bends, and stretches become more accessible. This style of yoga improves strength, flexibility, and balance while being gentle on the joints. Iyengar chair yoga is perfect for seniors who want a calm and safe way to stay active and healthy.

    Simple Chair Yoga Poses for Seniors


    Here are some simple chair asanas (yoga poses) for seniors, focusing on different areas of the body like the shoulders, back, neck, hips, and legs. These poses can be done with the support of a sturdy chair, helping improve flexibility and strength.

    1. Seated Shoulder Opener (For Shoulders)
    • Sit tall on a sturdy chair with your feet flat on the floor and your back straight.
    • Place your hands on the backrest of the chair, keeping your arms straight.
    • Gently press your chest forward and open your shoulders, allowing your shoulder blades to come together.
    • Hold for 10-15 seconds, then release.
    • Repeat 3-5 times.

    Benefits: Opens the chest and stretches the shoulders, improving mobility and posture.

    1. Seated Cat-Cow Stretch (For Back and Neck)
    • Sit upright on the edge of a chair with your feet flat on the floor and hands resting on your knees.
    • On an inhale, arch your back and lift your chest forward (Cow Pose).
    • On an exhale, round your spine and drop your chin toward your chest (Cat Pose).
    • Repeat 5-10 rounds.

    Benefits: Improves spinal flexibility and relieves back and neck tension.

    1. Seated Neck Stretch (For Neck)
    • Sit upright in a chair with feet flat on the floor.
    • Slowly lower your right ear towards your right shoulder, keeping your left shoulder down.
    • Hold for 10-20 seconds, then slowly return to the center.
    • Repeat on the left side.
    • Do 3-5 repetitions on each side.

    Benefits: Stretches the neck muscles and alleviates stiffness.

    1. Seated Hip Flexor Stretch (For Hips)
    • Sit at the edge of the chair with your feet flat on the floor and knees at 90 degrees.
    • Step one foot back, keeping the knee straight and the other knee bent at 90 degrees.
    • Lean forward gently to stretch the hip flexor of the extended leg.
    • Hold for 15-30 seconds, then switch sides.
    • Repeat 2-3 times on each side.

    Benefits: Stretches the hip flexors and improves flexibility in the lower body.

    1. Seated Leg Extension (For Legs)
    • Sit tall in a chair with feet flat on the ground.
    • Slowly extend one leg straight out in front of you, keeping the knee straight.
    • Hold the extended position for 5-10 seconds, then lower the leg.
    • Repeat with the other leg.
    • Do 5-10 repetitions on each leg.

    Benefits: Strengthens the quadriceps and improves circulation in the legs.

    1. Seated Forward Bend (Paschimottanasana)
    • Sit on the edge of the chair with feet flat.
    • Slowly bend forward, letting your hands reach toward your feet.
    • Hold for a few breaths, then return to an upright position.

    Benefits: Stretches the back and hamstrings.

    1. Chair Twist (Ardha Matsyendrasana)
    • Sit sideways on the chair, holding onto the chair’s backrest.
    • Gently twist your torso toward the chair, keeping your feet planted.
    • Hold for a few breaths, then switch sides.

    Benefits: Improves spine flexibility and aids digestion.

    1. Leg Lifts
    • Sit upright with feet flat on the ground.
    • Slowly lift one leg until it’s straight, hold for a moment, then lower.
    • Repeat with the other leg.

    Benefits: Strengthens legs and improves blood circulation.

    How to Start Chair Yoga at Home

    Seniors can easily start practicing chair yoga at home by following these simple steps:

    1. Choose the Right Chair
      Pick a sturdy chair without wheels or armrests. Make sure it’s stable and placed on a non-slip surface.
    2. Wear Comfortable Clothing
      Loose, breathable clothes allow for free movement.
    3. Warm Up First
      Begin with gentle movements like shoulder rolls or neck stretches.
    4. Use Online Resources
      Search for free chair yoga tutorials or follow step-by-step guides like this one.
    5. Go Slow
      Start with a few poses and gradually add more as you become comfortable.

    Safety Tips for Seniors

    To make chair yoga safe and enjoyable:

    • Listen to Your Body: Never push yourself into pain or discomfort.
    • Breathe Deeply: Focus on slow, steady breaths during each pose.
    • Take Breaks: Rest between poses if needed.
    • Consult Your Doctor: If you have health concerns, check with your doctor before starting yoga.

    Incorporating Chair Yoga into Daily Life

    Chair yoga doesn’t need to take much time. Just 10–15 minutes a day can make a significant difference. Try these ideas:

    • Do a short session in the morning to start your day with energy.
    • Practice in the afternoon to loosen stiff muscles.
    • End your day with a calming routine to improve sleep.

    Why Chair Yoga is Perfect for Seniors

    Chair yoga isn’t just an exercise—it’s a lifestyle. It’s accessible, low-impact, and can be practiced almost anywhere. Seniors can:

    • Stay independent by improving strength and mobility.
    • Feel more connected through group classes.
    • Boost mental well-being with mindfulness practices.

    Final Thoughts: Start Your Journey with Free Chair Yoga

    Chair yoga for seniors is a wonderful way to stay active, reduce stress, and improve overall health. With free resources available online and in local communities, there’s no reason to wait.

    Start small, stay consistent, and enjoy the journey to a healthier and happier life. Chair yoga proves that age is just a number—movement and mindfulness are always within reach.

    So grab a chair, take a deep breath, and let yoga bring peace and strength to your golden years!

  • How to Become a yoga teacher : The Ultimate Guide to 200 Hour Yoga Teacher Training in Rishikesh

    How to Become a yoga teacher : The Ultimate Guide to 200 Hour Yoga Teacher Training in Rishikesh

    How to Become a yoga teacher : The Ultimate Guide to 200-Hour Yoga Teacher Training in Rishikesh

    How Do You Become a Yoga Teacher Step by Step?

    1. Build a regular personal practice.
    2. Choose a serious training course with named teachers.
    3. Study anatomy, philosophy and teaching method.
    4. Complete supervised practice teaching.
    5. Graduate from the course.
    6. Apply for any registration pathway you are eligible for.
    7. Keep teaching, learning and collecting feedback.

    Completing an eligible 200-hour program may make you eligible to apply for RYT-200 registration through Yoga Alliance. Graduation does not automatically register you.

    200-Hour Yoga Teacher Training in Rishikesh: What to Check

    Benefits of Becoming a Yoga Teacher

    Table of Contents

    Benefits of Becoming a Yoga Teacher

    Becoming a yoga teacher is not only a fulfilling career choice but also a transformative personal journey. As a yoga teacher, you have the opportunity to make a positive impact on the lives of others, helping them improve their physical and mental well-being. Teaching yoga allows you to share your passion for the practice, inspire others, and create a sense of community.Apart from the spiritual and emotional rewards, there are practical benefits to becoming a yoga teacher as well. Many yoga studios and wellness centers offer competitive salaries and flexible working hours. Moreover, as the demand for yoga continues to grow worldwide, the job prospects for certified yoga teachers are promising.

    Choosing the Right Yoga Teacher Training Program

    Before starting your journey to become a yoga teacher, it’s essential to choose the right yoga teacher training (YTT) program. With so many options available, it can be overwhelming to make a decision. Here are some factors to consider when selecting a YTT program:Accreditation: Ensure the training program is accredited by a reputable yoga alliance. This ensures that the program meets certain standards and that your certification will be recognized internationally.Curriculum: Look for a program that covers a comprehensive curriculum, including asanas (yoga postures), pranayama (breathing techniques), meditation, anatomy, philosophy, teaching methodology, and ethics.Teaching Style: Consider the teaching style of the program and whether it aligns with your personal preferences and goals. Some programs may focus more on the physical aspects of yoga, while others may have a more holistic approach.Location: Decide whether you prefer to do your YTT program close to home or in a different country. Rishikesh, being the birthplace of yoga, offers a unique and immersive experience for aspiring yoga teachers.

    Overview of 200-Hour Yoga Teacher Training

    The 200-hour yoga teacher training is the foundational level of certification for aspiring yoga teachers. It provides a solid base of knowledge and skills necessary to teach yoga safely and effectively. The training typically spans over a period of four to six weeks, although some programs may offer an intensive option to complete it in a shorter duration.During the training, you will delve deep into the various aspects of yoga, including asana practice, pranayama, meditation, anatomy, philosophy, teaching methodology, and ethics. The goal is not only to deepen your personal practice but also to equip you with the necessary tools and techniques to become a confident, knowledgeable, and compassionate yoga teacher.

    Why Choose Rishikesh for Yoga Teacher Training

    Rishikesh, nestled in the foothills of the Himalayas, has long been revered as the yoga capital of the world. It is the birthplace of yoga and is home to numerous ashrams, yoga schools, and spiritual retreats. Choosing Rishikesh for your yoga teacher training offers a unique and authentic experience that is hard to find elsewhere.The serene and tranquil environment of Rishikesh provides the perfect setting for deepening your yoga practice and connecting with your inner self. The sacred Ganges River flows through the city, adding to its spiritual aura. The presence of experienced and knowledgeable yoga teachers, many of whom have dedicated their lives to the practice, makes Rishikesh an ideal destination for aspiring yoga teachers.

    What to Expect During the 200-Hour Training

    The 200-hour yoga teacher training is an intensive and immersive experience that will challenge you both physically and mentally. Here’s what you can expect during the training:Daily Schedule: The training typically follows a structured daily schedule that includes asana practice, meditation, pranayama, lectures, and teaching practice. The schedule is designed to provide a balanced and holistic approach to yoga education.Physical Intensity: Be prepared for long hours of physical practice. You will be expected to participate in daily asana classes, which will help you deepen your understanding of the poses and improve your alignment.Theory and Philosophy: In addition to the physical practice, you will also delve into the theoretical aspects of yoga, including philosophy, anatomy, and teaching methodology. This knowledge will form the foundation of your teaching skills.Self-Reflection: The training offers ample opportunities for self-reflection and personal growth. You will be encouraged to explore your own practice, face your limitations, and develop a deeper understanding of yourself.

    Curriculum and Topics Covered in the Training

    The 200-hour yoga teacher training covers a wide range of topics to provide you with a well-rounded education in yoga. The curriculum may vary from one training program to another, but here are some common topics that are typically included:Asana Practice: You will learn and practice a variety of yoga poses, including standing poses, forward bends, backbends, twists, inversions, and balancing poses. Emphasis will be placed on proper alignment, modifications, and variations.Pranayama and Meditation: You will be introduced to various breathing techniques and meditation practices to cultivate breath awareness, concentration, and inner stillness.Anatomy and Physiology: Understanding the human body and its functions is crucial for teaching yoga safely. You will learn about the skeletal system, muscular system, respiratory system, and how they relate to yoga practice.Yoga Philosophy: You will explore the ancient yogic texts, such as the Yoga Sutras of Patanjali, and gain insights into the philosophy and principles of yoga.Teaching Methodology: You will learn the art of sequencing a yoga class, how to give clear instructions, use props effectively, offer modifications and adjustments, and create a safe and inclusive space for your students.Ethics and Professionalism: As a yoga teacher, it is essential to maintain ethical standards and professionalism. You will learn about the ethical guidelines for teaching yoga and how to establish a professional relationship with your students.

    Certification and Accreditation for Yoga Teachers

    Upon successful completion of the 200-hour yoga teacher training, you will receive a certification that qualifies you to teach yoga. It is important to ensure that the training program is accredited by a recognized yoga alliance, such as Yoga Alliance USA or Yoga Alliance International. This accreditation ensures that the program meets certain standards and that your certification will be recognized internationally.Having a certification not only adds credibility to your teaching but also allows you to become a registered yoga teacher (RYT) with the yoga alliance. This opens up opportunities for teaching in yoga studios, wellness centers, retreats, and even the possibility of starting your own yoga business.

    Tips for Preparing for Yoga Teacher Training

    Preparing for a 200-hour yoga teacher training requires physical, mental, and emotional readiness. Here are some tips to help you make the most of your training:Establish a Regular Yoga Practice: Prior to the training, establish a consistent yoga practice to build strength, flexibility, and familiarity with the basic yoga poses.Study Yoga Philosophy: Familiarize yourself with the basic principles and philosophy of yoga. Reading books such as the Bhagavad Gita and the Yoga Sutras of Patanjali can provide a solid foundation.Maintain a Healthy Lifestyle: Yoga teacher training can be physically and mentally demanding. Prioritize self-care by eating nutritious food, getting enough rest, and managing stress.Keep an Open Mind: Approach the training with an open mind and a willingness to learn. Be open to new experiences, perspectives, and challenges that may arise during the training.Connect with Fellow Students: Reach out to your fellow students before the training starts. Building connections and a support network can enhance your learning experience.

    Conclusion and Next Steps After Completing the 200-Hour Yoga Teacher Training

    Completing a 200-hour yoga teacher training in Rishikesh is a significant accomplishment and the beginning of a new chapter in your yoga journey. After receiving your certification, you may choose to start teaching yoga immediately or further enhance your skills through additional trainings and workshops.Remember that becoming a yoga teacher is an ongoing process of learning and growth. As you embark on this path, continue to deepen your own practice, seek guidance from experienced teachers, and embrace the transformative power of yoga. By sharing your knowledge and passion for yoga with others, you have the opportunity to make a positive impact on the lives of many.

    Upcoming Traditional Multi-Style 200 Hour Yoga Teacher Training 2024

    Date Shared Room Book Private Room Book### Excerpt The Ultimate Guide to 200-Hour Yoga Teacher Training in Rishikesh provides a comprehensive overview of what to expect from the foundational certification for aspiring yoga teachers. It highlights the benefits of becoming a yoga teacher, both spiritually and practically, and delves into the training’s curriculum, which includes asanas, pranayama, meditation, philosophy, and teaching methodology. The guide also emphasizes the importance of choosing an accredited program, preparing adequately, and the transformative experience of studying in Rishikesh, the world’s yoga capital.
    Upcoming Traditional Multi-Style 200 Hour Yoga Teacher Training

    Upcoming Traditional Multi-Style 200 Hour Yoga Teacher Training

    Date Shared Room Book Private Room Book
  • What is Surya Namaskar? Your Guide to Sun Salutations.

    What is Surya Namaskar? Your Guide to Sun Salutations.

    Surya Namaskar: A Salute to the Sun

    Surya Namaskar: A Salute to the Sun

    A Tribute to the Sun God

    Surya Namaskar is steeped in ancient Indian tradition. The sun, revered as the life-giving force Surya , is honoured through this practice. Each movement represents the sun's journey across the sky, from rising to setting. It's a way to express gratitude for the sun's warmth, light, and the energy that sustains all living beings.

    A Dance of Body and Breath

    The twelve asanas of Surya Namaskar seamlessly flow into one another. Each posture stretches, strengthens, and invigorates different muscle groups. As you move, your breath synchronizes with the movements, creating a rhythmic dance between body and breath. This mindful flow promotes relaxation and helps center your mind.

    Why We Do Surya Namaskar

    Surya Namaskar is performed for several reasons:

    • To honour Surya: It's a way to express gratitude to the sun god, Surya, for his life-sustaining warmth and light.
    • To energize the body: The flowing movements stimulate the circulatory system, bringing fresh oxygen and nutrients throughout the body.
    • To improve flexibility: The postures stretch and lengthen various muscle groups, enhancing your overall flexibility.
    • To promote mindfulness: By focusing on your breath and movements, Surya Namaskar helps cultivate a sense of present-moment awareness.

    How Many Postures?

    There are twelve postures (asanas) that make up Surya Namaskar. These postures are performed in a continuous sequence, transitioning smoothly from one to the next.

    The 12 Surya Namaskar Poses

    1. Pranamasana (Prayer Pose)
    2. Urdhva Hastasana (Raised Hands Pose)
    3. Uttanasana (Standing Forward Fold Pose)
    4. Ashwa Sanchalanasana (Equestrian Pose - Right Leg)
    5. Chaturanga Dandasana (Four-Limbed Staff Pose)
    6. Ashtanga Namaskar (Eight-Point Salute)
    7. Bhujangasana (Cobra Pose)
    8. Adho Mukha Svanasana (Downward-Facing Dog Pose)
    9. Ashwa Sanchalanasana (Equestrian Pose - Left Leg)
    10. Uttanasana (Standing Forward Fold Pose)
    11. Urdhva Hastasana (Raised Hands Pose)
    12. Pranamasana (Prayer Pose)

    Mantras: Adding Depth (Optional)

    Traditionally, twelve mantras are associated with the twelve postures of Surya Namaskar. Each mantra is a Sanskrit chant that praises Surya using different names and aspects. While mantras can add a deeper layer of meaning, focusing on the postures and your breath is crucial initially. You can incorporate the mantras as you become more comfortable with the practice.

    Here are the twelve mantras:

    1. Om Mitraya Namaha
    2. Om Ravaye Namaha
    3. Om Suryaya Namaha
    4. Om Bhaanave Namaha
    5. Om Khagaya Namaha
    6. Om Pushne Namaha
    7. Om Hiranya Garbhaya Namaha
    8. Om Mareechaya Namaha
    9. Om Aadityaaya Namaha
    10. Om Savitre Namaha
    11. Om Arkaaya Namaha
    12. Om Bhaskaraya Namaha

    Benefits of Surya Namaskar

    Regular practice of Surya Namaskar offers a multitude of benefits:

    • Improved cardiovascular health: The flowing movements get your heart rate up, promoting cardiovascular health.
    • Increased strength and flexibility: Surya Namaskar strengthens and tones various muscle groups while enhancing flexibility.
    • Weight management: The practice can help boost your metabolism and aid in weight management.
    • Stress reduction: Focusing on your breath and movements can promote relaxation and reduce stress levels.
    • Improved mental clarity: The practice can help clear your mind and enhance focus.

    When to Do Surya Namaskar

    The ideal time to practice Surya Namaskar is early in the morning, on an empty stomach. This allows you to harness the fresh energy of the rising sun and avoid digestive discomfort. However, you can also perform it in the evening if mornings aren't feasible. Listen to your body and choose a time that works best for you.

    Summary

    Surya Namaskar is a beautiful and accessible yoga practice suitable for all ages and fitness levels. It's a way to honor the sun, energize your body, and cultivate inner peace. So, why not roll out your yoga mat and greet the day with a sun salutation?

  • Yoga : Be Your Own Super Hero

    Yoga : Be Your Own Super Hero

    Yoga: A Journey to Your Superpower!

    Yoga: A Journey to Your Superpower!

    Introduction

    Have you ever wondered how superheroes get so strong and focused? Maybe they have a secret training routine? Well, believe it or not, their secret might be something called yoga! Yoga isn't just for grown-up superheroes though. It's a powerful tool that anyone, including YOU, can use to become your own kind of superhero – a Super You! But wait a minute, isn't yoga just about stretching and weird poses? Not quite! Yoga is like a magical toolbox filled with different tools to help you become super healthy in all sorts of ways – from your body all the way to your spirit!

    Make your self Strong Physically

    Imagine your body as a superhero's awesome headquarters. Just like a strong fort needs thick walls, your body needs to be strong and flexible to handle all your adventures! This is where yoga poses come in. Think of a pose like Mountain Pose. Stand tall like a mighty oak tree, feet flat on the ground, arms by your side. Feel your legs getting strong and your back getting straight. Now, let's try Downward-Facing Dog. Imagine you're a playful puppy stretching after a nap. Hands and feet flat on the ground, your body makes a cool upside-down V shape! This pose stretches your whole back and makes your arms strong. There are many different yoga poses, each with a unique superpower. Some, like Tree Pose, help you balance like a superhero on a tightrope. Others, like Warrior Pose, make you feel powerful and brave, just like your favorite comic book hero! The more you practice these poses, the stronger and more flexible your body becomes. It's like adding bricks to your superhero headquarters, making it even tougher!

    Calming Your Super Mind

    Being a superhero isn't just about physical strength. Sometimes, bad guys like stress and worry can cloud your mind and make it hard to focus. This is where another amazing yoga tool comes in – breathing exercises! Imagine you're a superhero facing a tricky puzzle. You need to be calm and focused to find the answer. Breathing exercises like Bee Breath help you do just that! Close your mouth and take a deep breath in through your nose, like smelling a delicious flower. Then, breathe out slowly making a buzzing sound like a happy bee. This calms your mind and helps you concentrate. Another cool breathing exercise is called Lion's Breath. Imagine you're a mighty lion roaring at your enemies! Stick your tongue out a little, breathe in deeply through your nose, then open your mouth wide and roar out (without making a sound!) as you breathe out. This releases any built-up tension and helps you feel refreshed. By practicing these breathing exercises regularly, you can control your super mind and focus your energy on whatever challenges you face, just like a superhero facing a villain!

    Know the Power of Your Spirit

    Being a superhero isn't just about physical strength and mental focus. It's also about having a kind and happy spirit! The final tool in your yoga toolbox helps you with this. Yoga teaches you something called mindfulness. This means paying attention to the present moment, right here, right now. Imagine you're a superhero who can slow down time to think clearly during a battle. Mindfulness helps you do the same thing in everyday life! During yoga practice, there's time to sit quietly and focus on your breath, the sounds around you, and how your body feels. This helps you appreciate the good things in your life and become more grateful. It also helps you be kind to yourself, which is a super important superpower! Think about it: how can you fight bad guys if you're feeling grumpy all the time? Yoga helps you cultivate a happy and peaceful spirit, making you a stronger and more positive superhero!

    Putting Your Superpower into Action!

    Now that you've explored the amazing tools in your yoga toolbox, it's time to put them into action! Imagine yourself waking up in the morning feeling stiff and grumpy (like a superhero who just lost their cape!). You can use your yoga poses to stretch out your body and wake up your muscles. A few deep breaths can help you feel calm and focused for the day ahead. Throughout the day, whenever you feel stressed or overwhelmed, you can use your breathing exercises to calm your mind and refocus. If you're feeling down, some mindful moments can help you appreciate all the good things around you. Yoga practice isn't just about what you do on the mat. It's about using these tools throughout your day to become a Super You! Be kind to others, be strong and helpful, and face challenges with a calm and positive spirit.